Generate Cloud SIEM Signals With a Scheduled Search
This page has information about creating a scheduled search that will trigger a Cloud SIEM signal. Before you start using Scheduled Searches to create Cloud SIEM signals, it is helpful to understand what signals are, and how they relate to the generation of Cloud SIEM insights. For information about how it all works see Insight Generation Process.
For a more detailed description of the options you can configure for a scheduled search, see Create a Scheduled Search.
Requirements for the search query
When you create a scheduled search to generate signals in Cloud SIEM, you start by creating a search query.
This section describes the requirements for your scheduled search, which include a minimum set of fields to be returned, and renaming message fields as necessary to match attribute names in the selected Cloud SIEM record type schema.
Required fields
There are several fields that your scheduled search must return to enable signal generation:
normalizedseverity. This field must contain a value between (and including) 0 and 10. Signals generated by the scheduled search will have this severity value. SIgnal severity values are used by Cloud SIEM’s insight generation algorithm, as described above.stage. This field must contain a Tactic in the MITRE ATT&CK framework, one of the following:- Collection
- Command and Control
- Credential Access
- Defense Evasion
- Discovery
- Execution
- Exfiltration
- Impact
- Initial Access
- Lateral Movement
- Persistence
- Privilege Escalation
- Reconnaissance
- Resource Development
info
If the
stagefield contains a Tactic that isn't in the MITRE ATT&CK framework, a signal will not be generated, but a record will be.
- At least one entity field:
device_ipdevice_macdevice_natIpdns_replyIpdstDevice_hostnamedstDevice_ipdstDevice_macdstDevice_natIpfromUser_usernamesrcDevice_hostnamesrcDevice_ipsrcDevice_macsrcDevice_natIpuser_username
Renaming message fields
When you configure a Scheduled Search to create Cloud SIEM signals, you are prompted to select a Cloud SIEM record type. The fields returned by your search must match an attribute in the record type you select. A field whose name does not match a Cloud SIEM attribute will not be populated in the record created from the Schedule Search results. For more about Cloud SIEM attribute names, see Attributes You Can Map to Records.
Example
Let's suppose that user_username is the entity field we want to use, and its value needs to be mapped to actor.email. Then you need to add the following line to the query: actor.email as user_username.
And because the final output of this query is an aggregate, and Cloud SIEM signals expect normalizedfield, stage, and entity, we need need to add those in the count expression.
This is how the final query might look:
((_index=sec_record_* objectType=*)
AND _sourcename = "Google Apps Audit Event")
AND _sourcecategory = "GoogleWorkspace/Groups"
| 5 as normalizedseverity
| "Initial Access" as stage
| json auto
| actor.email as user_username
| count by events.name, events.type, actor.email, event.parameters.user_email, event.parameters.group_email, user_username, stage, normalizedseverity
Scheduling the search
- After creating and saving your search, click the save icon.

- The Save Item popup appears.
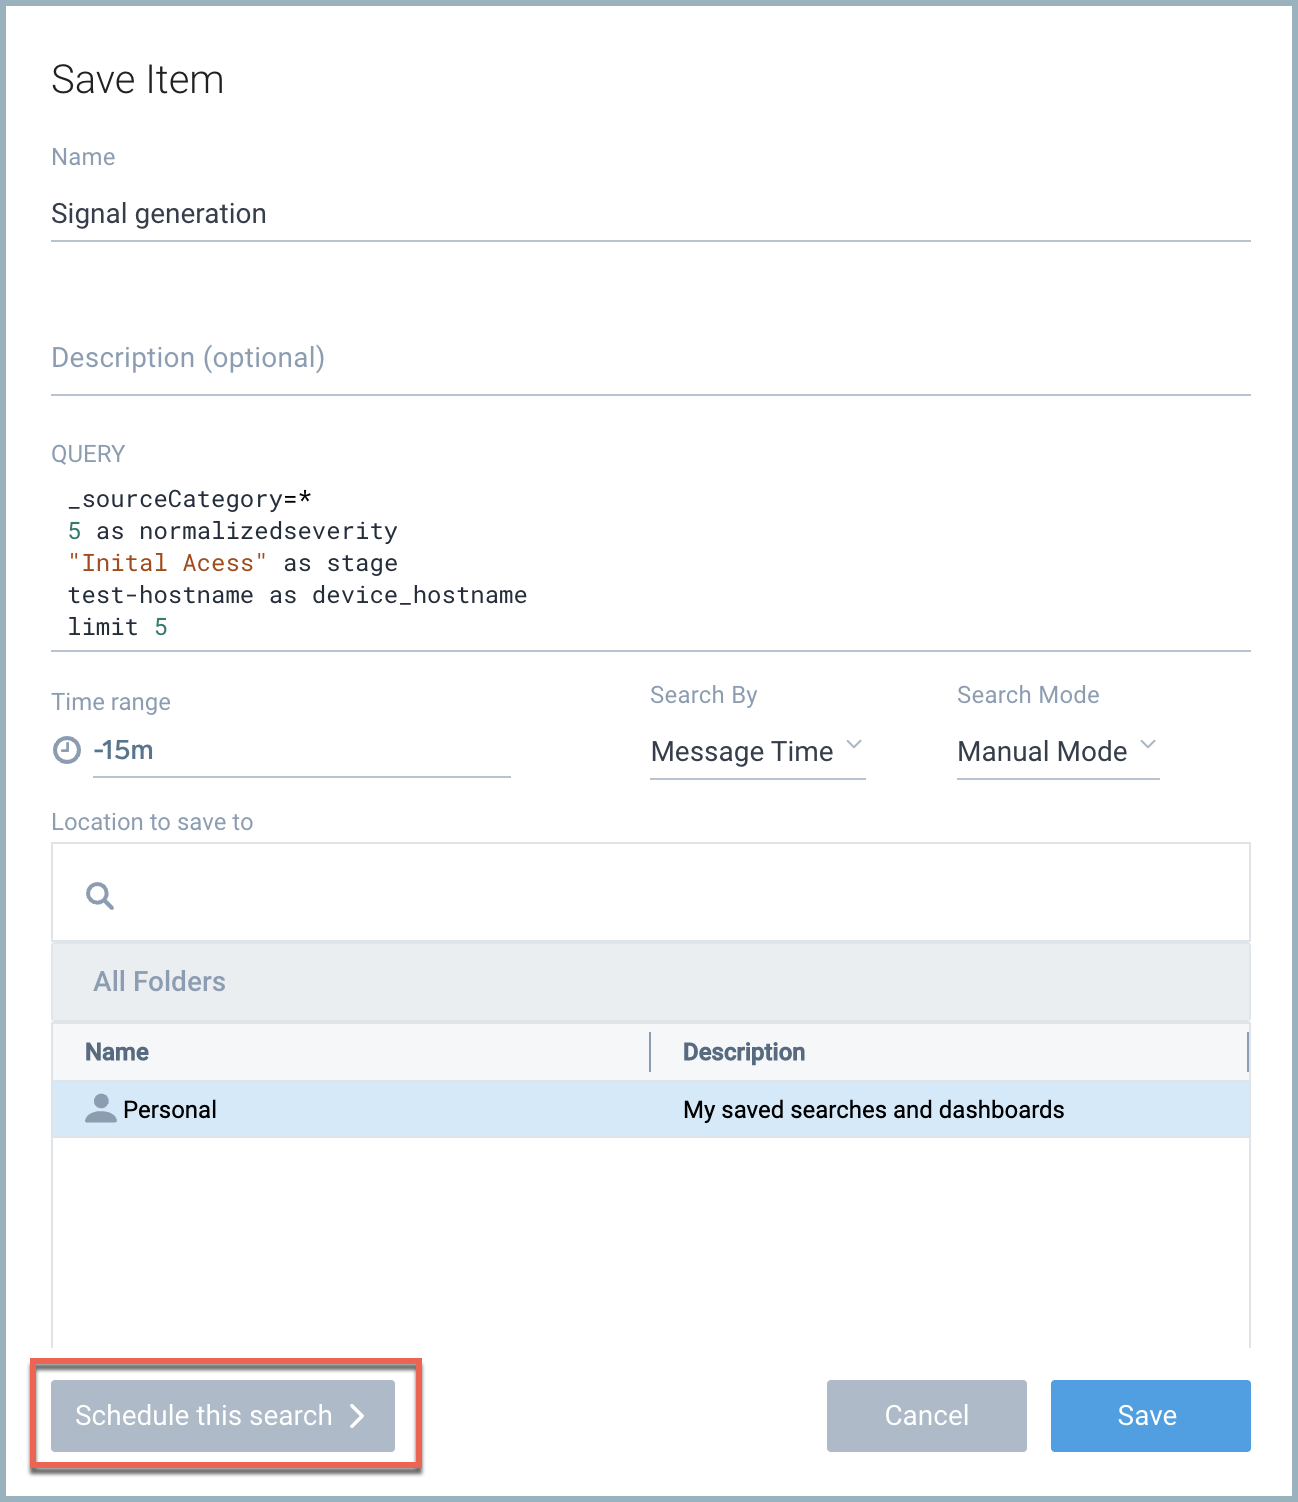 note
noteThe name of your scheduled search will appear as the signal name in Cloud SIEM.
- Click Schedule this search.
- The Save Item popup prompts you to select a run frequency.
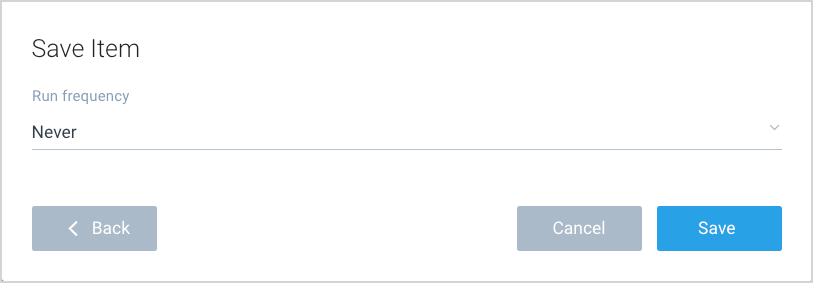
- Select a frequency from the pull-down list and click Save. Scheduling a run frequency that matches your query time range will reduce overlapping searches and duplicate alerts. When you have a search scheduled to run over the same results as a previously scheduled search you would trigger an alert on the same data.
- The popup refreshes.
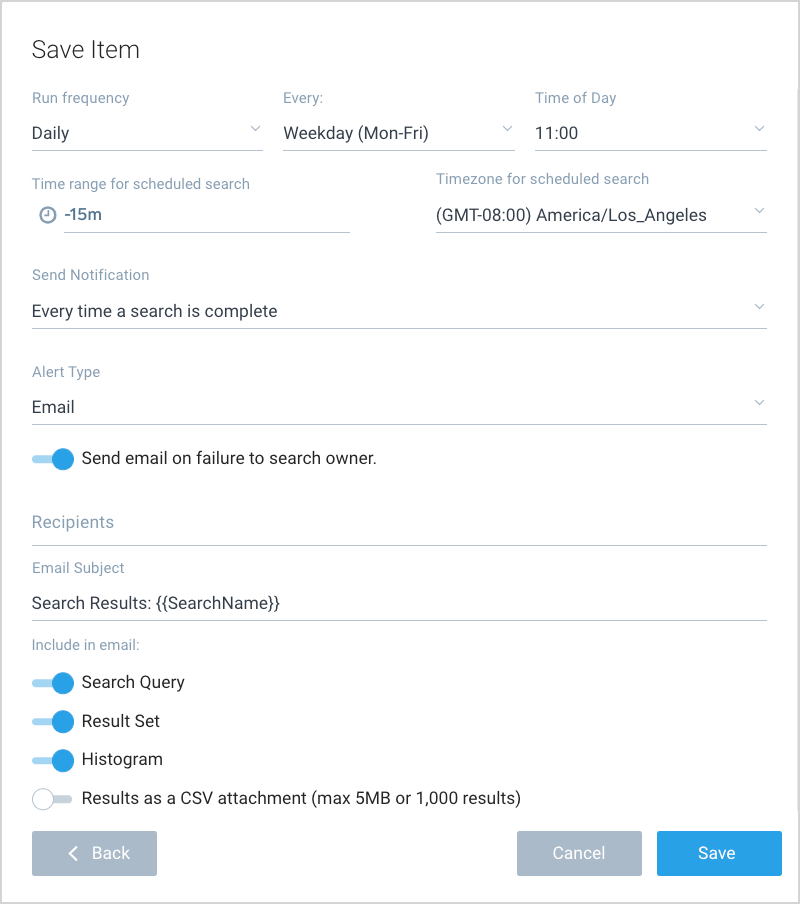
- Time range for scheduled search. Indicates the time range your query will use to execute, which impacts the results generated by the query.
note
This setting is different than the time range option configured for the Saved Search. The first time range is only used when you run the Saved Search from the library. This time range applies to your Scheduled Search.
- Timezone for scheduled search. Select the time zone you would like your scheduled search to use. The schedule's time is based on this time zone. This time zone is not related to the time zone of your data. If you do not make a selection, the scheduled search will use the time zone from your browser, which is the default selection.
- Send Notification. Select If the following condition is met, and enter an alert condition and the number of results that should trigger the alert.
- Alert Type. Select CSE Signal.
- The popup refreshes.
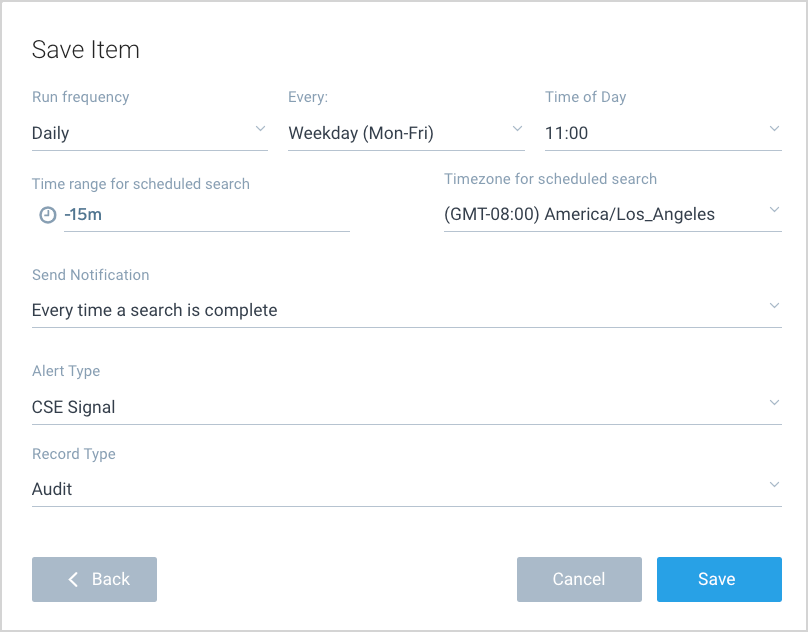
- Record Type. Select a record type.
- Click Save.
View signals in Cloud SIEM
To view signals that were created from a scheduled search, run a keyword search on “Scheduled Search” on the Signals page in the Cloud SIEM UI:
- Classic UI. In the main Sumo Logic menu, select Cloud SIEM, and then select Signals in the top menu.
New UI. In the main Sumo Logic menu, select Cloud SIEM > Signals. You can also click the Go To... menu at the top of the screen and select Signals. - Click in the Filters field at the top of the screen.
- Type Scheduled Search and press Enter. The keyword search returns a list of all signals created by scheduled searches.
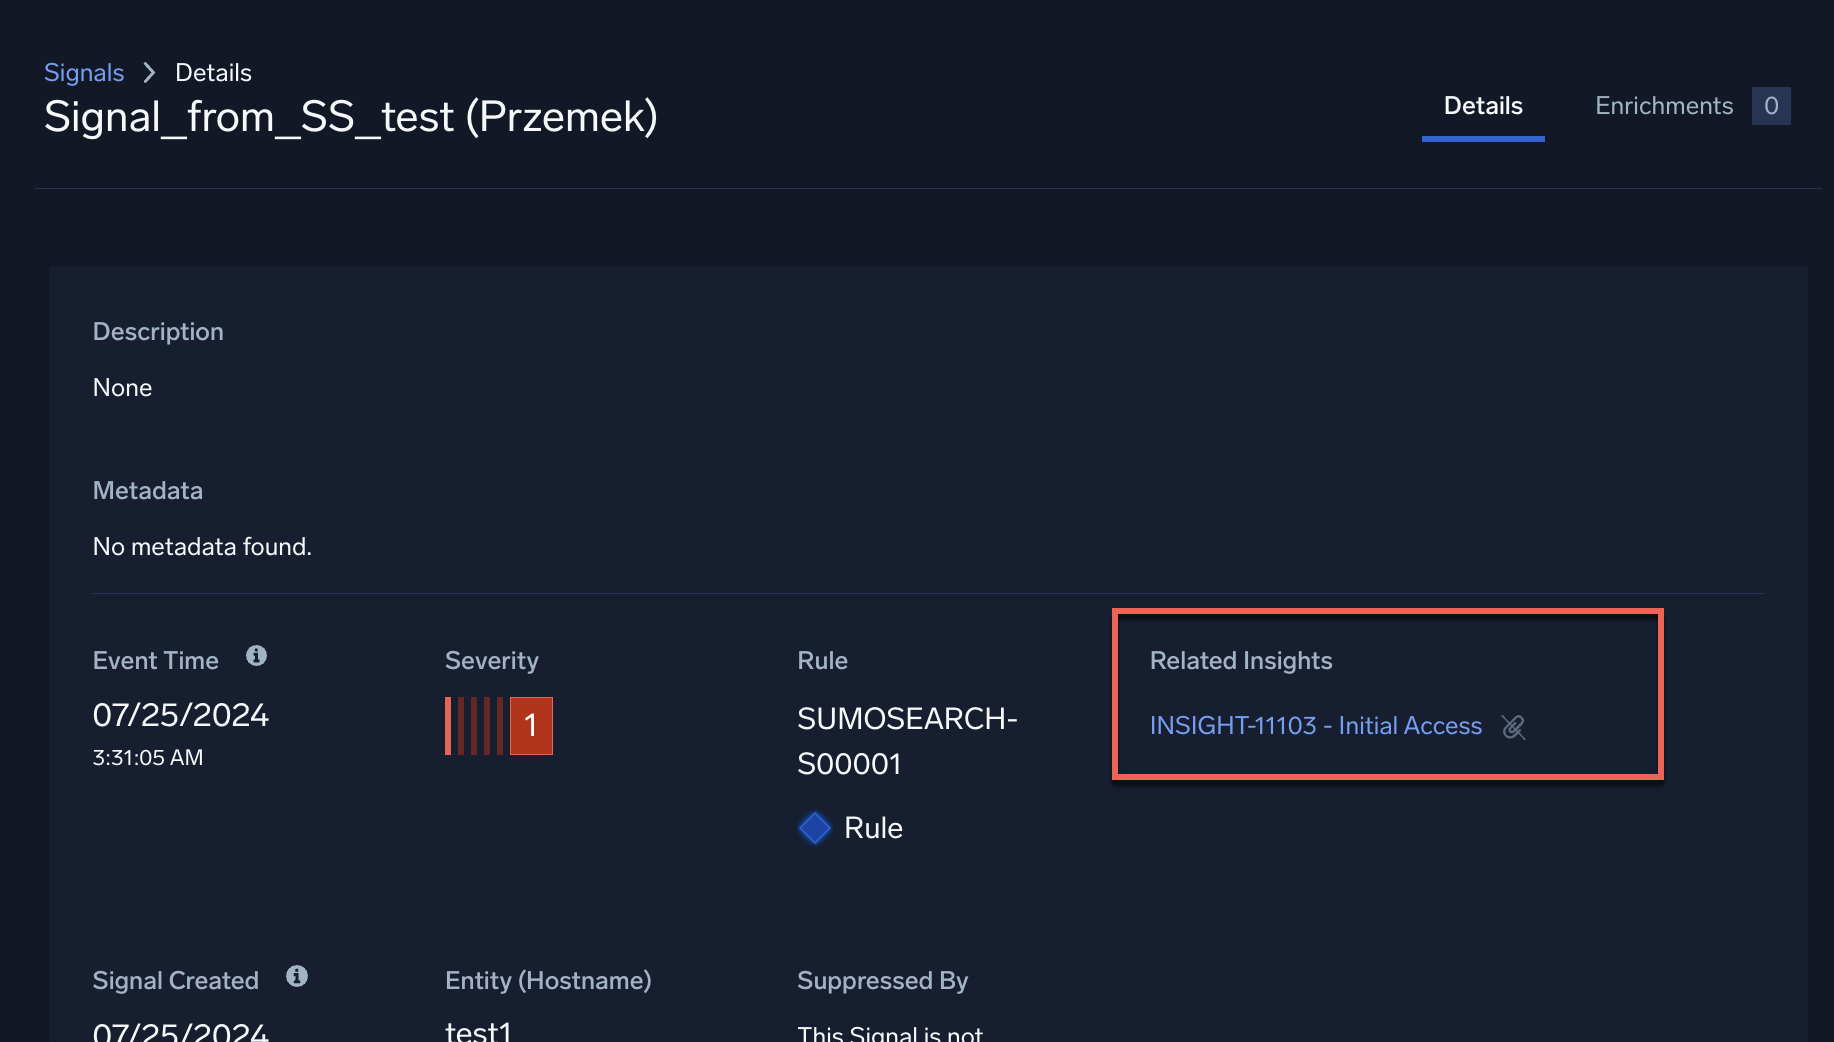
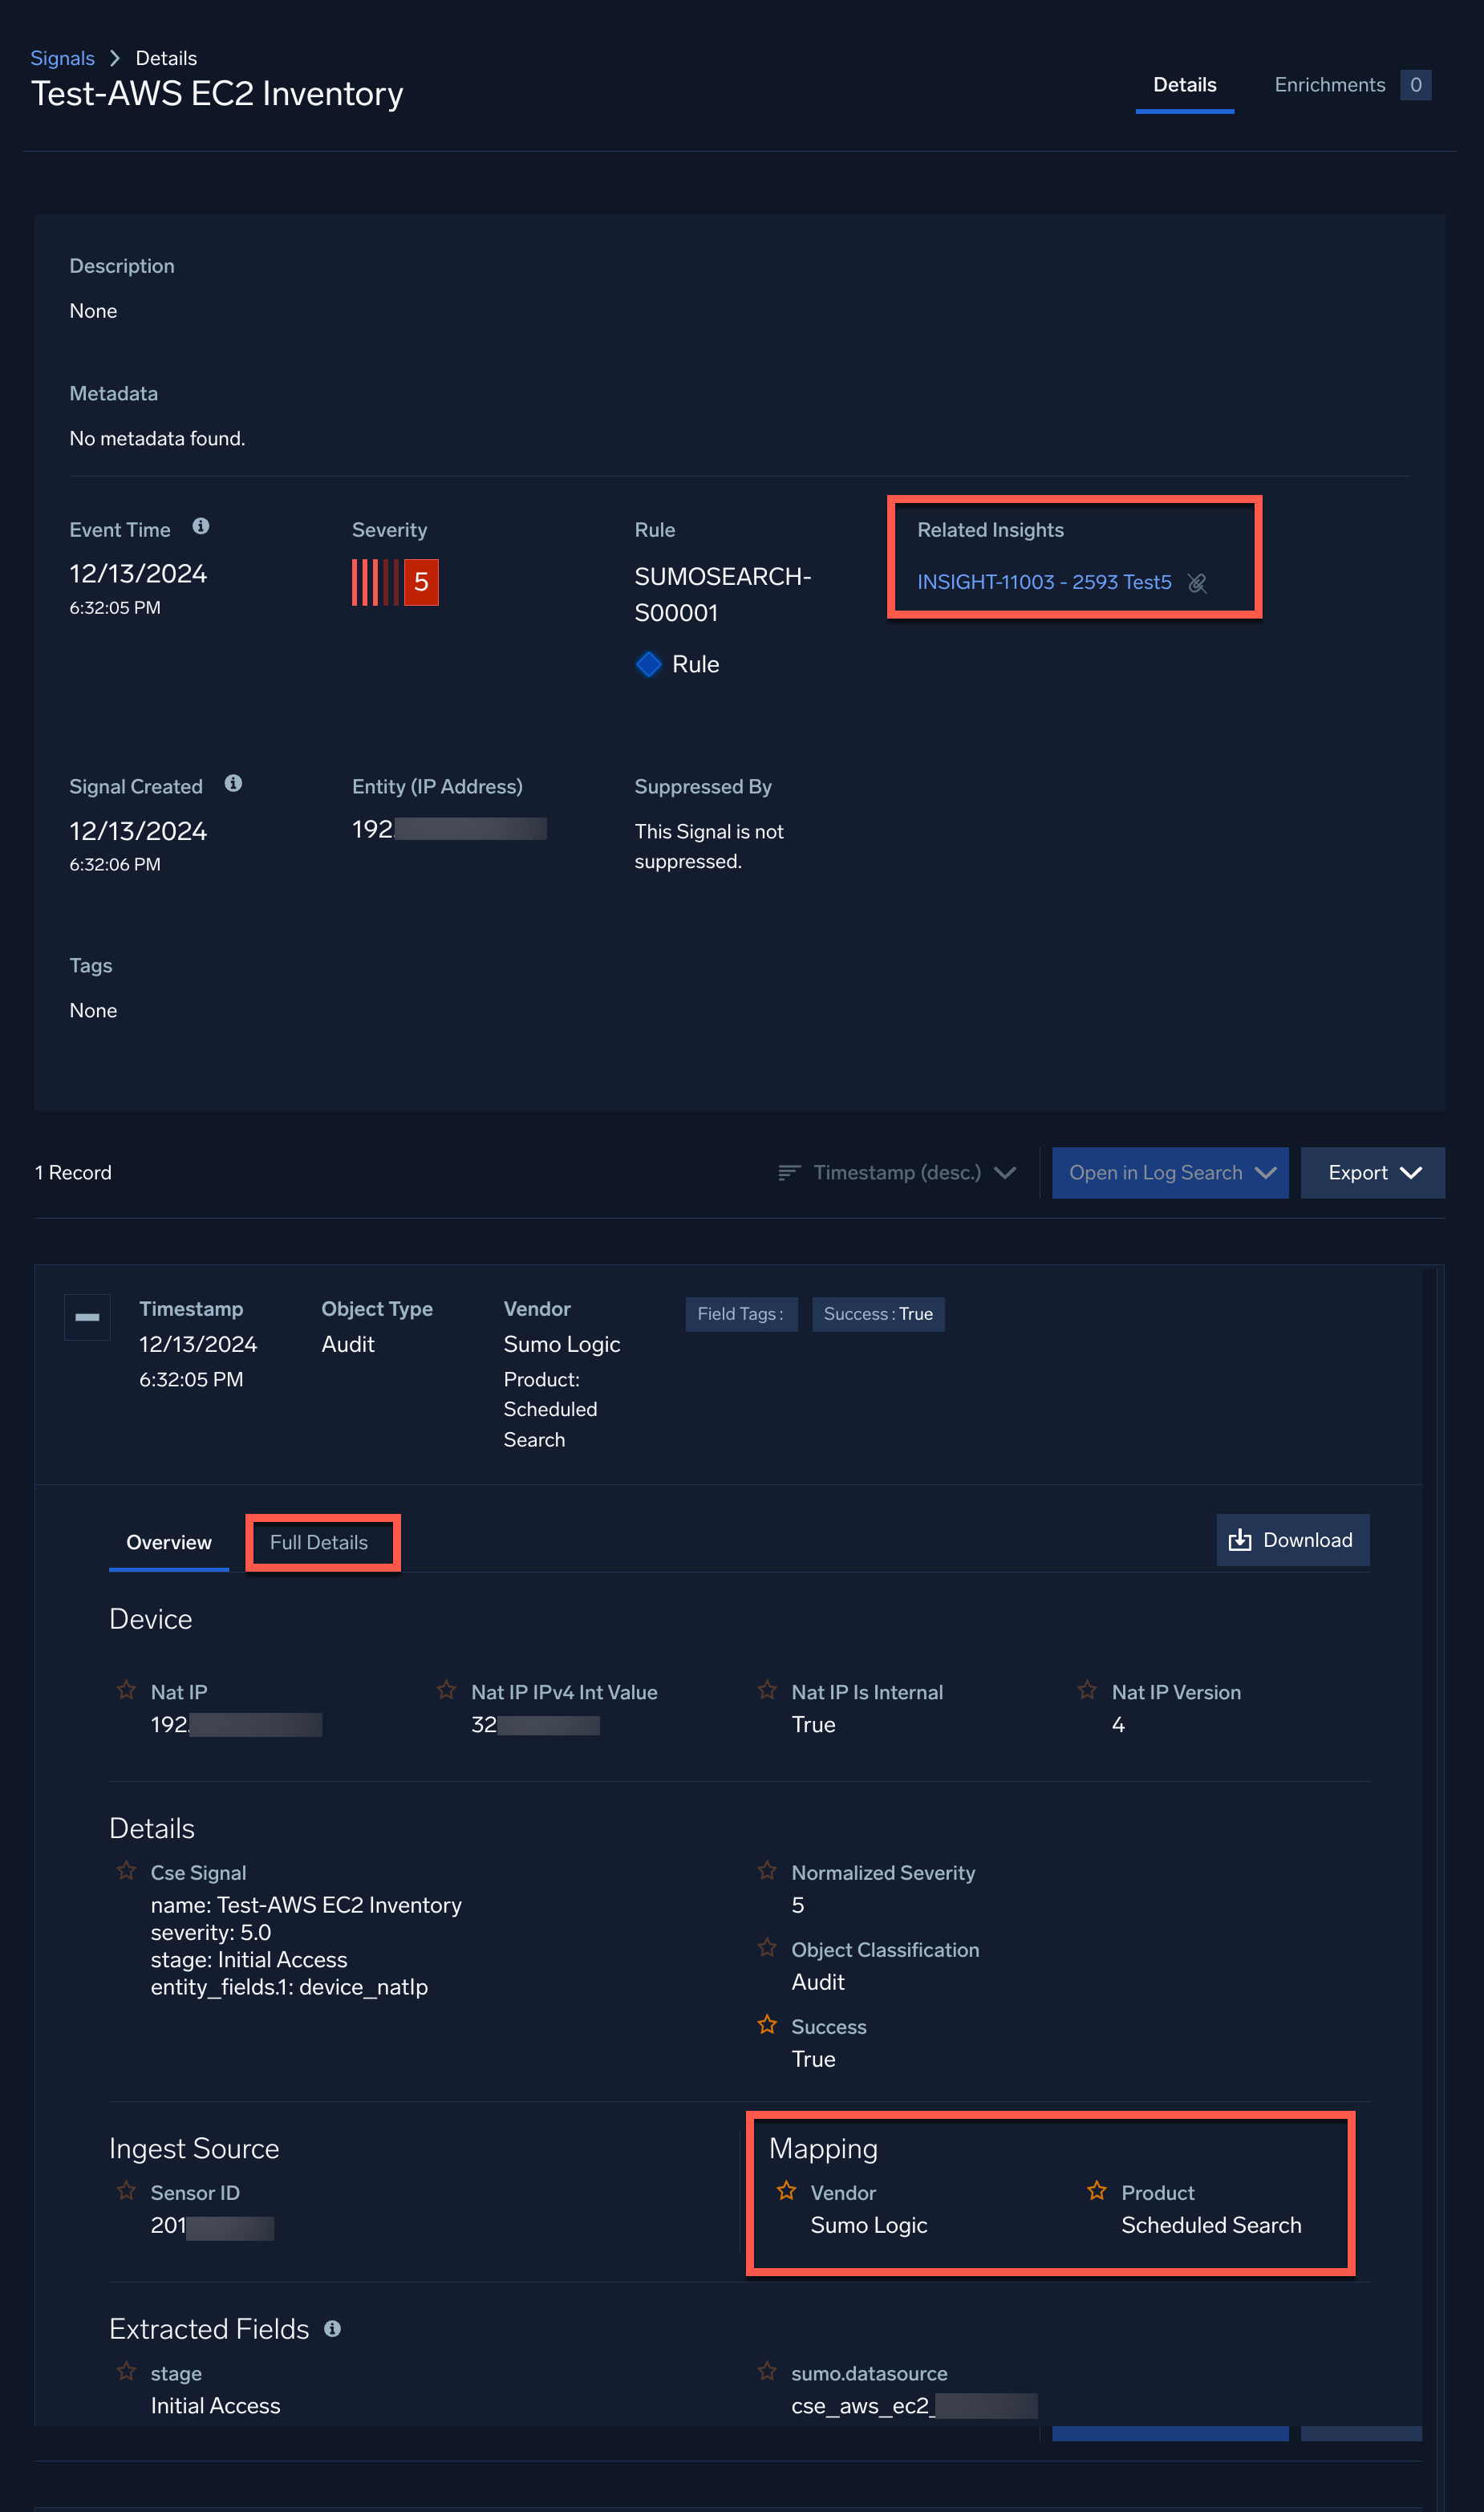
- Click a signal from the list. Below is a screenshot of a signal that was created from a scheduled search. Note that:
- Related Insights shows the insights the signal is included with. If the signal is not part of an insight, there’s a Create Insight link you can use to create an insight for the signal. For more information, see Create an insight from signal.
- You can click the Full Details link for more information about the signal. See View signal details below for a screenshot.
- The Mapping section at the bottom of the page shows that the signal was the result of a scheduled search.
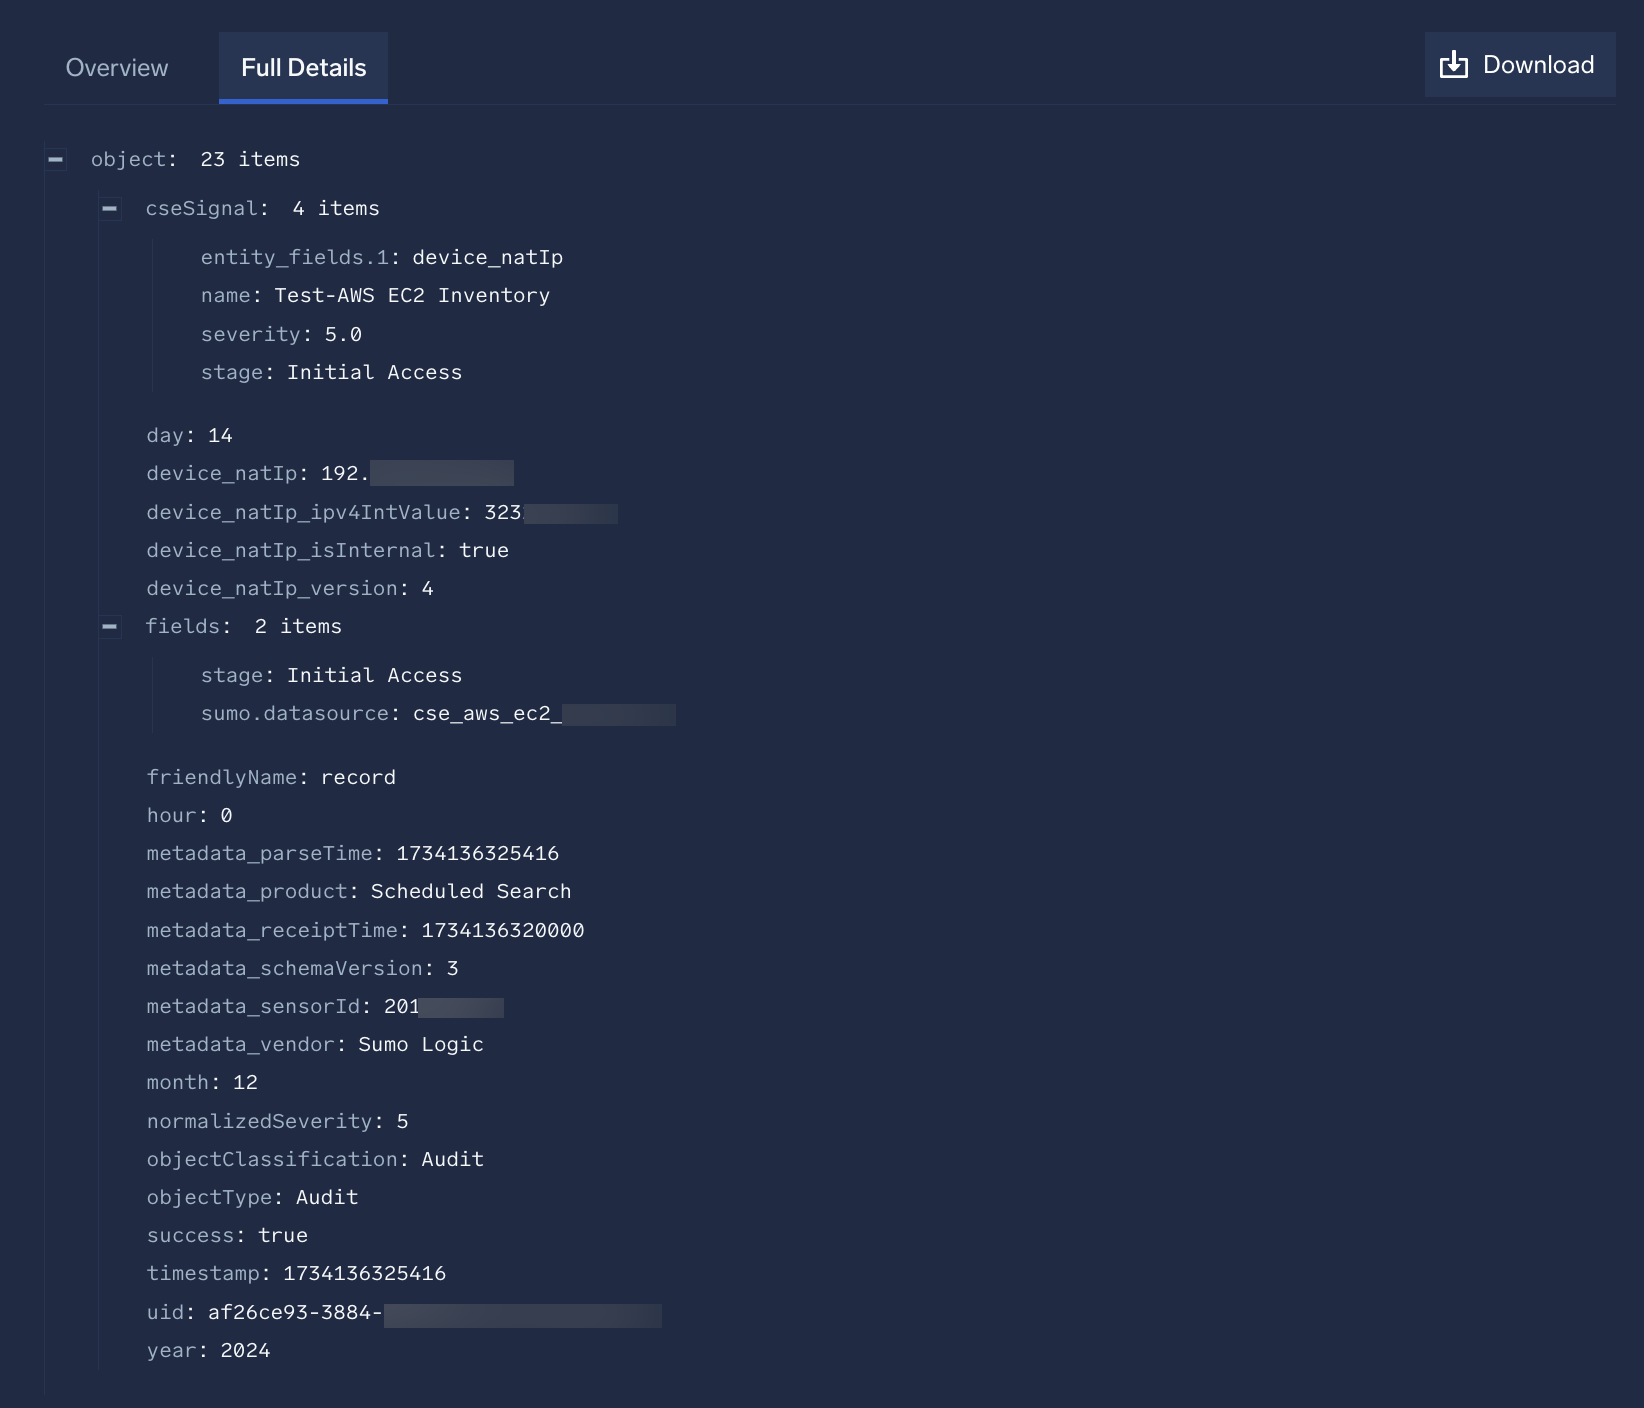
View signal details
The Full Details tab displays details about the signal.
Create an insight from signal
To create an insight from a signal generated from a scheduled search:
- Navigate to a signal that was generated from a scheduled search.
- Related Insights shows the insights the signal is included with. If the signal is not part of an insight, there’s a Create Insight link you can use to create an insight for the signal. Click Create Insight.
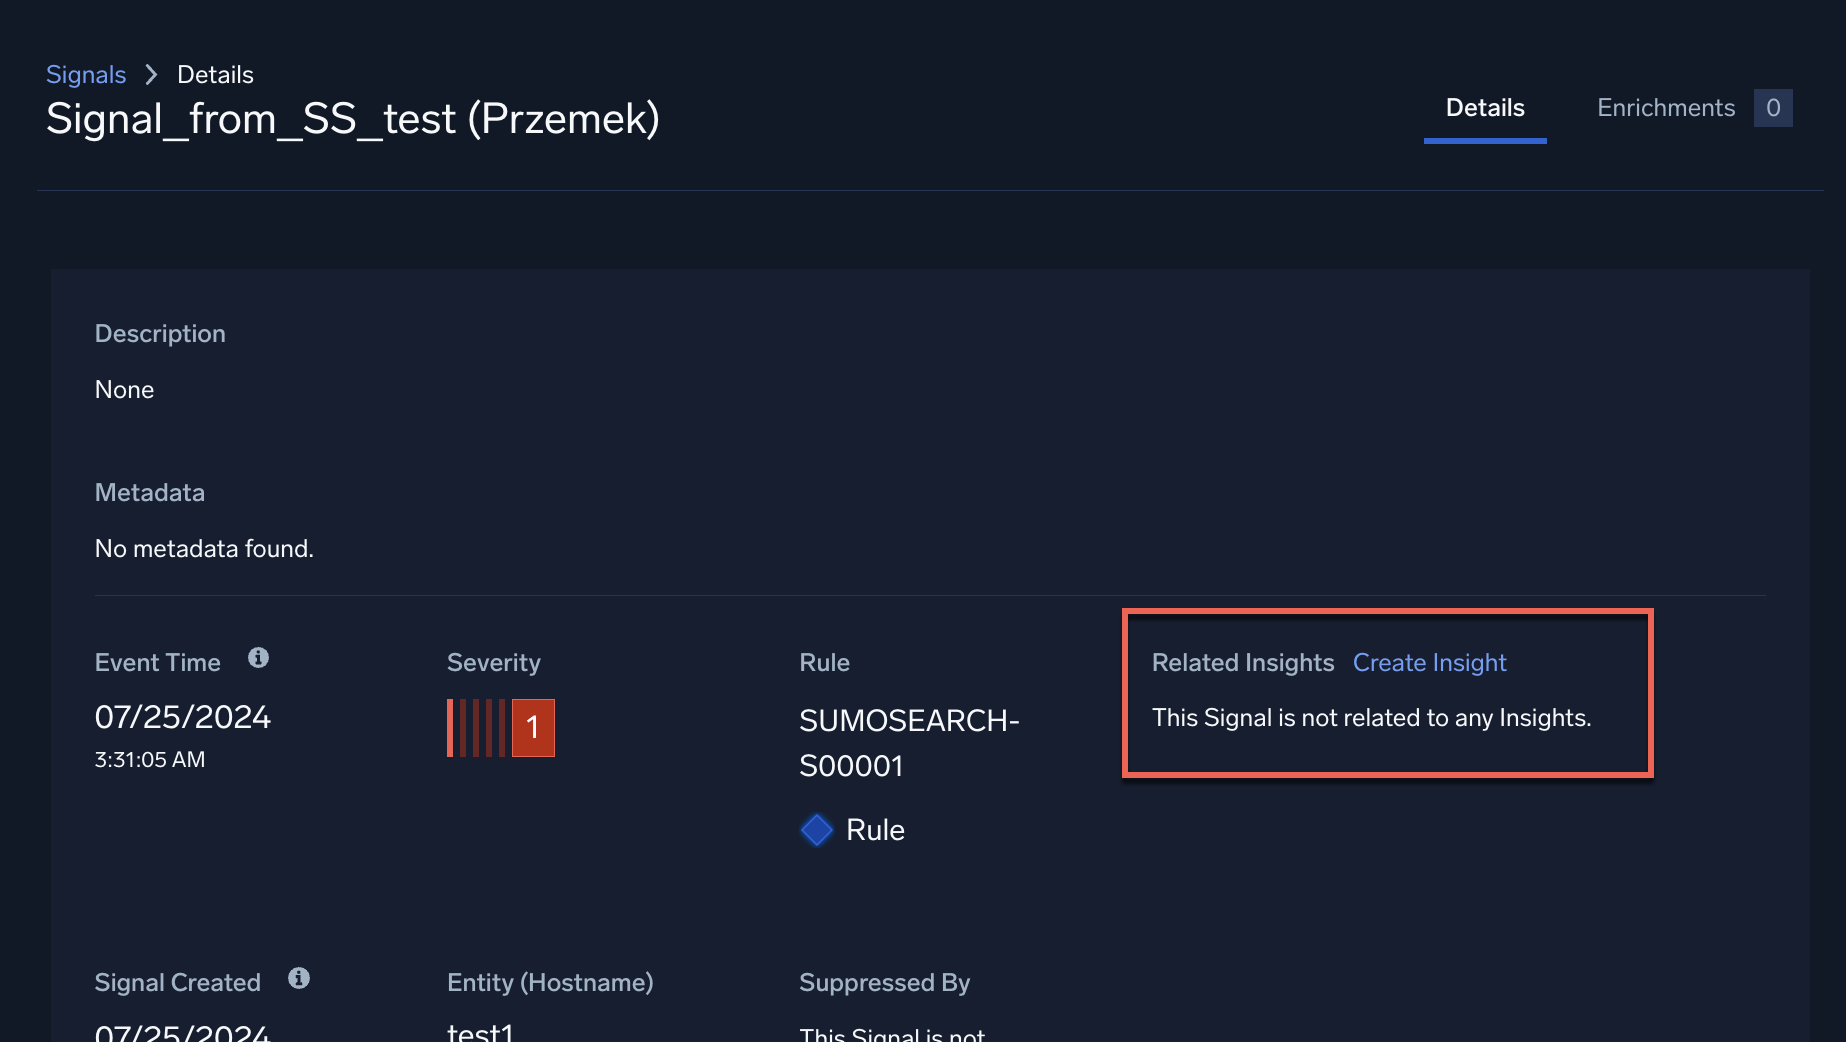
- Click Yes, Create Insight.
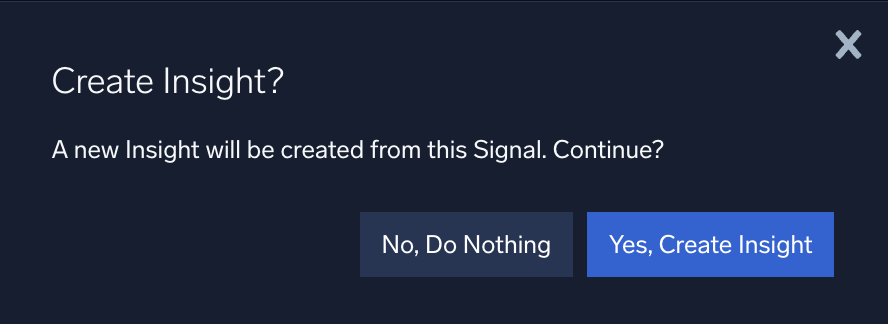
- The new insight is created and appears as a Related Insight.