Set Up Searches for ServiceNow Integration
Scheduled searches are saved searches that run automatically at specified intervals. When a scheduled search is set to upload search results to ServiceNow, you can combine services for round-trip investigations.
You can create a brand new search, or you can base a search on an existing saved or scheduled search. If you'd like to use an existing search, you'll need to save the query as a new search to not override the search's current schedule.
Before you can set up searches for ServiceNow, you'll need to configure a ServiceNow Connection.
To set up a search for ServiceNow integration
-
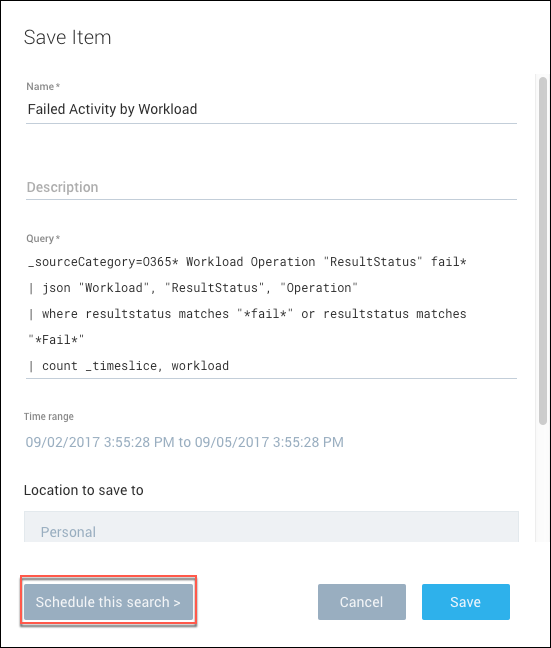
Create the search that you would like to integrate with ServiceNow. Click Save As under the query currently displayed in the search box.
-
In the Save Item dialog box, enter a Name for the search and an optional description.
-
Choose an option from the Time Range menu.
-
Click Schedule this search.
-
Choose an option from the Run Frequency menu:
- Never. Choose this option to temporarily turn off a scheduled search.
- Every 15 Minutes. The search will run for the first time when you save the schedule, and then every 15 minutes after that.
- Hourly. The search will run for the first time at the top of the next hour after you save the schedule, and then every hour after that. * Every 2, 4, 6, 8, or 12 Hours. The search will run for the first time at the top of the hour you choose.
- Daily. Choose the time you'd like to run the search every day. A Daily search will cover exactly 24 hours of activity. You can change the schedule whenever you'd like.
-
Choose a Time Range option to set the default range the scheduled search is run against. Alternately type a time range; for example, -15m to run the search against data generated in the past 15 minutes.
-
Select a Timezone you would like your scheduled search to use. If you do not make a selection, the scheduled search will use the timezone from your browser, which is the default selection.
-
For Alert Condition, choose one of the following for Send Notification: You can set up to a maximum of 1000 alerts per search. For either Alert Condition option, if no search results are generated by the search, no data is uploaded to ServiceNow.
- Notify me every time upon search completion if you want be alerted with search results every time the search is run (depending on the frequency, you could get an email every 15 minutes, every hour, or once a day).
- Notify me only if the condition below is satisfied if you'd like to set up a scheduled search that alerts you to specific events, and then set any of the following conditions before typing a value in the text box:
infoFor either Alert Condition option, if no search results are generated by the search, no data is uploaded to ServiceNow.
-
Choose an option for Number of Results. Depending on the search, set a condition to receive an alert by the number of results. If your saved search returns log messages, then the alert will use the number messages you specify; if your query produces aggregate results, the alert will use the number of aggregates (or groups).
- Equal to. Choose if there is an exact number of records in a search result at which you want to be notified.
- Greater than. Choose if you want to be notified only if the search results include greater than that number of messages or groups you set in the text box.
- Greater than or equal to. Choose if you want to be notified if the search results include greater than or equal to the number of messages or groups you set in the text box.
- Fewer than. Choose if you want to be notified only if the search results include fewer than the number of messages or groups you set in the text box.
- Fewer than or equal to. Choose if you want to be notified if the search results include fewer than or equal to the number of messages or groups you set in the text box.
-
Choose an option:
- For Legacy ServiceNow Connections only:
- For Alert Type, choose ServiceNow Connection to upload search results to ServiceNow.
- Next, you'll set your ServiceNow-specific options. Select a Connection, choose an option for Severity, then enter the following information:
- Type. The category the event source uses to identify the event.
- Node. The physical or virtual device on which the event occurred.
- Resource (optional). The component on the node to which the event applies. For information on these three fields, see here.
- For ServiceNow Connections only:
- For Alert Type, choose Webhook.
- Choose connection name from the dropdown and customize the payload, if needed.
- For Legacy ServiceNow Connections only:
-
Click Save.