Write a Match Rule
This topic has information about match rules and how to create them in the Cloud SIEM UI.
If you are new to writing rules, see About Cloud SIEM Rules for information about rule expressions and other rule options.
About match rules
A match rule is the simplest type of Cloud SIEM rule. Each time a single record matches the rule expression, a signal is fired.
A match rule doesn’t allow you to define other conditions for signal, like requiring multiple records to match the rule expression, or looking for events of the different types within a timespan.
Here’s an example of the rule expression for a match rule:
metadata_vendor = 'Amazon AWS' AND metadata_product = 'CloudTrail' AND metadata_deviceEventId = 'AwsApiCall-CreateUserPoolClient'
This rule fires a signal each time a UserPoolClient, which has permission to call unauthenticated API operations, is created.
Watch this micro lesson to learn how to create a match rule.
Create a match rule
- Classic UI. In the top menu select Content > Rules.
New UI. In the main Sumo Logic, menu select Cloud SIEM > Rules. You can also click the Go To... menu at the top of the screen and select Rules. - On the Create a Rule page, click Create in the Match card.
- In the rules editor:
- Name. Enter a name for the rule.
- Enabled. By default, the rule will be enabled. It's good practice to use the slider to disable the rule so that it won’t be applied to incoming records until you’ve tested it.
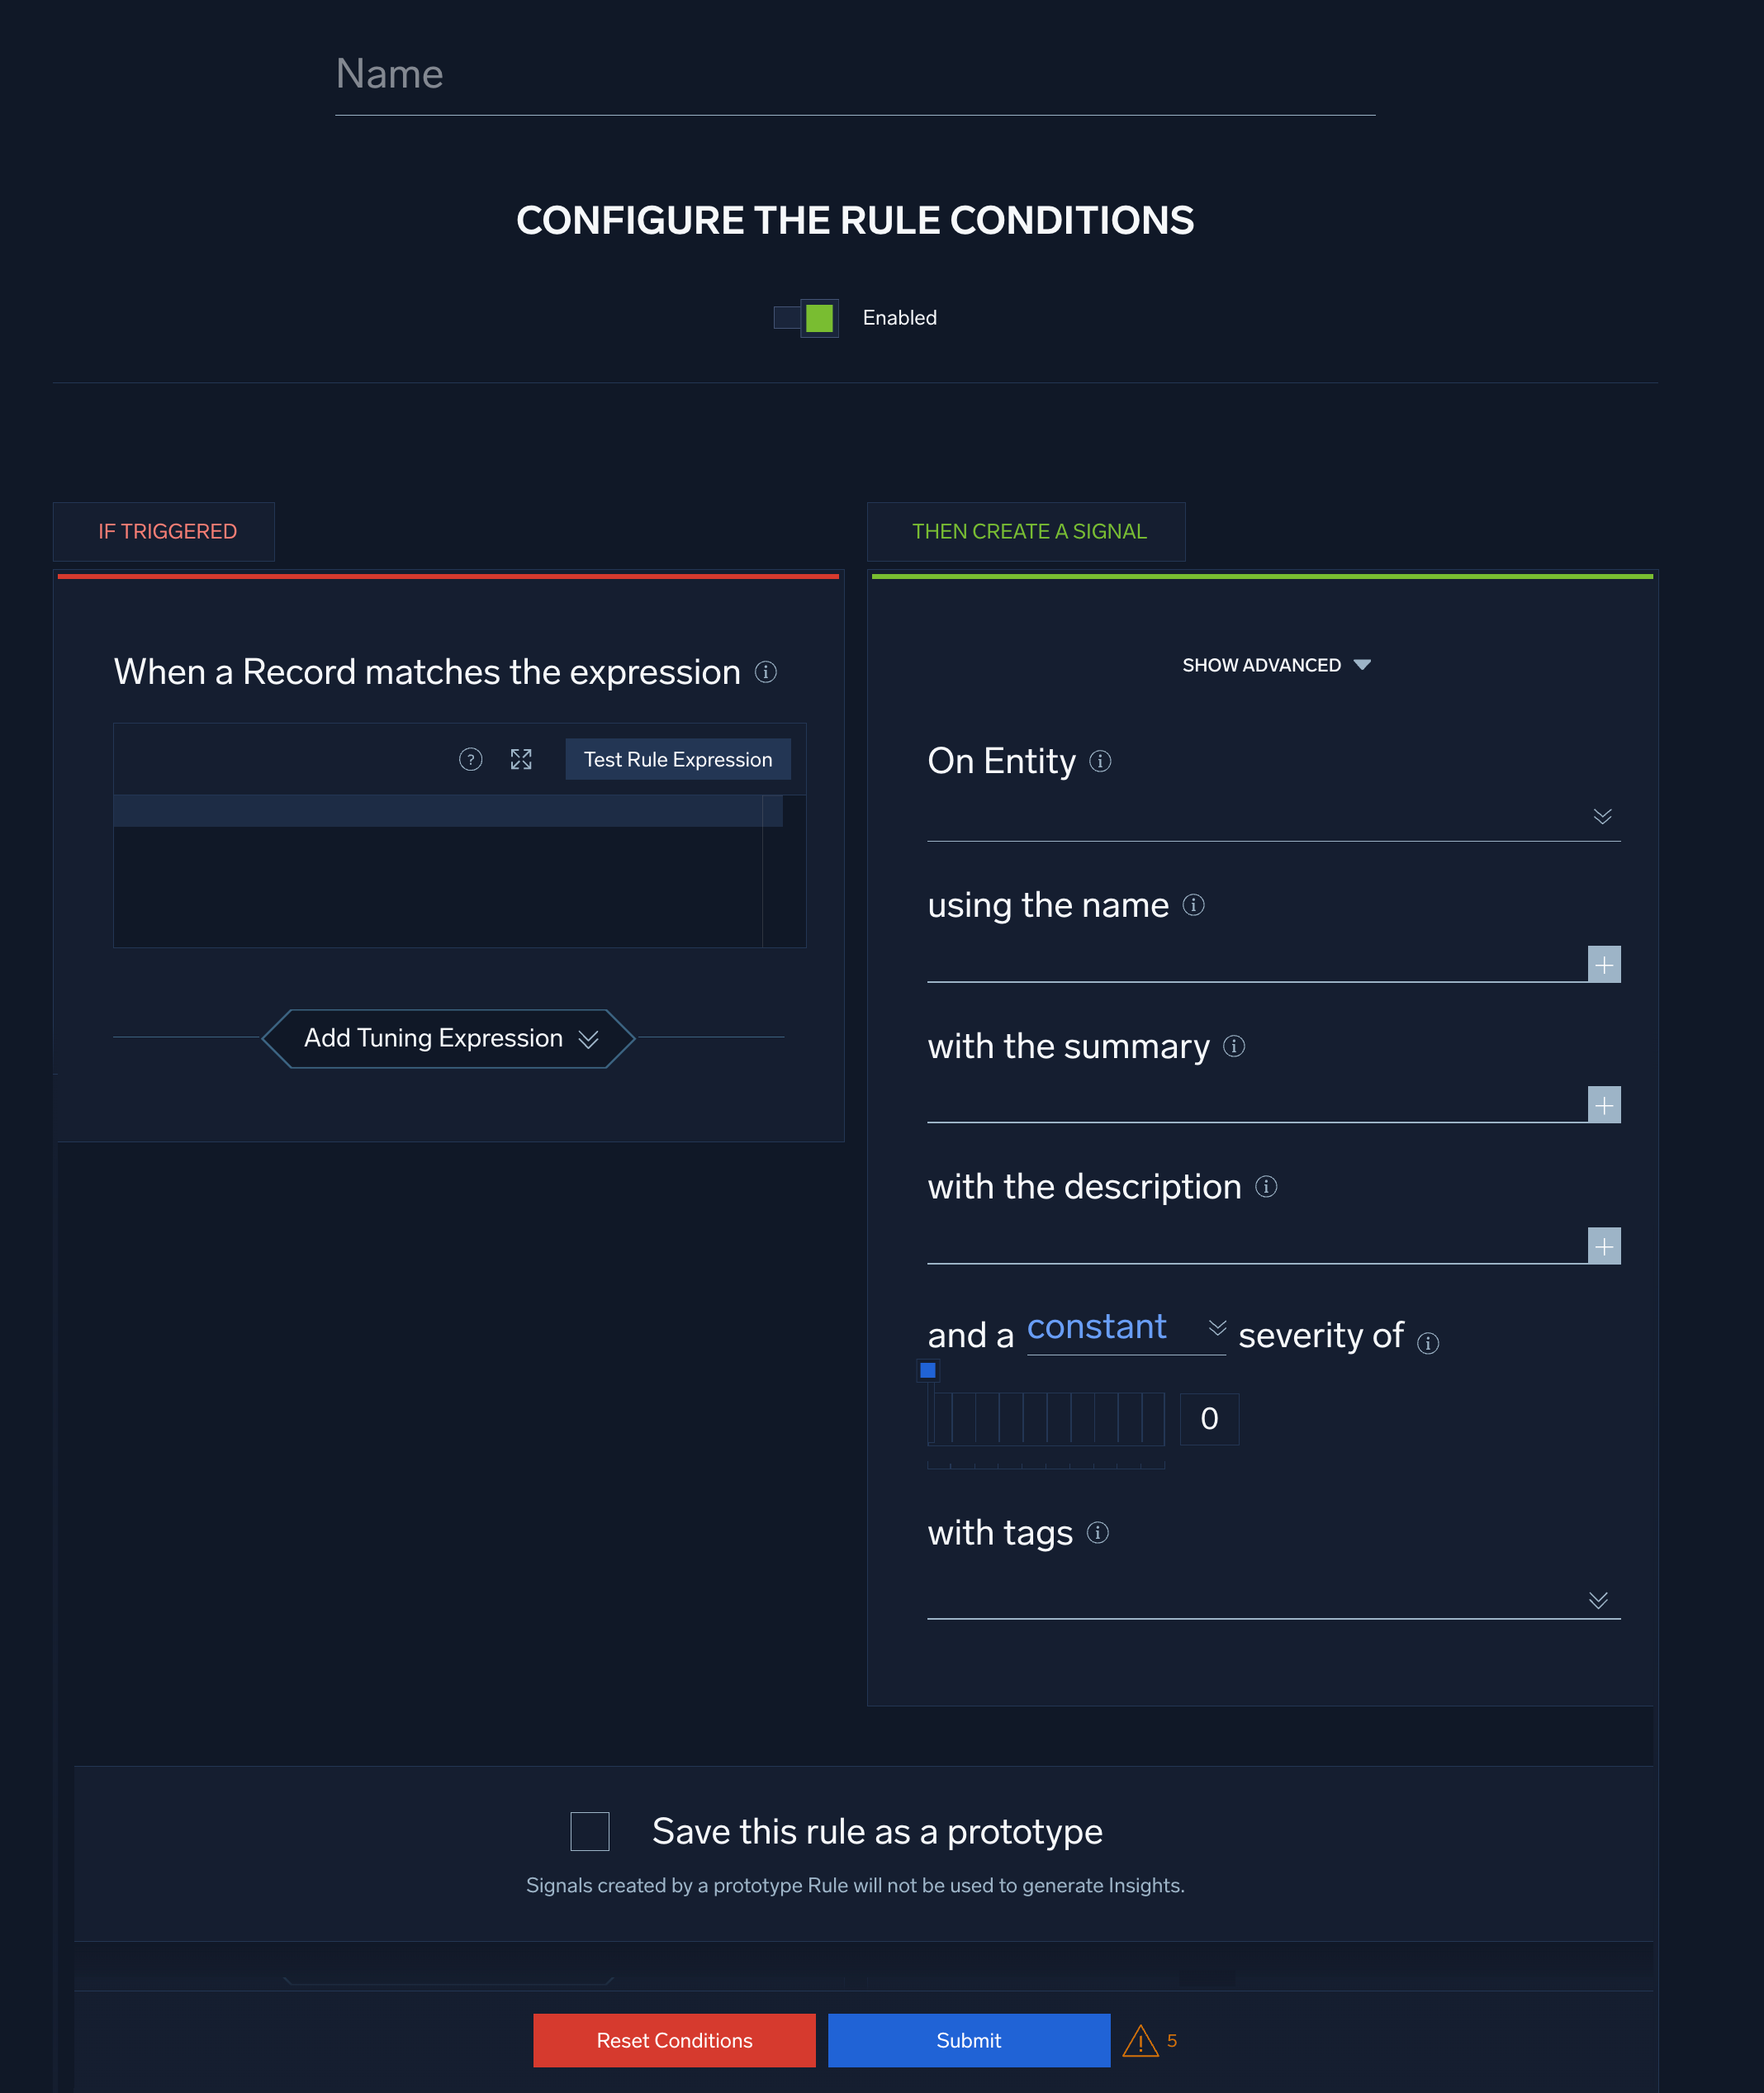
Configure "If Triggered" settings
- When a Record matches the expression. Enter a rule expression that the rule must match before generating a signal.
- Click Test Rule Expression to test it against existing records in Cloud SIEM. The If Triggered section expands, and Cloud SIEM searches for records that match the rule expression. If there are no matching records, you'll see a There aren't any matches for the expression message. If no matches were returned, try changing the time range.
- Select Add Tuning Expression if you want to add a rule tuning expression to the rule.
note
If you use Test Rule Expression on a rule that has one or more rule tuning expressions, you can test it without the tuning expressions, or with selected tuning expressions.
Configure "Then Create a Signal" settings
- Click Show Advanced if you want the rule to override global signal suppression.
- On Entity. Select the entity field—for example, an IP address, MAC address, hostname, and so on—in the record that the resulting signal should be associated with. (In Cloud SIEM, an insight is a set of signals with the same entity field.) Select a value from the pull-down list.
- using the name. Define the name for signals fired by the rule. You can enter text, and include record fields from the custom token list. Including record field values in the signal name can make it more meaningful.
note
- When you're configuring a Threshold and Chain rule, you do not supply a signal name; a signal fired by those rule types has the same name as the rule that fired it.
- For extracted fields, you can specify a token for an extracted field using the format
{{fields[<field_name>]}}.
- with the summary. Enter a brief summary describing what causes the rule to create a signal.
- with the description. Define the description for the signal the same way you did the signal name, using text and record fields. The signal description should be a good indication of what the rule looks for.
note
You can add a markdown link (for example,
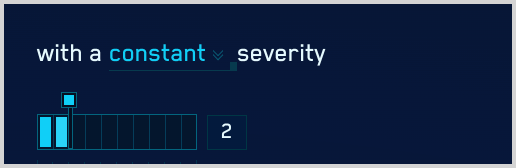
[link](https://link-target)) in the with the description field to add a link that will appear in the Signal that the rule fires. Then people viewing the Signal can click the link to access documentation about how to respond to the Signal. - with a severity of. Severity is an estimate of the criticality of the detected activity, from 1 (lowest) to 10 (highest). There are two ways to specify Severity:
- Constant. Every signal that the rule fires will have the same severity,
- Dynamic. Severity is based on the value of a field in the record.
- Configure constant severity. Choose Constant, and select a severity level. Then, proceed to Step 8.
- Configure dynamic severity.
- Choose Dynamic.
- The severity area updates.
- severity of. Use the pulldown to select a default severity value.
- for the record field. Use the down arrows to display a list of fields, and select one. The dynamic severity will be based on the value of (or existence of) that field in the record that matched the rule expression.
- The Add More Mappings option appears.
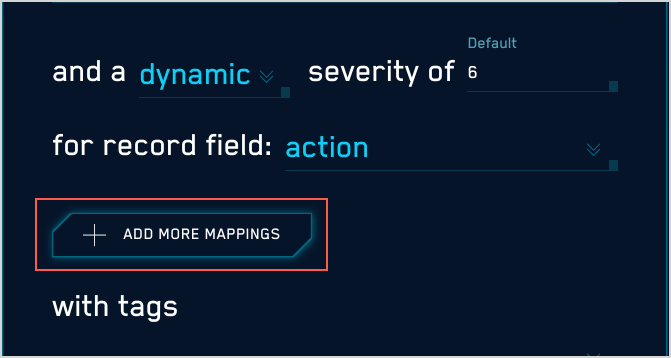
- Click Add More Mappings. (Optional) You can define additional mappings if desired. If you don’t, the severity value will be the value of the record field you selected above.
- The if the value is option appears.
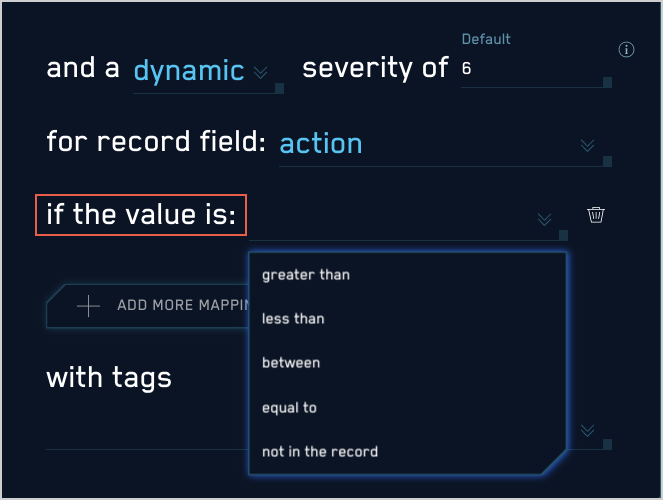
- Select one of the following options:
- greater than. The record field’s value must be greater than the numeric value you supply. The match is not inclusive. For example "greater than “5" will match “5.1”, but not “5”.
- less than. The record field’s value must be less than the numeric value you supply. The match is not inclusive. For example "less than 5" will match “4.9” but not “5”.
- between. The record field’s value must be between the two numeric values you supply. The match is inclusive. For example, "Between 5 and 10" will match “5”, “7”, or “10”, but not “10.1”.
- equal to. The record field’s value must exactly match the string or numeric value you supply. For example "equal to 4" will match "4" and “4.0” but not “4.01”.
- not in the record. Will match when the attribute is found in the record. For example, if the selected field is
broirc_value, and that field is not present in a record, the rule will match. Ifbroirc_valueexists but is null or empty, the rule will not match.
- You can define additional conditions, as desired. To define an additional condition, repeat the steps above, starting with Add More Mappings.
noteThe conditions you define will be processed in the order you define them. Once a match occurs, processing stops–remaining conditions are ignored.
- with tags. If desired, you can add metadata tags to your rule. Tags are useful for adding context to items like rules, insights, signals, entities. You can also search for and filter items by tag. Tags you set here will be automatically set on any signals created from this rule, and inherited by any insights generated from those signals.
Save as prototype
If you are not sure that your rule is ready for prime time, you can save it as a prototype. A prototype rule generates signals, but those signals won't contribute to insights. (Signals generated by a prototype rule do not increment the rule's On Entity entity's Activity Score.) Running the rule as a prototype for a while allows you to determine whether the rule is too noisy and fires too many signals.
To make the rule a prototype, click the box next to Save this rule as a prototype. When you are satisfied with the rule's behavior you can uncheck the box.