Fields
Fields allow you to reference log data based on meaningful associations. They act as metadata tags that are assigned to your logs so you can search with them. Each field contains a key-value pair, where the field name is the key. Fields may be referred to as Log Metadata Fields.
In addition to defining fields through Field Extraction Rules, you can define fields on data sent to Sumo by manually defining them on Sources and Collectors, as well as dynamically through HTTP headers and tags from Amazon EC2.
The order of precedence for field assignment from highest to lowest is:
- Field Extraction Rule (FER)
- Amazon EC2 resource tags
- Amazon EC2 instance information
- HTTP Header
- Source
- Collector
So, if you have a field defined at the Collector or Source level, and you create a FER against the same source of data with the same field name, the FER will win the field assignment.
Any fields you want assigned to log data need to exist in a Fields schema. Each account has its own Fields schema that is available to manage in the Sumo web interface. When a field is defined and enabled in the Fields schema it is assigned to the appropriate log data as configured. If a field is sent to Sumo Logic but isn’t present or enabled in the schema, it’s ignored and marked as Dropped.
Fields specified in field extraction rules are automatically added and enabled in your Fields schema.
Field management is important to ensure search performance is maintained and you continue to have meaningful fields assigned to your data. You can manage fields defined through any of these methods at any time, to include deleting unneeded fields, see manage fields for details.
About metrics sources, fields, and metadata
Sumo Logic metrics sources also support tagging with fields defined in your Fields schema or other metadata that hasn’t been added to your schema. Here’s how it works:
When creating or updating the configuration of an HTTP Source or a Collector that has an HTTP source, you assign it a field on the configuration page. If the field doesn’t exist in the schema, you are prompted whether or not you want to Automatically activate all fields on save. If you select that option, the field will be added to the schema and be applied to the logs collected by the Collector, and to metrics and logs collected by the HTTP Source. If you do not select Automatically activate all fields on save, the field will not be saved to your Fields schema, and the field will be applied only to the metrics collected by the HTTP Source.
When creating or updating the configuration of a Streaming Metrics Source, a Host Metrics Source, or a Docker Source, you can assign it metadata on the source configuration page. Metadata fields you assign in this fashion to these metrics sources do not need to exist in your Fields schema and will not be added to the schema.
Limitations
- Fields created as log metadata and from Field Extraction Rules share the same quota of 200 fields. The Fields page shows how many fields your account is using out of the total available at the bottom of the table as Fields Capacity.
note
Enterprise and Enterprise Suite users can create a maximum of 400 fields.

- It can take up to 10 minutes for fields to start being assigned to your data.
- A Collector can have up to 10 fields.
- A Source can have up to 10 fields.
- An HTTP request is limited to 30 fields.
- A field name (key) is limited to a maximum length of 255 characters.
- A value is limited to a maximum length of 200 characters.
- Fields cannot be used with Live Tail.
Collector and Source fields
Fields can be assigned to a Collector and Source using the Fields input table in the Sumo user interface when creating or editing a Collector or Source.
-
New UI. In the main Sumo Logic menu select Data Management, and then under Data Collection select Collection. You can also click the Go To... menu at the top of the screen and select Collection.
Classic UI. In the main Sumo Logic menu, select Manage Data > Collection > Collection. -
Create or find and select the Collector or Source you want to assign fields to.
-
Click the +Add Field link in the Fields section. Define the fields you want to associate, each field needs a name (key) and value.
 A green circle with a check mark is shown when the field exists and is enabled in the Fields table schema.
 An orange triangle with an exclamation point is shown when the field doesn't exist in the Fields table schema. In this case, you'll see an option to automatically add or enable the nonexistent fields to the Fields table schema. If a field is sent to Sumo Logic but isn’t present or enabled in the schema, it’s ignored and marked as Dropped.
-
Automatically activate all fields on save.
If you click Automatically activate all fields on save:
- The field will be saved to your Fields schema.
- The field will be applied to logs collected by the Collector or Source.
- If you are adding the field to an HTTP Source, or to a Collector that has an HTTP Source, the field will be applied to the metrics collected by the source.
If you do not click Automatically activate all fields on save:
- The field will be not be saved to your Fields schema
- The field will be applied to logs collected by the Collector or Source, but because the field won’t be added to your Fields schema, it will be dropped by Sumo Logic when logs with that field are ingested.
- If you are adding the field to an HTTP Source, or to a Collector that has an HTTP Source, the field will be applied to the metrics collected by the source.
-
Click Save.
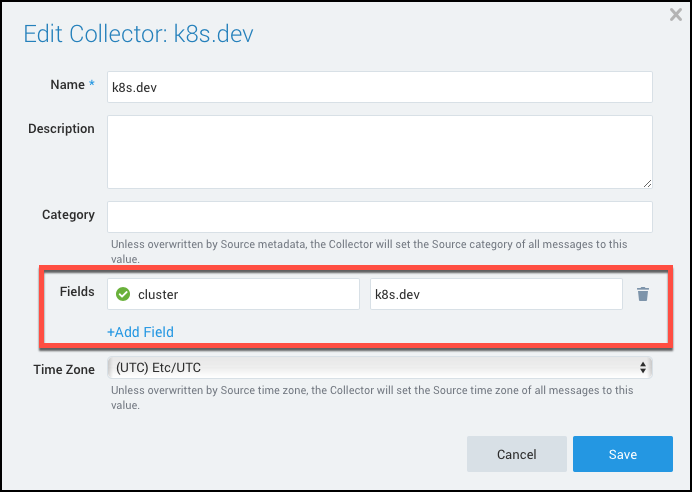
In the above example, we have created a new field called cluster and set the value to k8s.dev. With this configuration, any logs sent to this Collector will now have this key-value pair associated with it.
With this association, you can search for cluster=k8s.dev to return your logs.
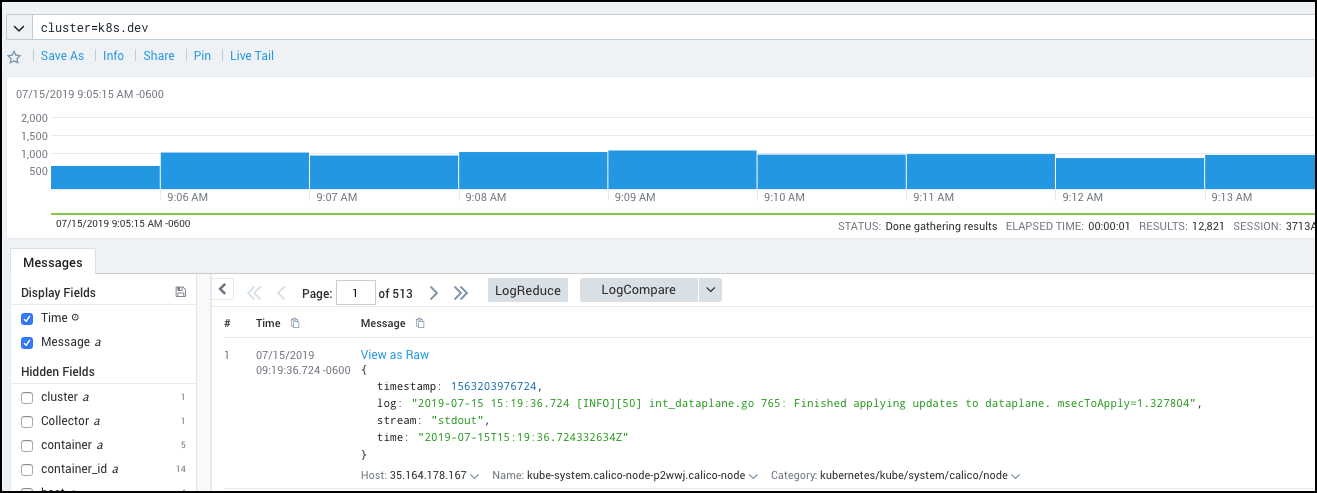
Using Collector API
Use the fields parameter with the Collector API to define fields on a Collector or Source.
| Parameter | Type | Required? | Description | Access |
|---|---|---|---|---|
| fields | JSON Object | No | JSON map of key-value fields (metadata) to apply to the Collector or Source. | Modifiable |
The following JSON is an example configuration of a Hosted Collector with the fields parameter:
{
  "collector":{
    "collectorType":"Hosted",
    "name":"My Hosted Collector",
    "description":"An example Hosted Collector",
    "category":"HTTP Collection",
    "fields": {
        "cluster":"k8s.dev"
    }
  }
}
Using Local Configuration
Installed Collectors can use JSON files to configure their Sources when using Local Configuration File Management. Use the fields parameter in your JSON configuration to define fields on a Source.
| Parameter | Type | Required? | Description | Access |
|---|---|---|---|---|
| fields | JSON Object | No | JSON map of key-value fields (metadata) to apply to the Collector or Source. | Modifiable |
The following JSON is an example configuration of a Local File Source with the fields parameter:
{
    "api.version":"v1",
    "sources":[
    {
        "name":"Test-Chef",
        "category":"Chef",
        "automaticDateParsing":true,
        "multilineProcessingEnabled":false,
        "useAutolineMatching":false,
        "forceTimeZone":false,
        "timeZone":"UTC",
        "filters":[],
        "cutoffTimestamp":1426057200000,
        "encoding":"UTF-8",
        "fields":{
            "node":"hornetq-livestream-9",
            "deployment":"sumologic",
            "cluster":"k8s.dev"
        },
        "pathExpression":"/home/ubuntu/chef*.log",
        "sourceType":"LocalFile"
    }
  ]
}
HTTP Source fields
When uploading log data with HTTP Sources you can pass fields in two ways,
- with the X-Sumo-Fields HTTP header.
- enabling Extended HTTP Metadata Collection on your Source.
You can use both methods together. If there is a name collision between a given header and a value passed in X-Sumo-Fields, X-Sumo-Fields takes precedence.
Any fields passed with your data need to exist in your Fields schema defined in Sumo. Any fields not defined in Sumo that are passed through a header are dropped. See how to define fields in the manage fields section.
See how to upload logs to an HTTP Source.
X-Sumo-Fields HTTP header
Your fields need to be in a comma separated list of key-value pairs. For example, a cURL command posting data with custom fields would look like:
curl -v -X POST -H 'X-Sumo-Fields:environment=dev,cluster=k8s' -T /file.txt <HTTP endpoint>
Extended HTTP Metadata Collection
When creating or editing your HTTP Source that will receive log data add the field _convertHeadersToFields with a value of true. This field needs to be added to your Fields schema to work.
With this field set on your Source, headers are processed as metadata fields. For example, a cURL command posting data with custom fields would look like:
curl -v -X POST -H 'environment: dev' -H 'cluster: k8s' -T /file.txt <HTTP endpoint>
Reserved headers
The following headers are reserved and can not be used: X-Sumo-Category, X-Sumo-Dimensions, X-Sumo-Fields, X-Sumo-Host, X-Sumo-Metadata, X-Sumo-Name, Webhook-AuthID, Webhook-ValidationCode, and x-amz-sns-topic-arn.
Tags from EC2
Create a Sumo Logic AWS Metadata Source to collect custom tags from EC2 instances running on AWS. An Installed Collector automatically pulls AWS instance identity documents (IMDSv2) from instances to get their accountID, availabilityZone, instanceId, instanceType, and region.
Logs ingested by Installed Collectors on EC2 instances will be tagged as long as the tag, including instance information tags, exists in the organization's Fields schema. See how to define fields in the manage fields section. EC2 resource tags take precedence over EC2 instance information. Only one AWS Metadata Source is required to collect tags from multiple hosts.
Tags are returned in your search results and can be referenced in queries. For information about assigning tags to EC2 instances, see Tagging Your Amazon EC2 Resources in AWS help.
Using fields
Fields can be used in the following ways:
- Log Search page. Use the key-value pair as a keyword search expression (before the first pipe, | ).
- Role Based Access Control (RBAC). Fields can be used in role search filters to control access to data.
- Partitions, Scheduled Views, and Field Extraction Rules. Fields can be used in the scope of Partitions, Scheduled Views, and Field Extraction Rules.
Fields cannot be used with Live Tail.
Manage fields
Fields in your account are manageable in the Fields page.
New UI. To access the Fields page, in the main Sumo Logic menu select Data Management, and then under Logs select Fields. You can also click the Go To... menu at the top of the screen and select Fields.
Classic UI. To access the Fields page, in the main Sumo Logic menu select Manage Data > Logs > Fields.
To refine the table results, use the Add a filter section located above the table. AND logic is applied when filtering between different sections, while OR logic is applied when filtering within the same section.
You can see the suggestions only if there are two or more responses for the same column or section.
You need the Manage Fields role capability to manage fields.
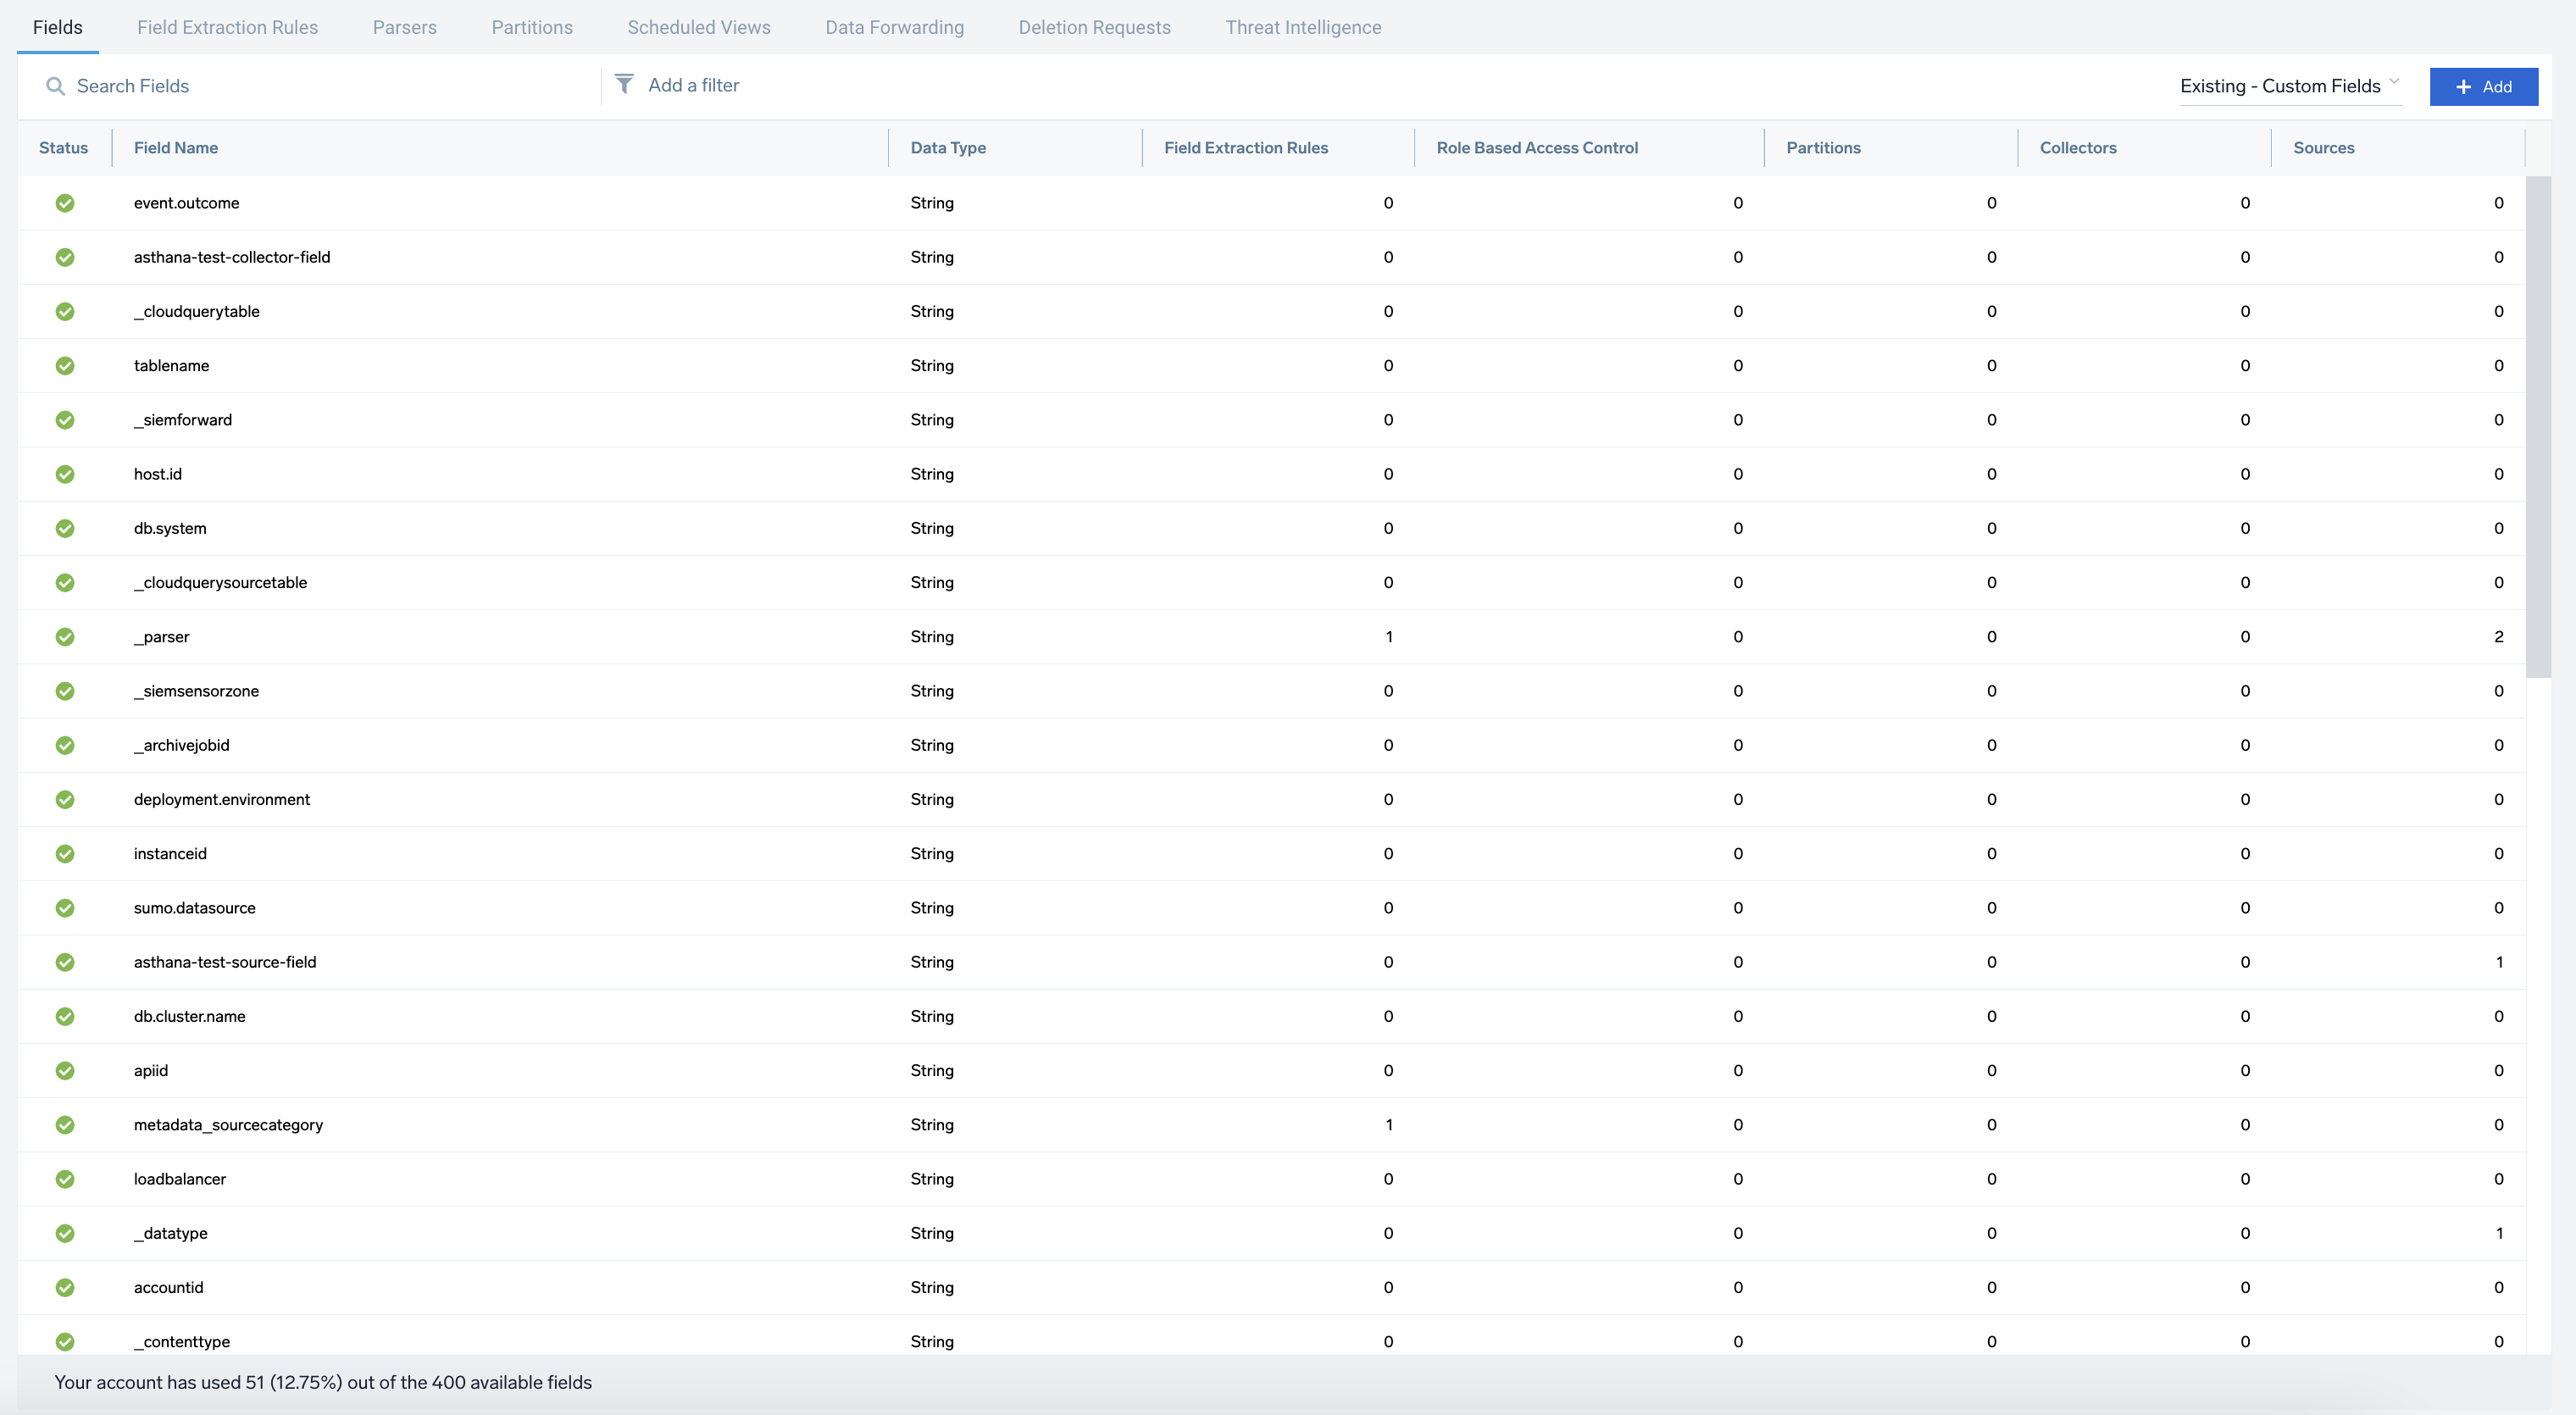
The Fields page displays the following information:
- Status shows a checkmark in a green circle
 to indicate if the field is actively being applied or an exclamation mark in a red circle
 to indicate if the field is disabled and being dropped.
- Field Name is the name of the field, known as the key in the key-value pair.
- Data Type shows the data type of the field.
- Field Extraction Rules shows the number of Field Extraction Rules that reference the field.
- Role Based Access Control shows the number of Roles using a search filter that references the field.
- Partitions shows the number of Partitions that reference the field.
- Collectors shows the number of Collectors that reference the field. (Available when viewing custom fields.)
- Sources shows the number of Sources that reference the field. (Available when viewing custom fields.)
- Fields Capacity (bottom of table) shows how many fields your account is using, out of the total available for use.
On the Fields page you can:
-
Click + Add to add fields.
-
Search fields * The dropdown next to the add button lets you toggle between the following:
- Existing - Built-in Fields. These are metadata fields created by Sumo Logic and cannot be modified.
- Existing - Custom Fields. These fields were either created by FERs or users.
- Dropped Fields. These fields are being dropped due to not existing in the fields table.
-
Disable fields
-
Delete fields
When hovering over a row in the table there are icons that appear on the far right for disabling and deleting the field.
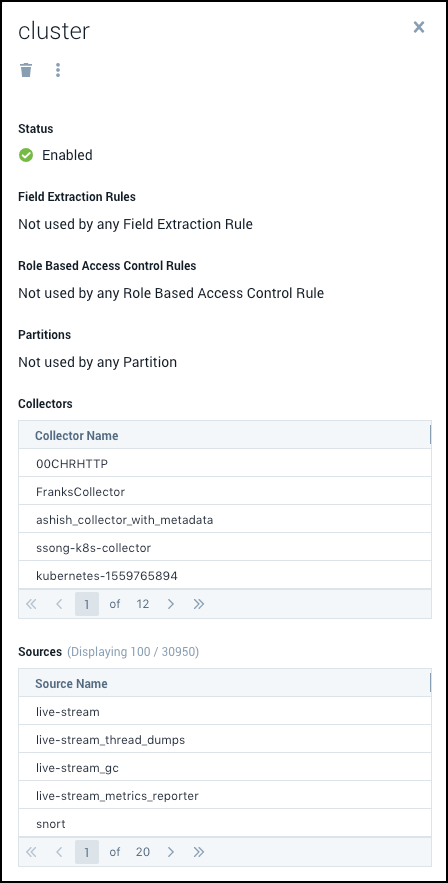
For the fields listed, select a row to view its details. A details pane appears to the right of the table where you can disable and delete the field.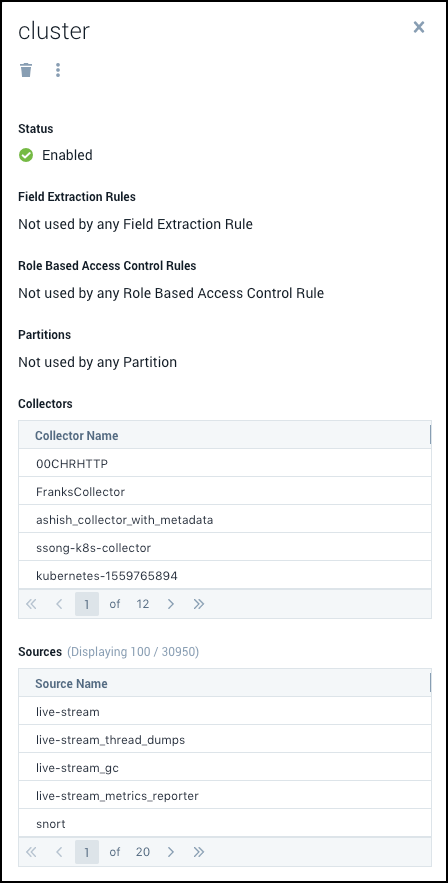
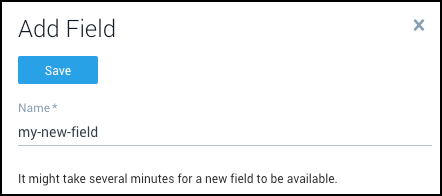
Add field
Adding a field will define it in the Fields schema allowing it to be assigned as metadata to your logs.
- Click the + Add button on the top right of the table. A panel named Add Field appears to the right of the fields table.
- Input a field name and click Save.
Disable field
Disabling a field will stop it from being assigned to new log data. Any searches still using the field will continue to work but will not have the field returned in its results once disabled. Data already collected is not affected, you can still search on a disabled field against data that was collected before it was disabled.
Built-in fields cannot be disabled.
In the details pane of the field, click the Disable button.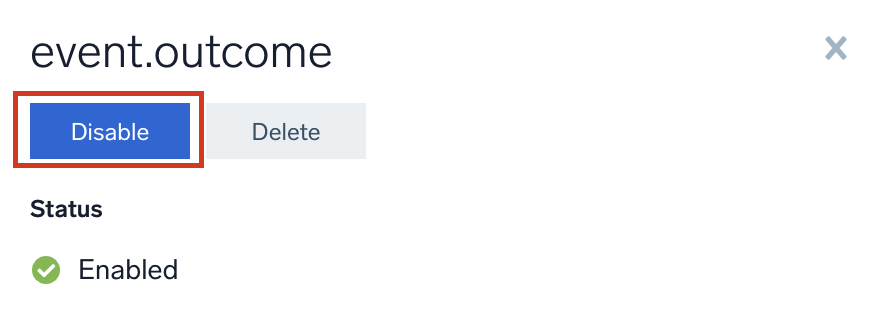
Delete field
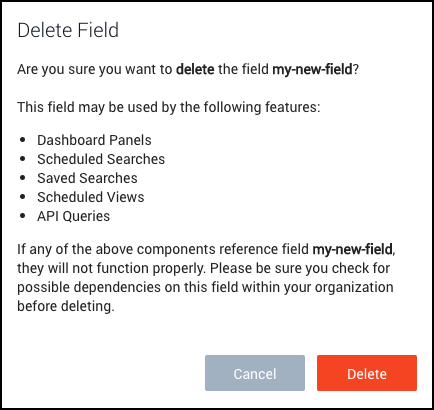
Deleting a field does not delete historical data assigned with that field. If you delete a field by mistake and one or more of those dependencies break, you can re-add the field to get things working properly again. You should always disable a field and ensure things are behaving as expected before deleting a field.
Select the Delete button in the details pane of the field. To delete a field you need to remove any references to it from some features. If the field is used by any of the following
- Field Extraction Rule
- Role
- Partition
- Collector
- Source
You will see the following prompt and you must remove the field reference before you can delete it.
Built-in fields cannot be deleted.
For example, if the field is used by a Field Extraction Rule, you must first delete the Field Extraction Rule before you can delete the field.
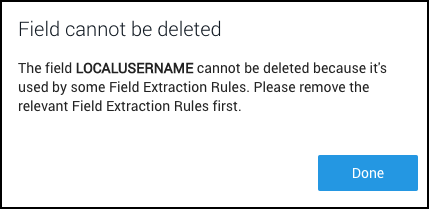
If the field is not used by those features you will see the following prompt.
View dropped fields
Dropped fields are fields being sent to Sumo Logic, but are being ignored since they are not defined in your fields schema. Use the fields dropdown to view the dropped fields.
Click on any dropped field of your choice from the table to open a details pane. There is a convenient button provided to create the field if needed.
It can take a few minutes for a created field to be removed from the Dropped Fields table.
