Integrate Sumo with AWS Single Sign-On
Availability
| Account Type | Account Level |
|---|---|
| CloudFlex | Enterprise |
| Credits | Trial, Enterprise Operations, Enterprise Security, Enterprise Suite |
This section has instructions for configuring AWS Single Sign-On with Sumo Logic.
note
AWS Single Sign-On does not currently support sending assigned group names in a SAML assertion attribute. For this reason, Sumo Logic does not support on-demand role provisioning with AWS Single Sign-On. You must assign Sumo Logic roles to each user after the user account provisioning has occurred.
Step 1: Create a AWS Single Sign-On Application
- Open the AWS Management Console.
- Go to the AWS Single Sign-on Service.
- Select Applications from the left navigation.
- Click Add a New Application.
- Search the AWS SSO Application Catalog for "Sumo Logic".
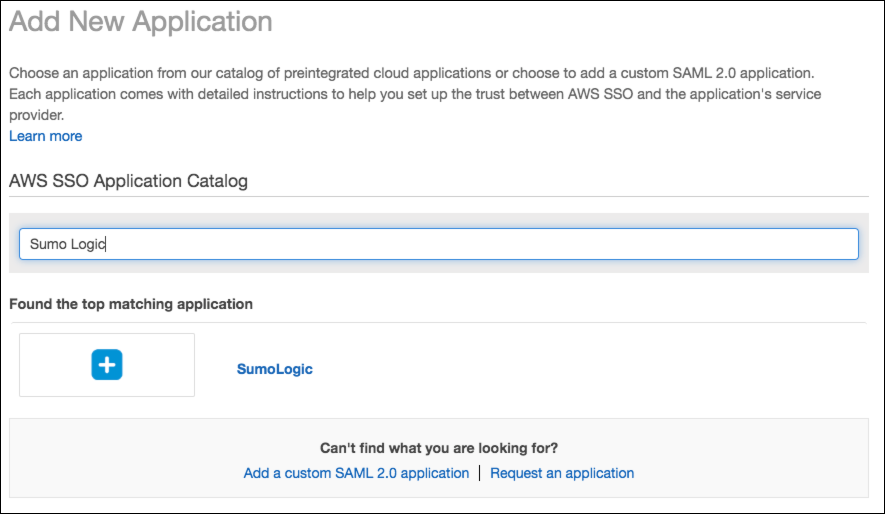
- Click on the matching Sumo Logic application.
- Click the Add application button.
- The Configure Sumo Logic page appears.
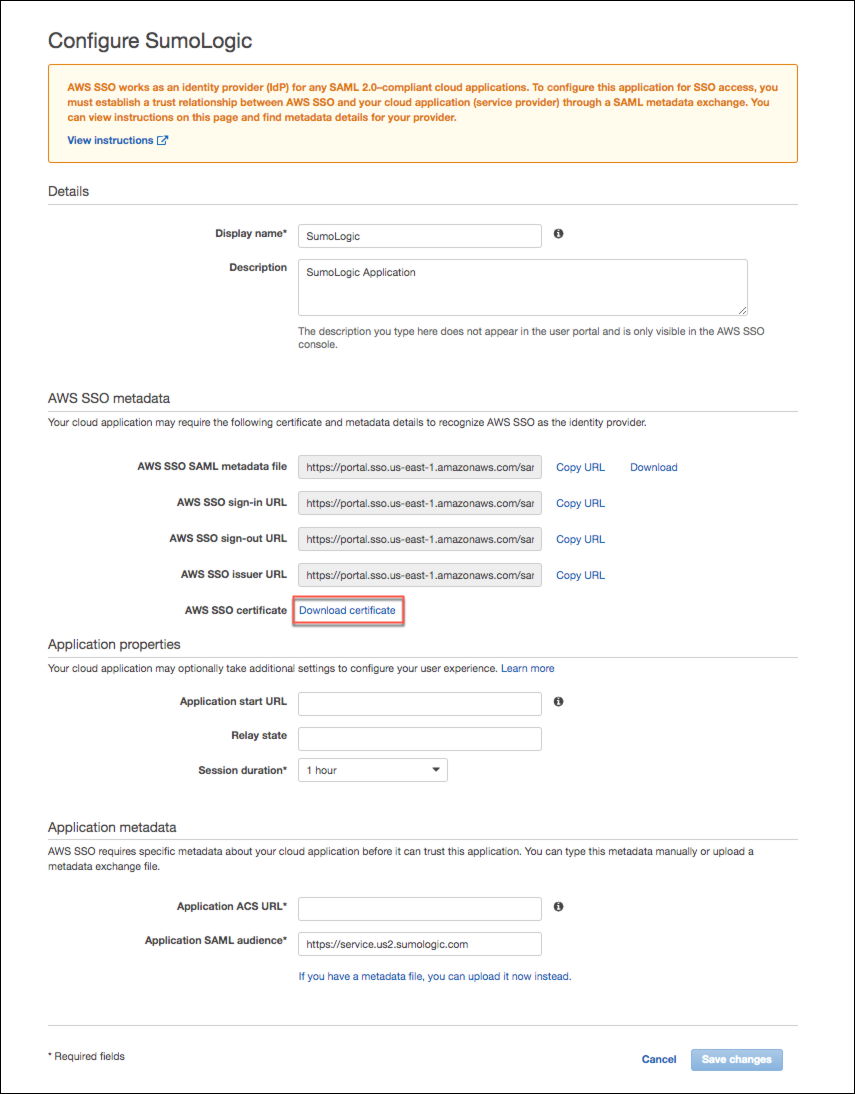
- Click Download Certificate in the AWS SSO Metadata section of the page. You'll need the certificate later in this procedure. Keep the AWS configuration page open for now, as you'll need to access it to complete the AWS Single Sign-on configuration.
Step 2: Configure SAML in Sumo Logic
This section has instructions for configuring basic SAML in Sumo Logic.
- Open a new browser window and login to your Sumo Logic account.
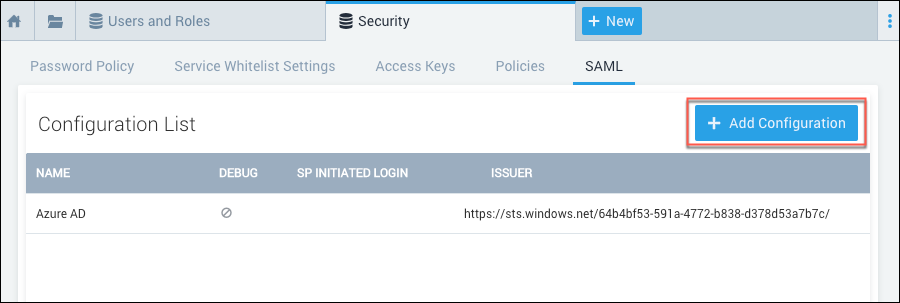
- Classic UI. In the main Sumo Logic menu, select Administration > Security > SAML.
New UI. In the top menu select Administration, and then under Account Security Settings select SAML. You can also click the Go To... menu at the top of the screen and select SAML. - Click Add Configuration.
- The Add Configuration page appears.
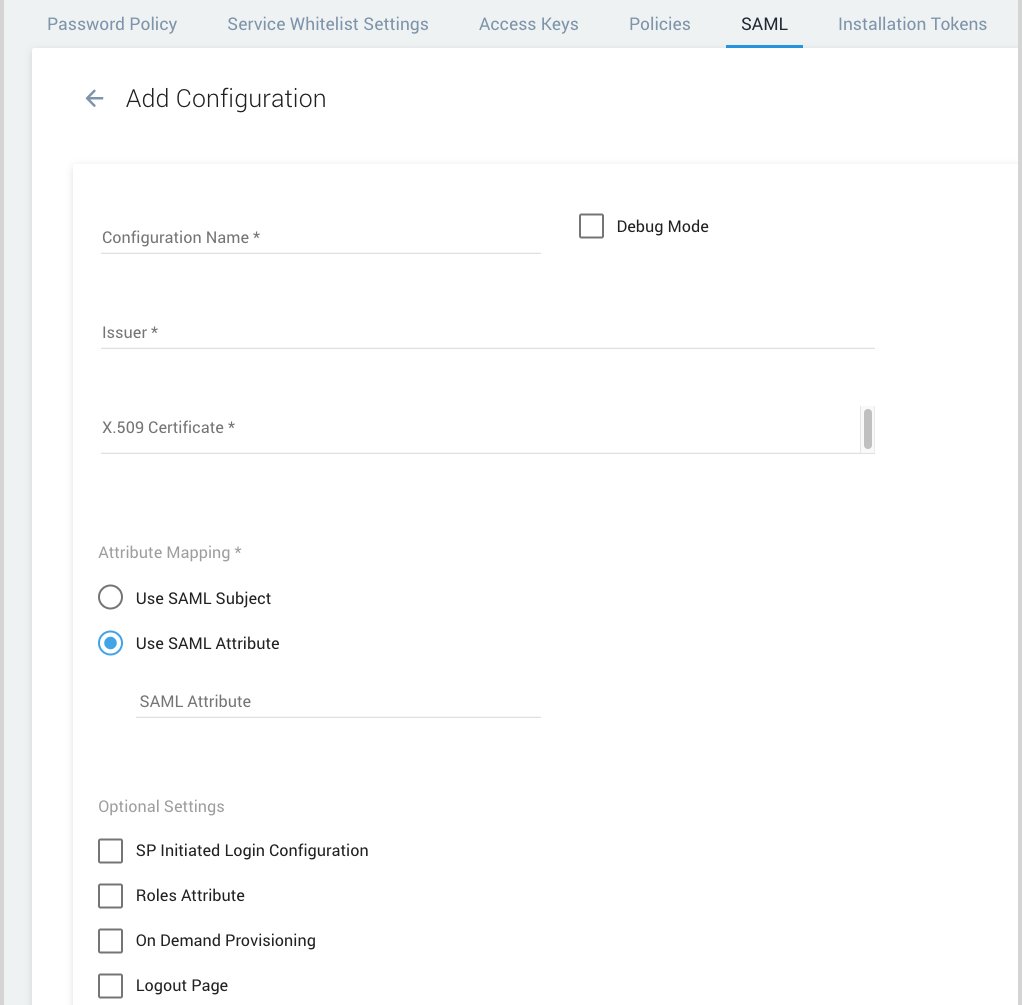
- Configuration Name. Enter a name for the configuration, for example “AWS Single Sign-On”.
- Debug Mode. Select this option if you'd like to view additional details if an error occurs when a user attempts to authenticate. For more information, see View SAML Debug Information.
- Issuer. Paste in the AWS SSO Issuer URL from the AWS SSO Metadata section of your AWS SSO configuration.
- X.509 Certificate. Open the certificate file you downloaded from AWS in a text editor. Copy all text from the file and paste it in here.
- Attribute mapping. Select Use SAML Subject.
- On-demand account provisioning. (Optional) If you configure this feature, Sumo Logic will create a new user’s account the first time the user accesses Sumo Logic using AWS Single Sign-on. To configure on-demand provisioning, you supply the First Name and Last Name attributes that AWS Single Sign-on uses to identify users, and the Sumo roles you want to assign to the accounts created.
- Click the On Demand Provisioning checkbox.
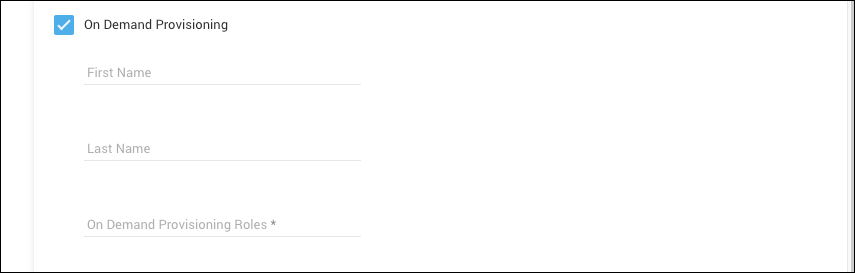
- First Name. Enter:
FirstName - Last Name. Enter:
LastName - On Demand Provisioning Roles. Specify the Sumo RBAC roles you want to assign when user accounts are first provisioned. (The roles must already exist in Sumo.) If you enter multiple roles, separate them with commas. For example:
Analyst, CollectorManager
- Click the On Demand Provisioning checkbox.
- Click Save.
- To view the details of your configuration, select it the Configuration List.

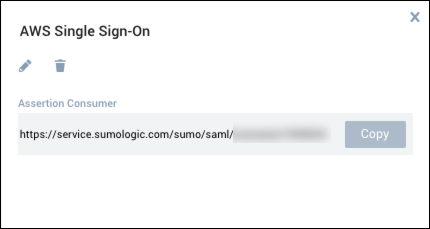
- Keep the panel open. When you complete the AWS Single Sign-on configuration below, you will copy the Assertion Consumer and Entity ID values into AWS Single Sign-on.
Step 3: Complete SAML configuration in AWS Single Sign-on.
- Return to the Configure Sumo Logic page in AWS Single Sign-on.
- Paste the Assertion Consumer value from Sumo Logic into the Application ACS URL field in the Application Metadata section of the page.
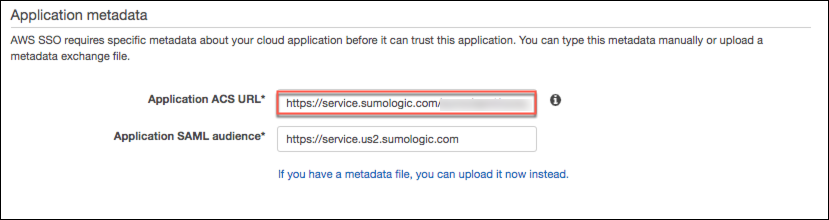
- Paste the Entity Id value from Sumo Logic into the Application SAML audience field in the Application Metadata section of the page.
- Click Save Changes.
- On the Assigned Users tab of your new AWS SSO configuration, click Assign users.
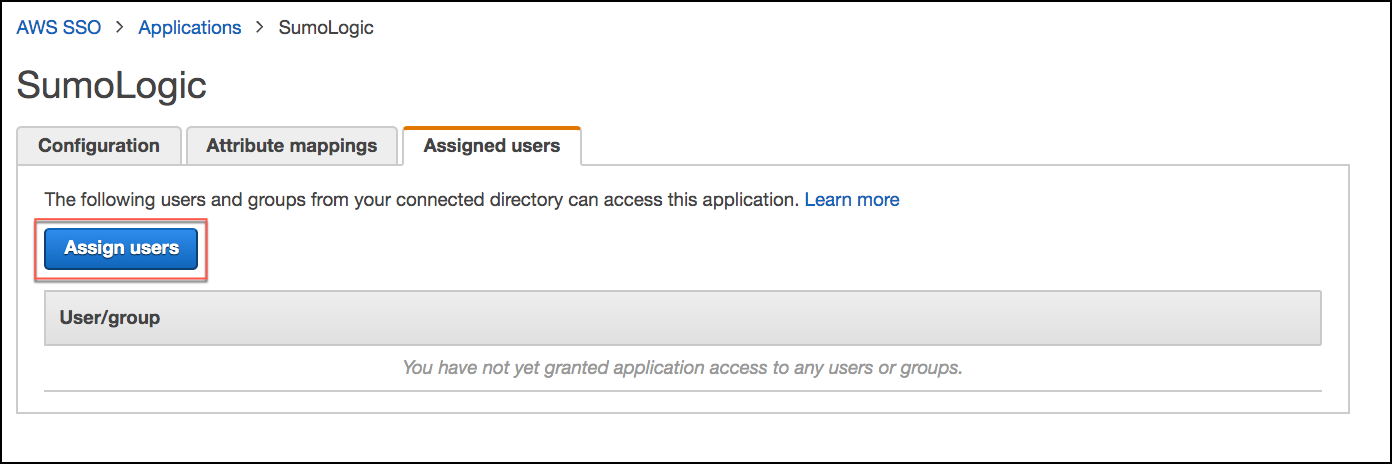
- Select the individual users or groups that you want to allow to sign into Sumo Logic using AWS SSO. If you have not previously configured AWS Single Sign on you may need to first add your users and groups, as described in AWS help:
- Click Assign Users to complete the addition of your users to the configuration.
This completes the setup for AWS Single Sign-On to Sumo Logic. Your users should now be able to sign in to Sumo Logic from your AWS SAML Application page by clicking the SumoLogic tile.