PowerShell Tools

Version: 1.5
Updated: Nov 23, 2023
Runs commands on a Local or Remote Window Host and returns all output from the commands, including errors.
Actions
- Execute Commands (Enrichment) - Execute commands on local or remote Window Server/host.
- Whois (Enrichment) - Whois performs the registration record for the domain name or IP address that you specify.
- Query User (Enrichment) - Displays information about user sessions on a Remote Desktop Session Host server.
- DNS Lookup (Enrichment) - Performs a DNS query for the specified name and this is similar functionally to the nslookup tool which allows users to query for names.
- VMware Carbon Black Enrichment (Enrichment) - This enrichment queries the Carbon Black Device API for an IP address and returns host information
- CrowdStrike Falcon Enrichment (Enrichment) - This enrichment queries the CrowdStrike Device API for an IP address and returns host information
- GreyNoise Enrichment (Enrichment) - GreyNoise helps security teams reduce noise and prioritize signal-targeted attacks against their organization. This enrichment queries GreyNoise to see what it knows about the IP address
- SentinelOne Enrichment (Enrichment) - The SentinelOne enrichment queries IP addresses or hostnames using the SentinelOne API and returns the information SentinelOne knows about the host.
Configuration
PowerShell Tools Configuration on Window Server (Domain Controller)
Note: PowerShell Tools was tested on Windows Server 2016 and 2008, PowerShell Remoting is using WinRM, So it's strongly suggested to test this integration on test environments before testing it on production environments. In this configuration guide, you will be directed on how to prepare a environment for testing on a window host but this guide is only related to the environment we tested on it, so it may differ in case you are using a different window server/host version
You must have Windows Server/Host to do the following setup on that Window Server/Host, So that Cloud SOAR can connect to the window Server/host and run PowerShell commands, also a user who will run the PowerShell command must have admin access for the local or remote window host.
The Enable-PSRemoting cmdlet configures the computer to receive PowerShell remote commands that are sent by using the WS-Management technology. WS-Management-based PowerShell remoting is currently supported only on the Windows platform. PowerShell remoting is enabled by default on Windows Server platforms. You can use Enable-PSRemoting to enable PowerShell remoting on other supported versions of Windows and to re-enable remoting if it becomes disabled.
You have to run this command only one time on each computer that will receive commands. You do not have to run anything on Cloud SOAR that only sends commands. Because the configuration starts listeners to accept remote connections, it is prudent to run it only where it is needed.
PowerShell remoting must be enabled on the remote/local computer. The remoting features of PowerShell are supported by the WinRM service, which is the Microsoft implementation of the Web Services for Management (WS-Management) protocol. When you enable PowerShell remoting, you change the default configuration of WS-Management and add a system configuration that allows users to connect to WS-Management
To configure PowerShell to receive remote commands:
-
Start PowerShell with the Run as administrator option.
-
At the command prompt, type:
Enable-PSRemoting.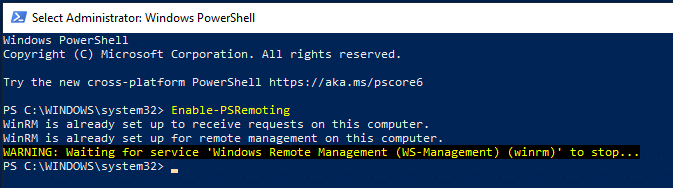
The Enable-PSRemoting cmdlet performs the following operations:
- Runs the Set-WSManQuickConfig cmdlet, which performs the following tasks:
- Starts the WinRM service.
- Sets the startup type on the WinRM service to Automatic.
- Creates a listener to accept requests on any IP address.
- Enables a firewall exception for WS-Management communications.
- Creates the simple and long name session endpoint configurations if needed.
- Enables all session configurations.
- Changes the security descriptor of all session configurations to allow remote access.
- Restarts the WinRM service to make the preceding changes effective.
- Runs the Set-WSManQuickConfig cmdlet, which performs the following tasks:
-
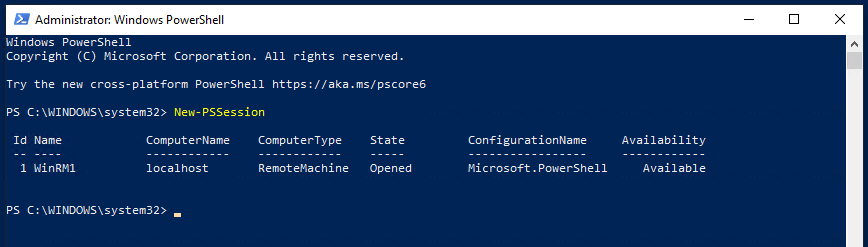
To verify that remoting is configured correctly, run a test command such as the following command, which creates a remote session on the local computer.
New-PSSessionIf remoting is configured correctly, the command will create a session on the local computer and return an object that represents the session. The output should resemble the following sample output: powershell-tools.
If the command fails, for assistance, see about_Remote_Troubleshooting.
-
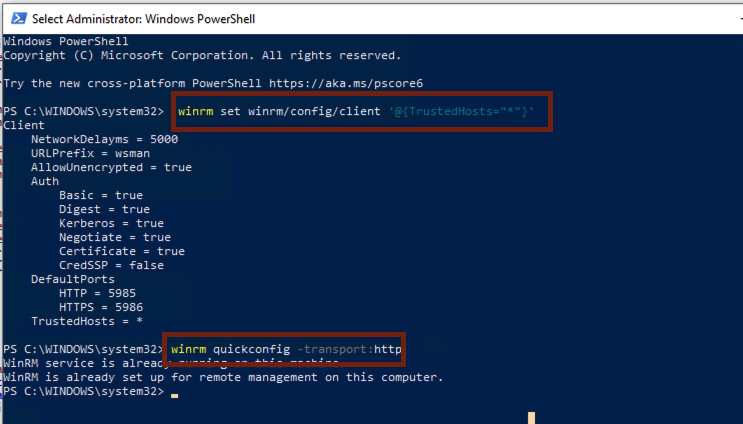
From the same Administrative command line run following commands:
winrm set winrm/config/client '@{TrustedHosts="*"}'
winrm set winrm/config/client/auth '@{Basic="true"}'
winrm set winrm/config/service/auth '@{Basic="true"}'
winrm set winrm/config/service '@{AllowUnencrypted="true"}'
winrm set winrm/config/client '@{AllowUnencrypted="true"}'
Basic Authentication Limitations:
Basic Authentication over HTTP is not supported. Basic Authentication can be used over HTTPS by installing a certificate on the target server. The certificate must have a CN name that matches the hostname, is not expired or revoked. A self-signed certificate may be used for testing purposes. See How To: Configure WINRM for HTTPS for additional details.
Configuration on Domain Controller for WinRM over HTTPS
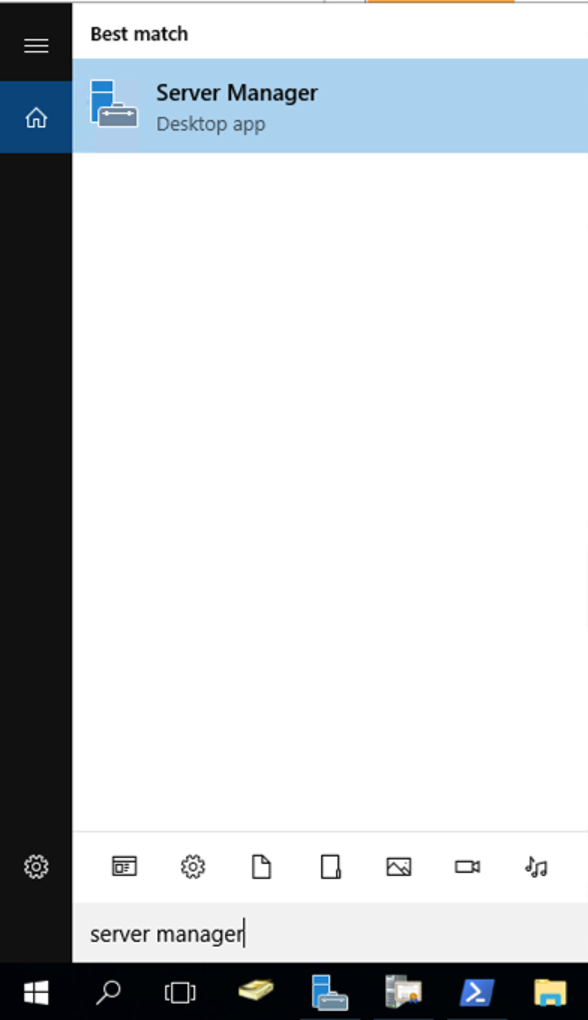
- Open Server Manager on Window Server (Domain Controller).
- The Active Directory Certificate Services role with the Certification Authority sub-role should already installed and configured on your Domain Controller.
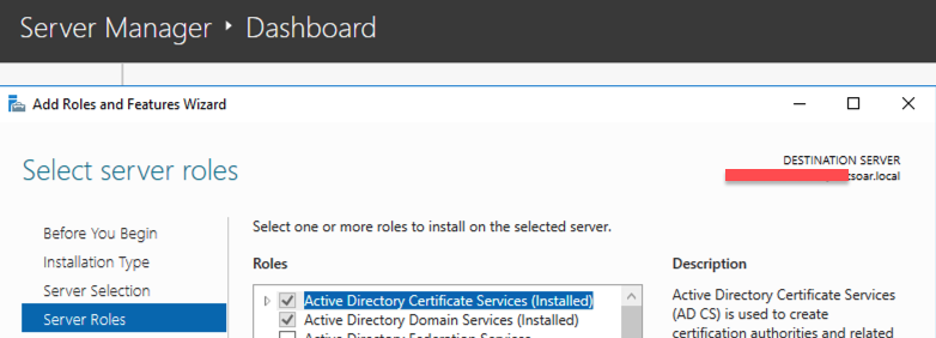
- If Active Directory Certificate Services role is not already installed, refer to this Docs.
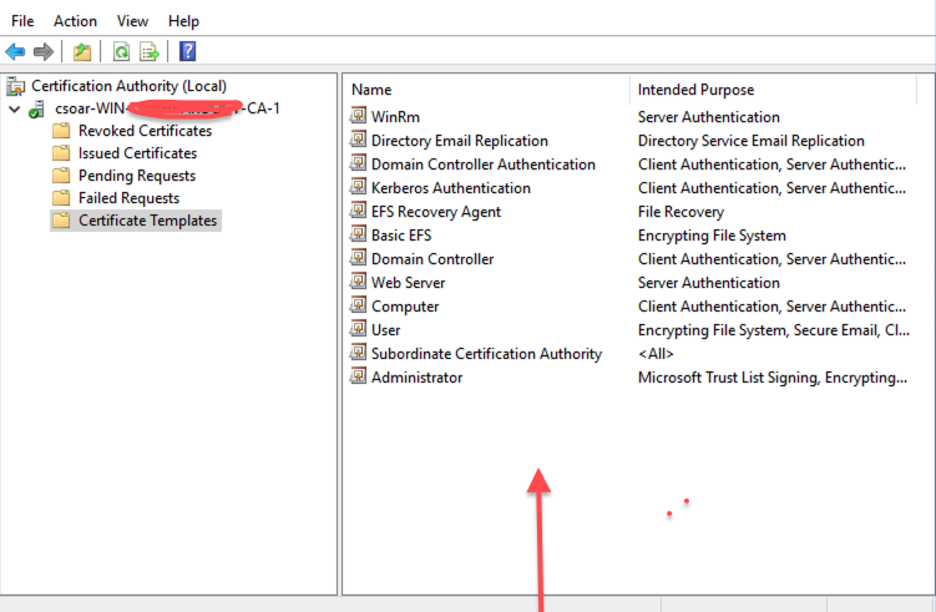
- Open Certification Authority through Server Manager - Tools menu.
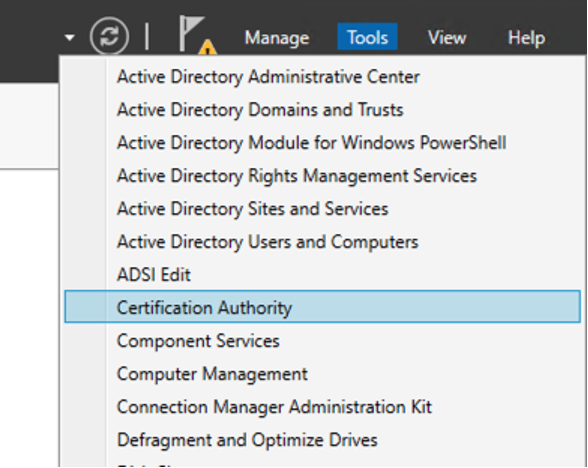
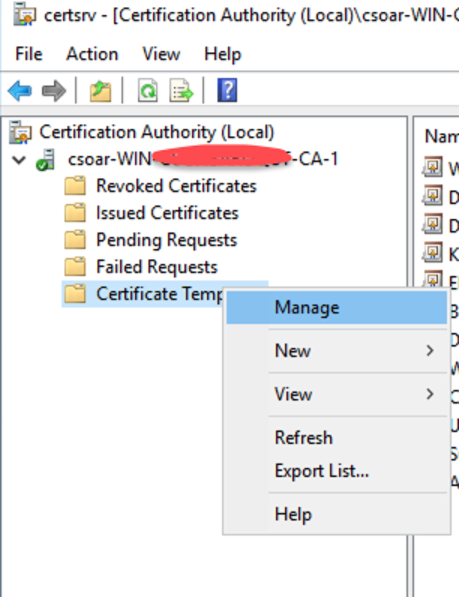
- You should observe all these directories associated with Certification Authority including Certificate Templates.

- As a First step, you need to create a customized WinRM SSL Certificate Template, which will be used for WinRM over HTTPS.
- Right-click on the Certificate Template and select Manage.
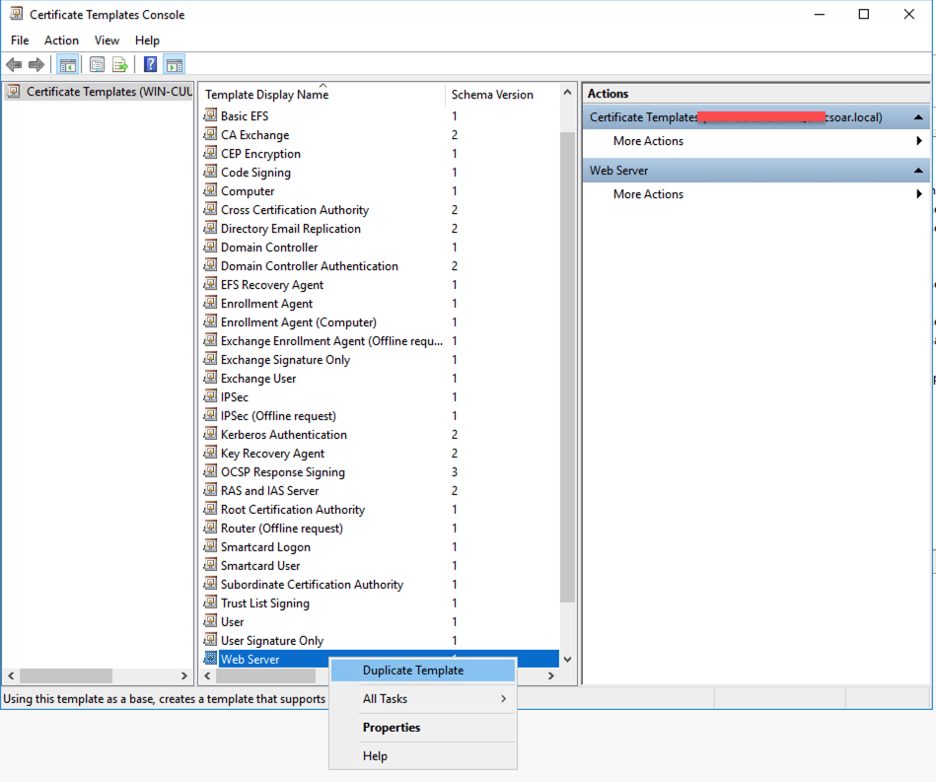
- Right-click on the Web Server and choose Duplicate Template.
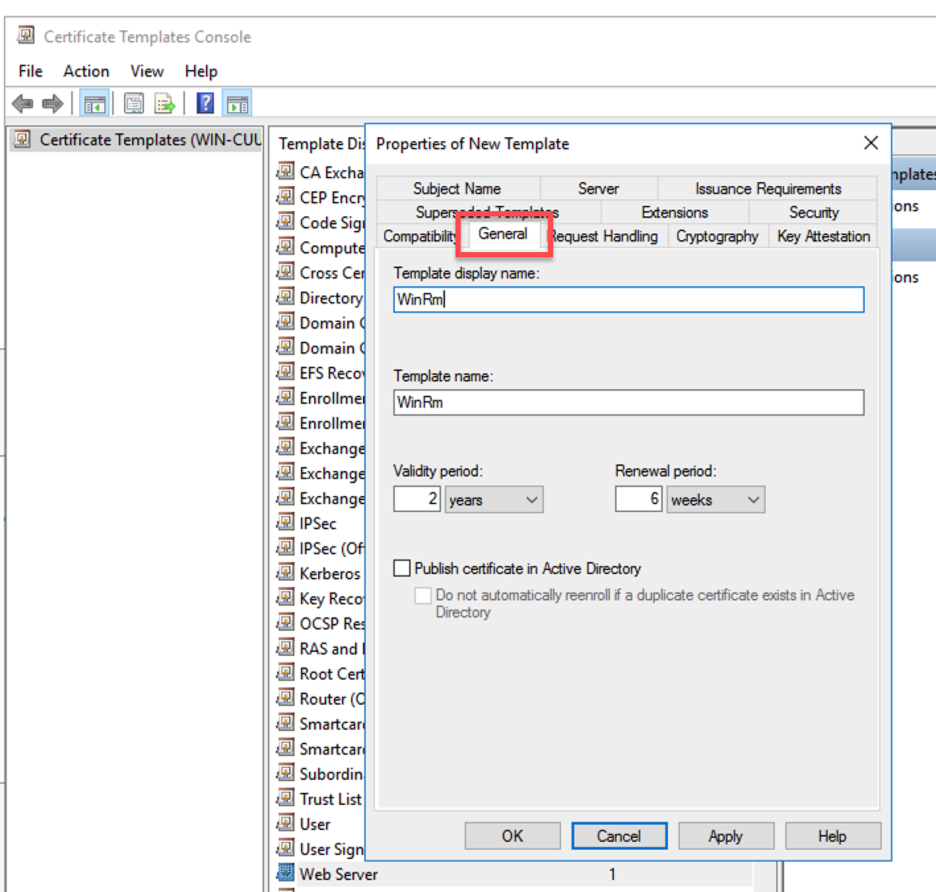
- Go to the General Tab and set the Template Name and Display Name.
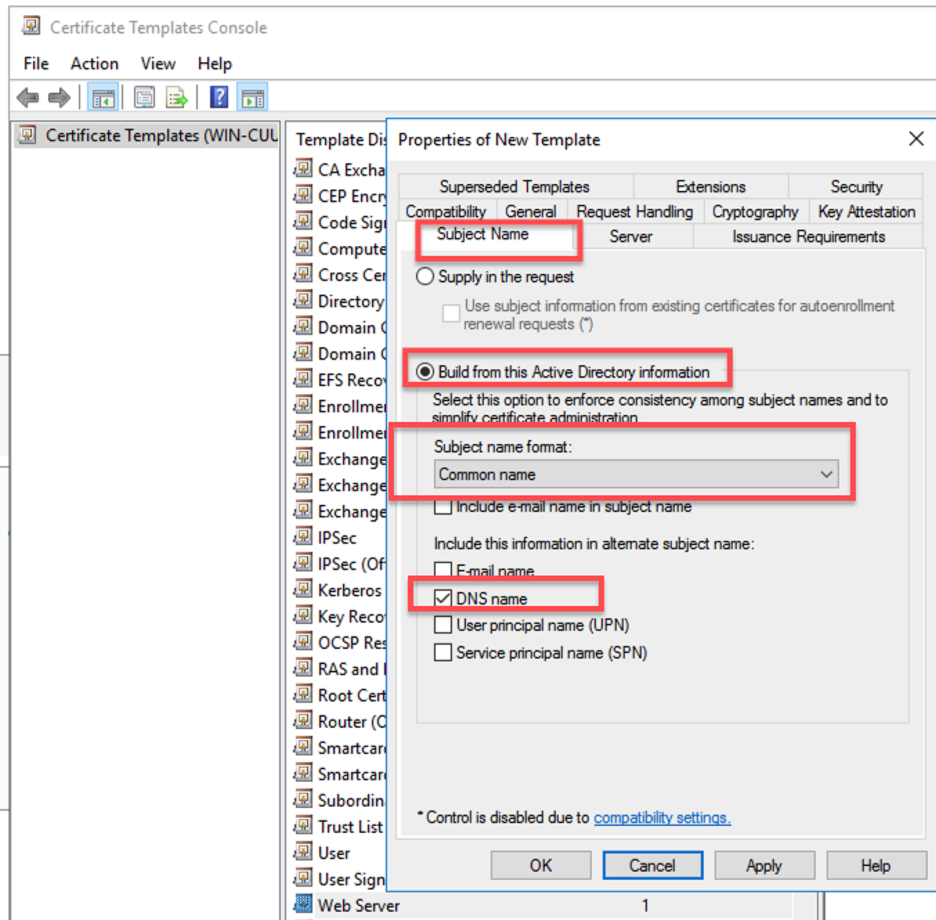
- Go to the Subject Name Tab and choose Build from this Active Directory information From the drop-down list, choose Common name as the Subject name format. Uncheck the User Principal Name (UPN) and only check the DNS name.
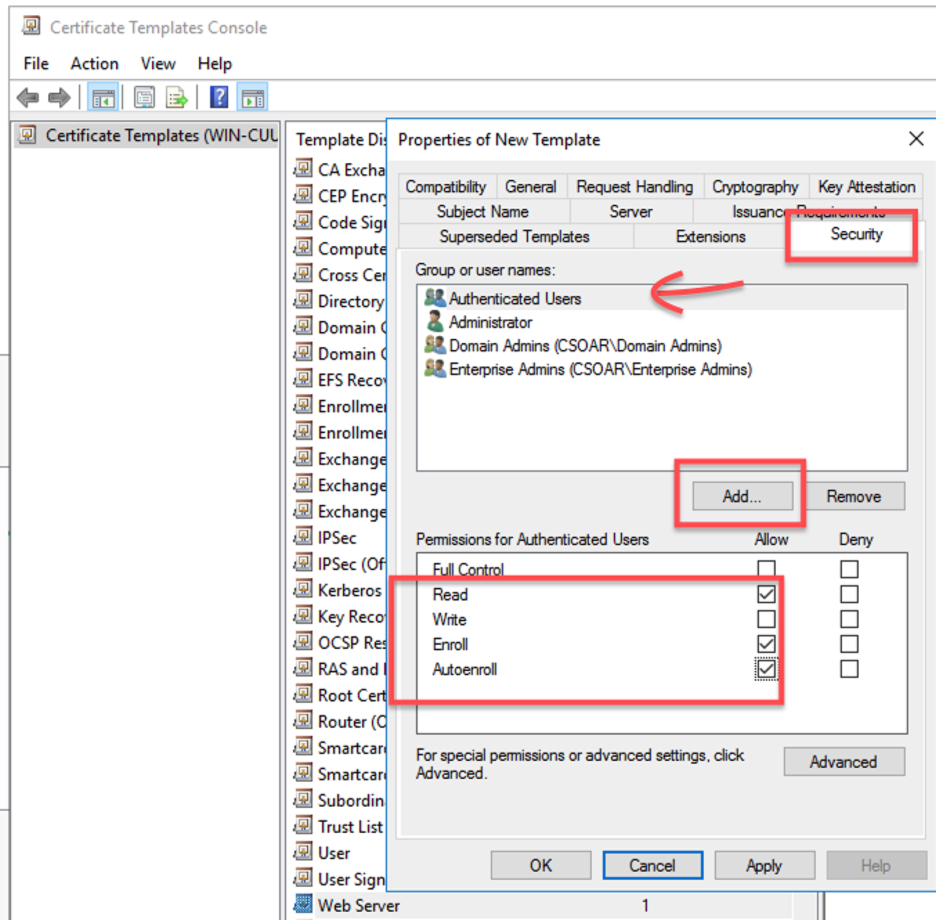
- Go to the Security tab, add the group that you want to be able to request the certificate template and grant them Read, Enroll, and Autoenroll permissions.
- Click Apply to save the changes made to your new template Within the Certification Authority, select Certificate Templates > New > Certificate Template to Issue.
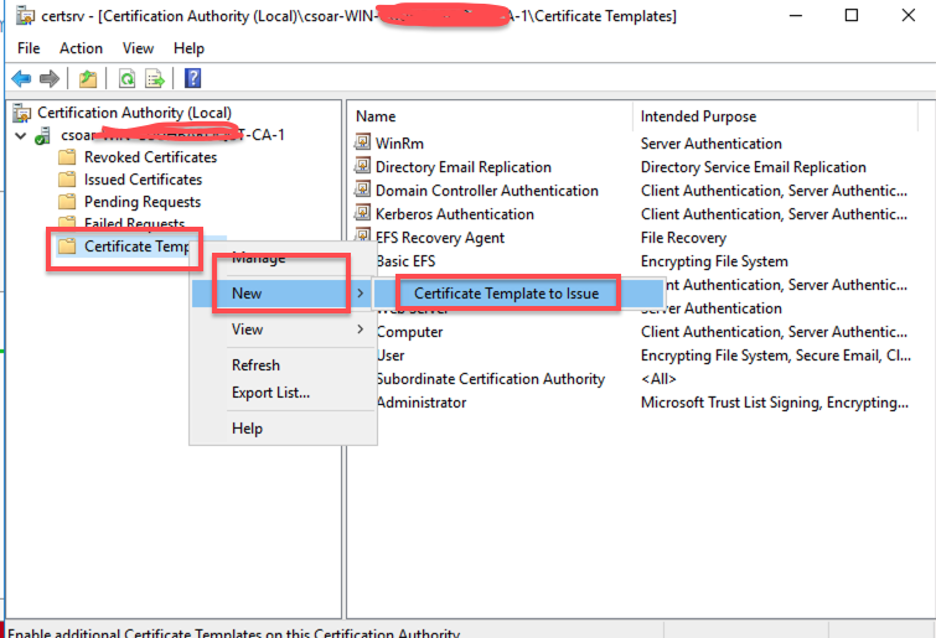
- Choose the recently created template from the list and click OK.
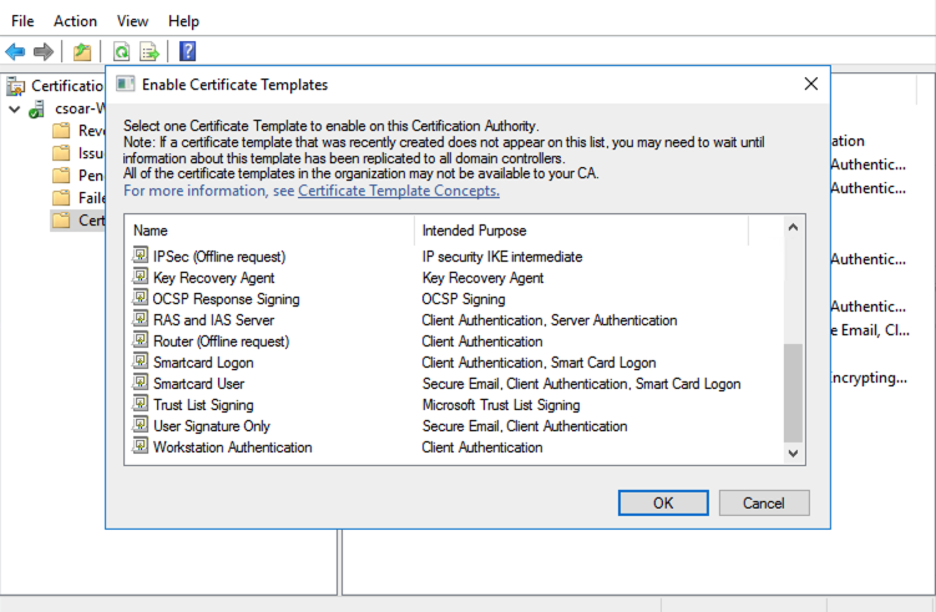
- You will see your new certificate template.
Configure Group Policy Management
- For automatic enrollment of computers, set up Group Policy Objects (GPO) on the domain or organizational units (OU).
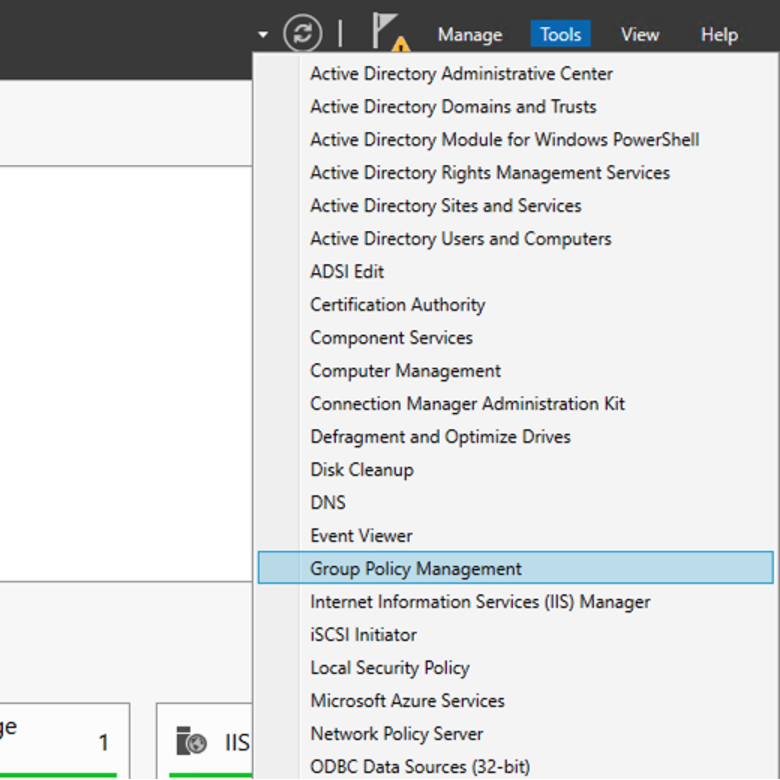
- Open Group Policy Management from the Server Manager Tools menu.
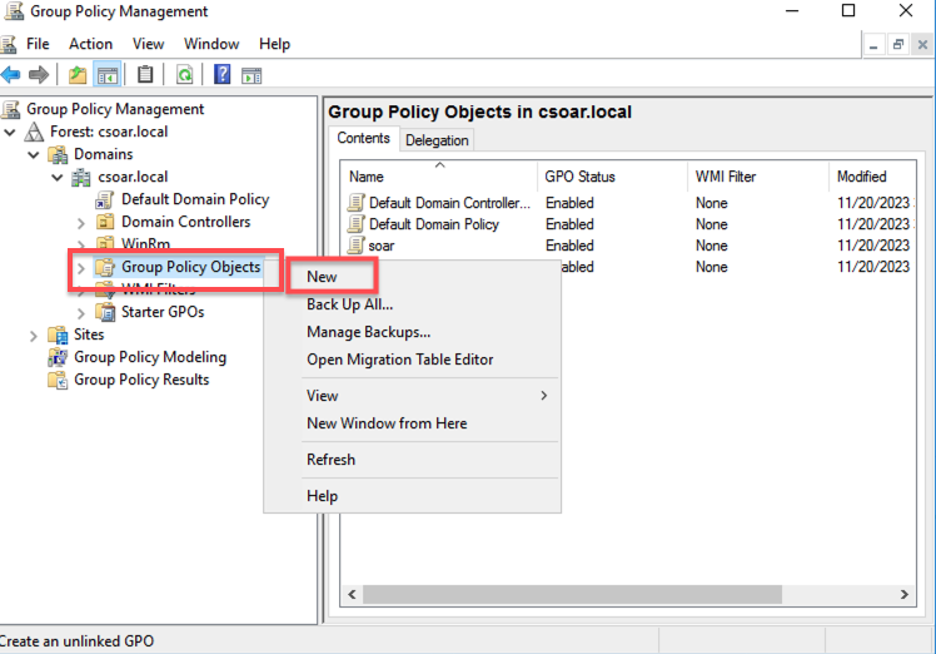
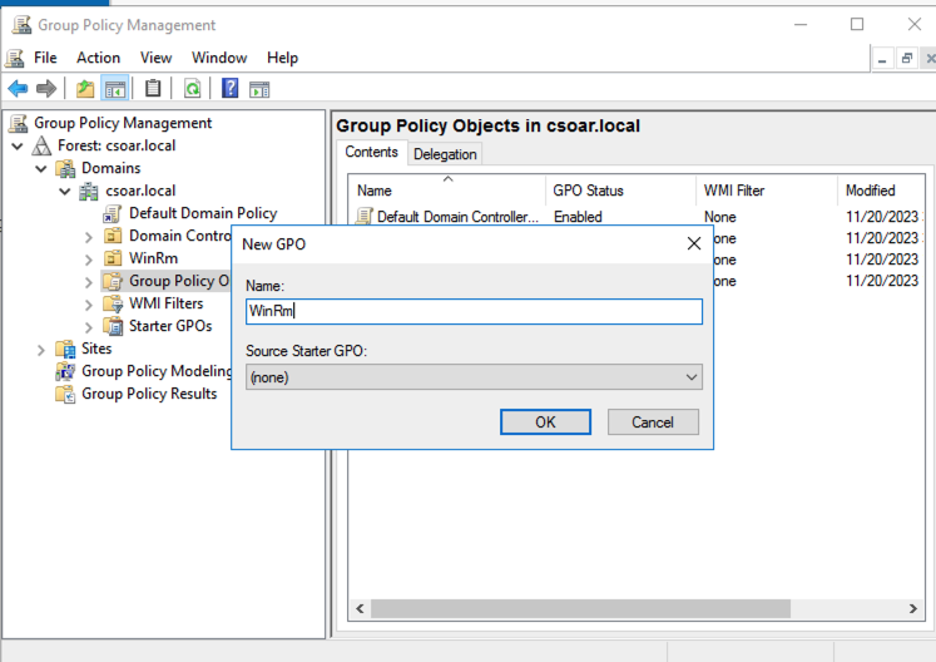
- To create new Group Policy Object (GPO), Right-click on Group Policy Objects and select New.
- Provide a new name for your Group Policy Object (GPO) and click OK.
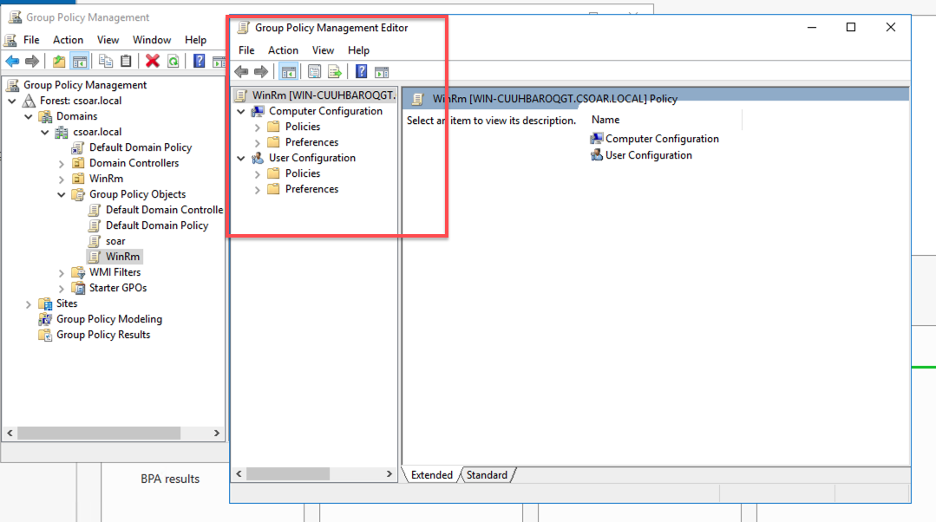
- Right-Click on your newly Created GPO and Click on Edit.
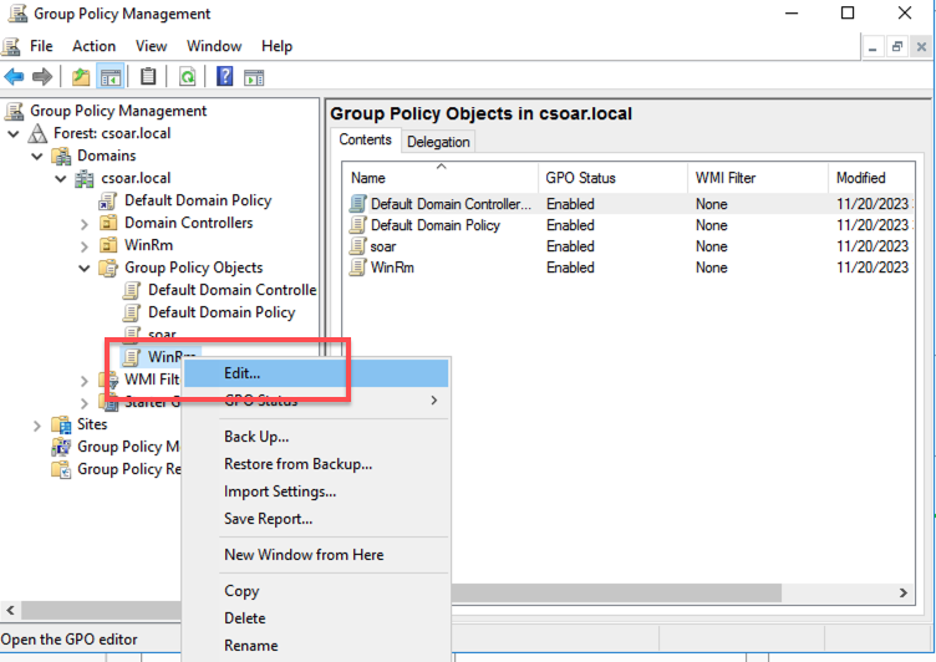
- This window will be displayed.
- You need to configure client certificate auto-enrollment settings. Go to Computer Configuration > Policies > Windows Settings > Security Settings > Public Key Policies > Certificate Services Client - Auto-Enrollment.
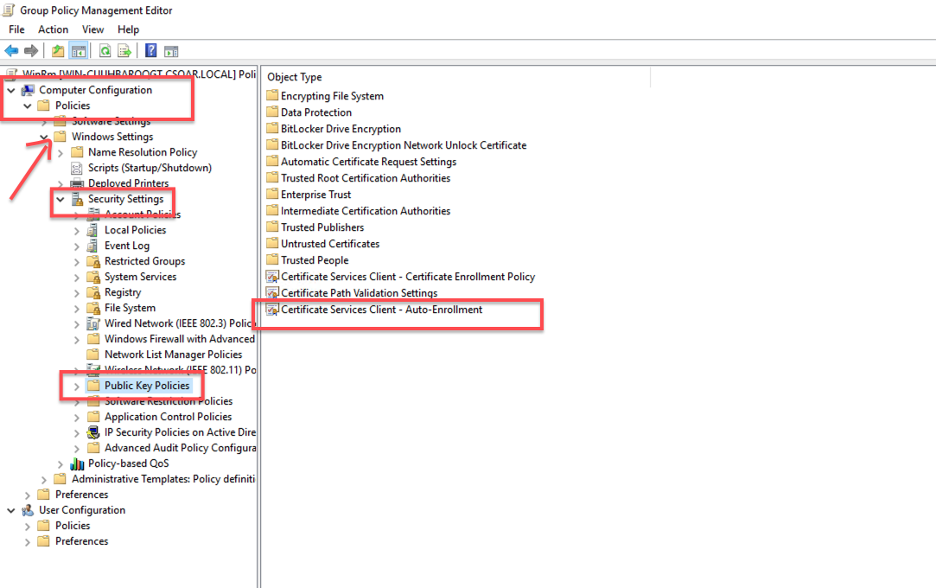
- Double-click on Certificate Services Client - Auto-Enrollment, choose Enabled, and check both checkboxes.
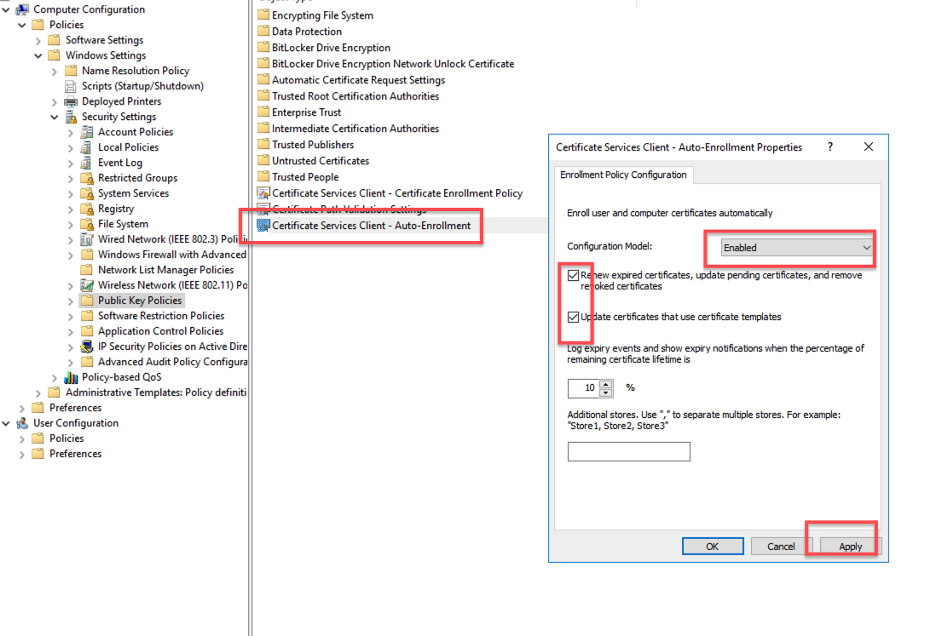
- Click Apply and OK.
- Set the Windows Remote Management service to Automatic.
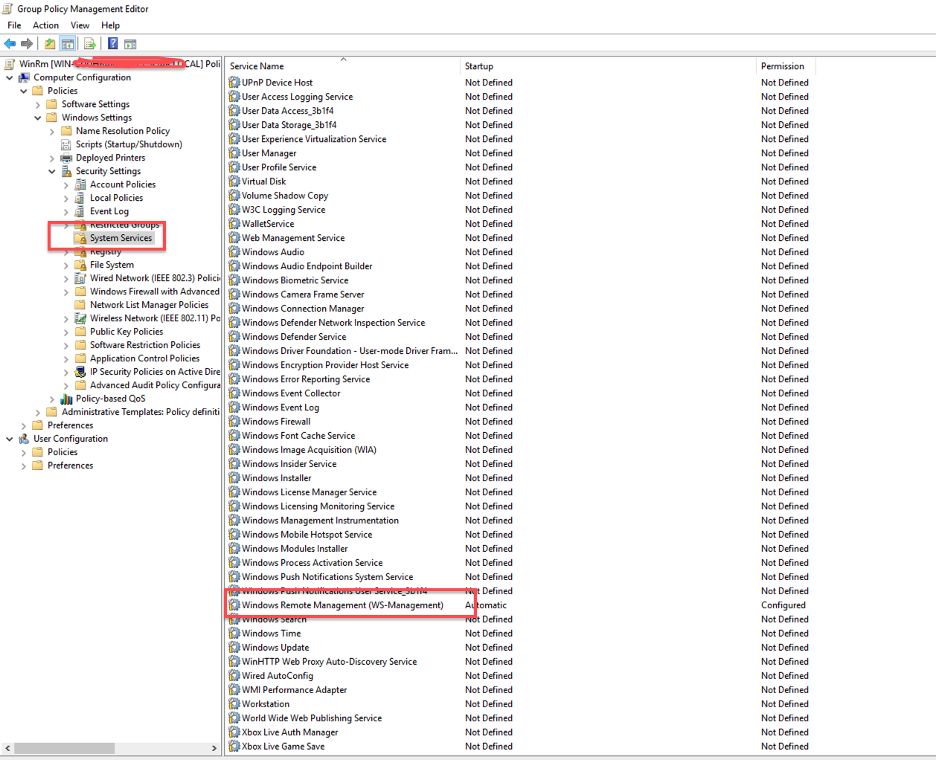
- In the Group Policy Management console, go to Computer Configuration > Policies > Windows Settings > Security Settings > System Services.
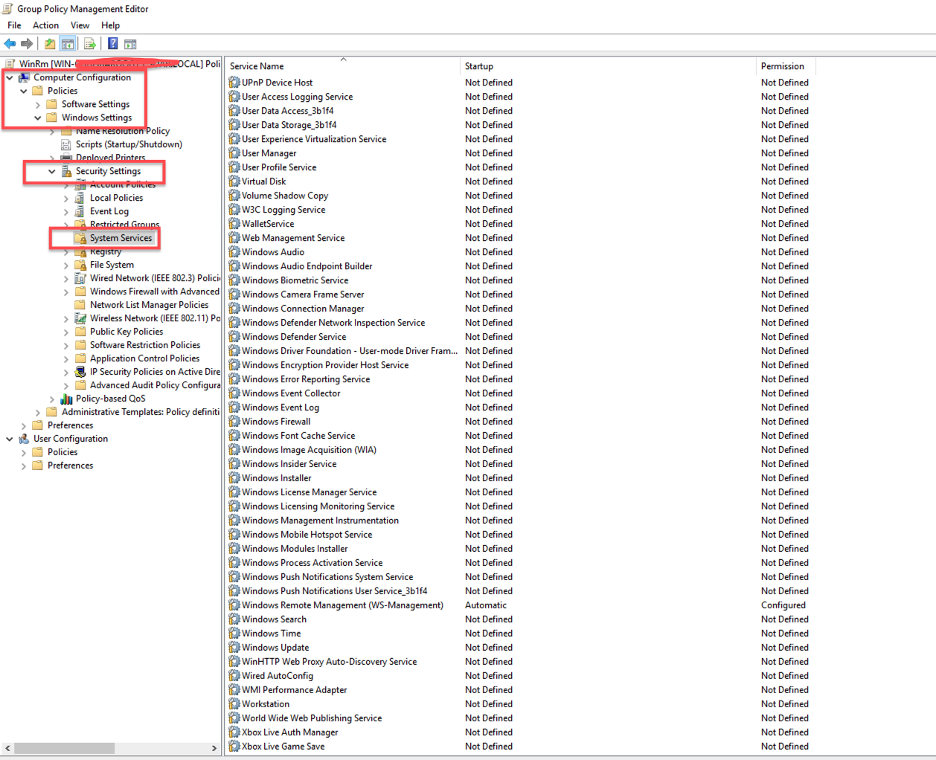
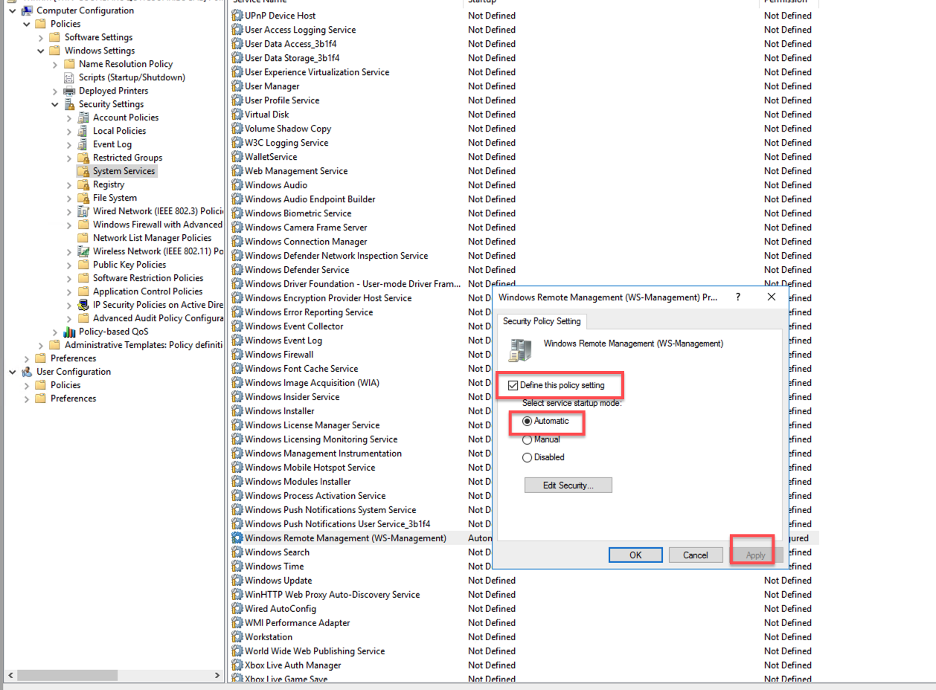
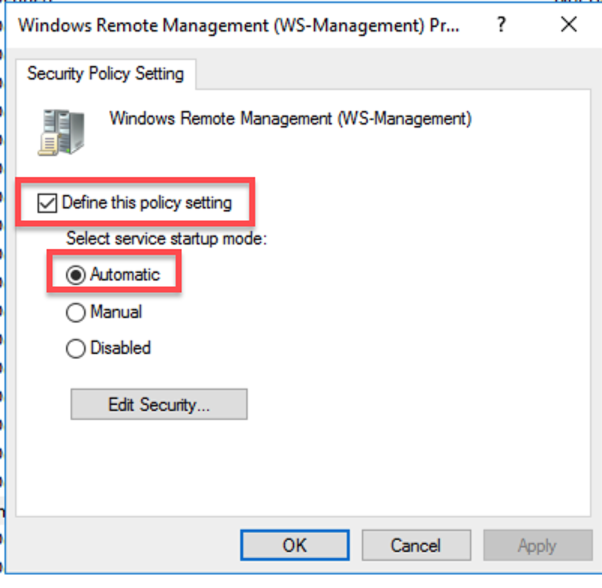
- Double click on Windows Remote Management (WS-Management).
- Check the box to define the policy setting and configure the startup mode of the WinRM service to Automatic.
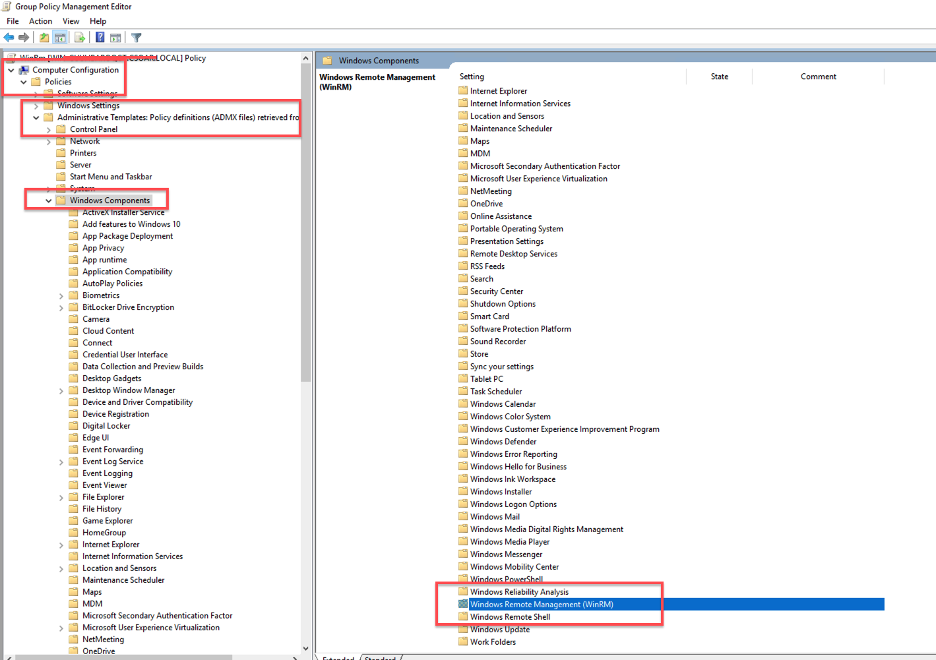
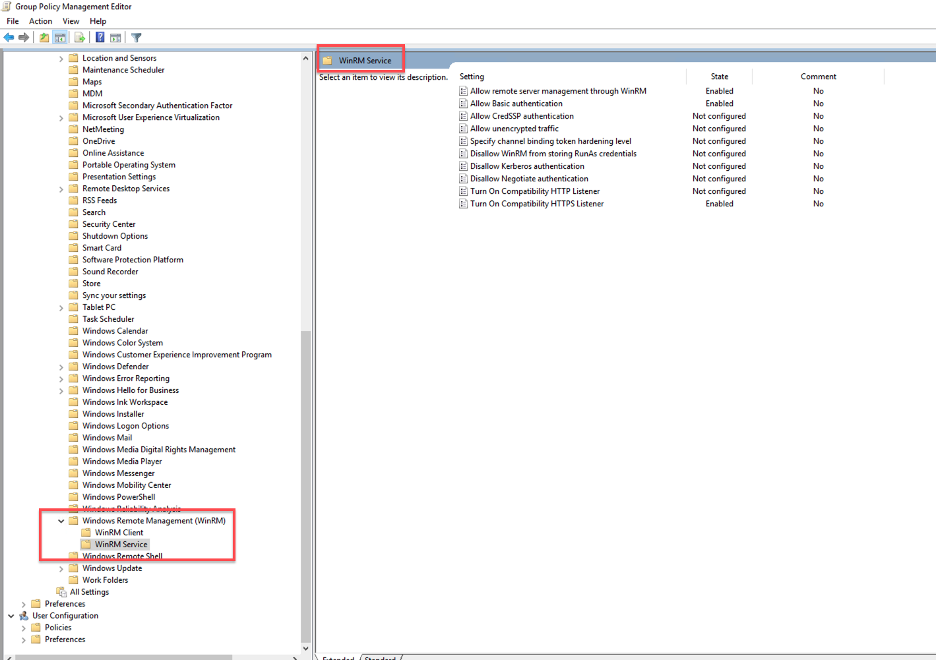
- In the Group Policy Management console, go to Computer Configuration > Policies > Administrative Templates: > Windows Components > Windows Remote Management (WinRM) > WinRM Service.
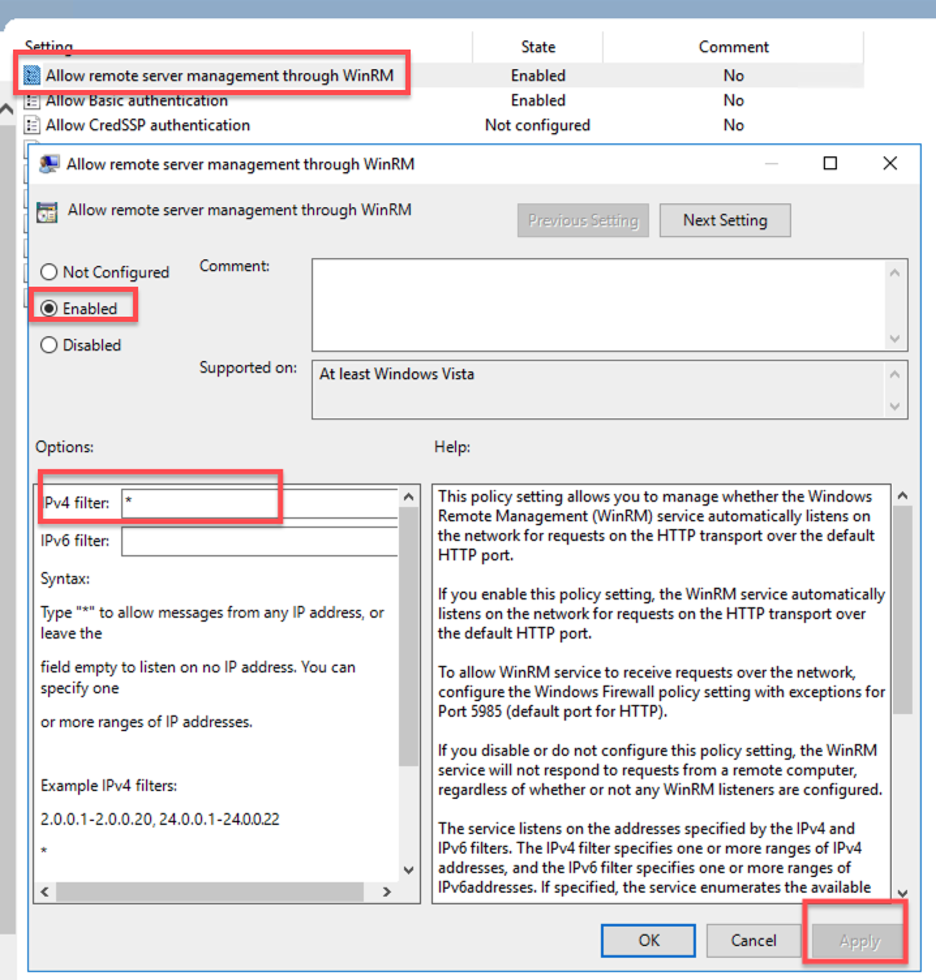
- Double click on Allow remote server management through WinRM.
- Choose Enabled and specify the IP address of your automation bridge (Cloud SOAR).
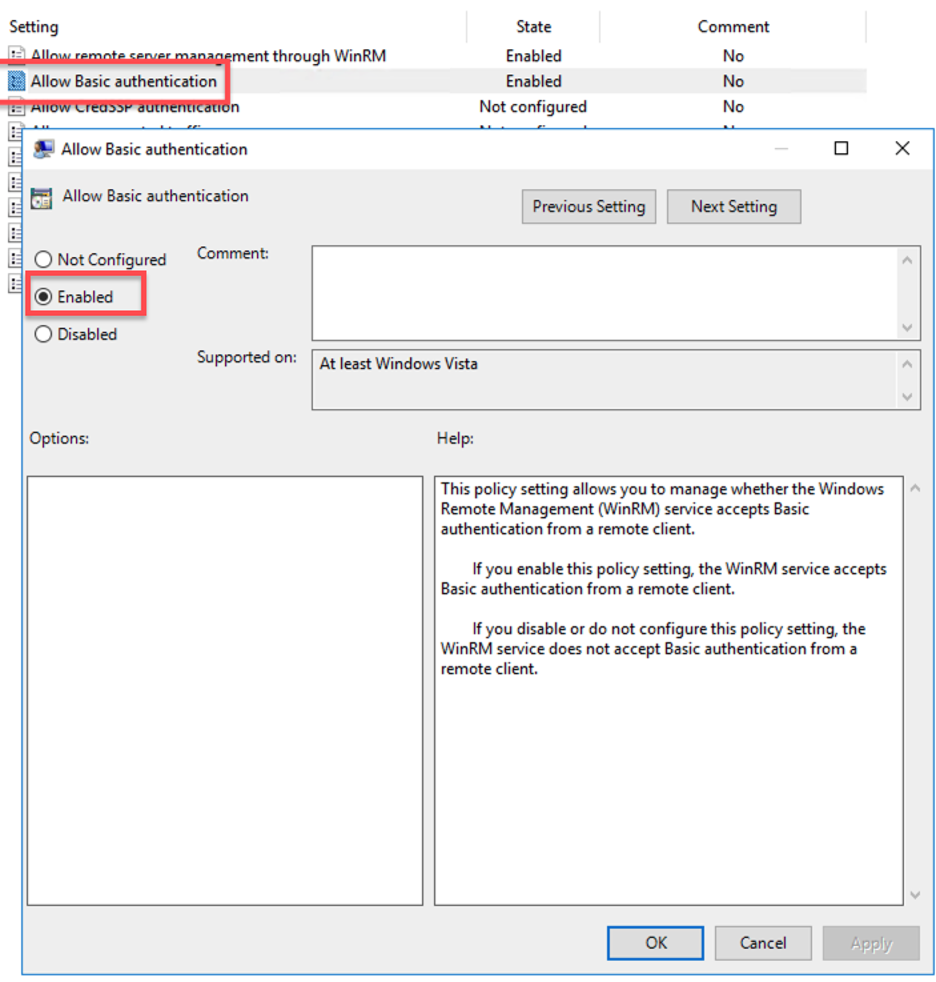
- Within the same WinRM Service console, double-click on Allow Basic Authentication. This policy setting enables you to control whether the Windows Remote Management (WinRM) service accepts Basic authentication from Cloud SOAR.
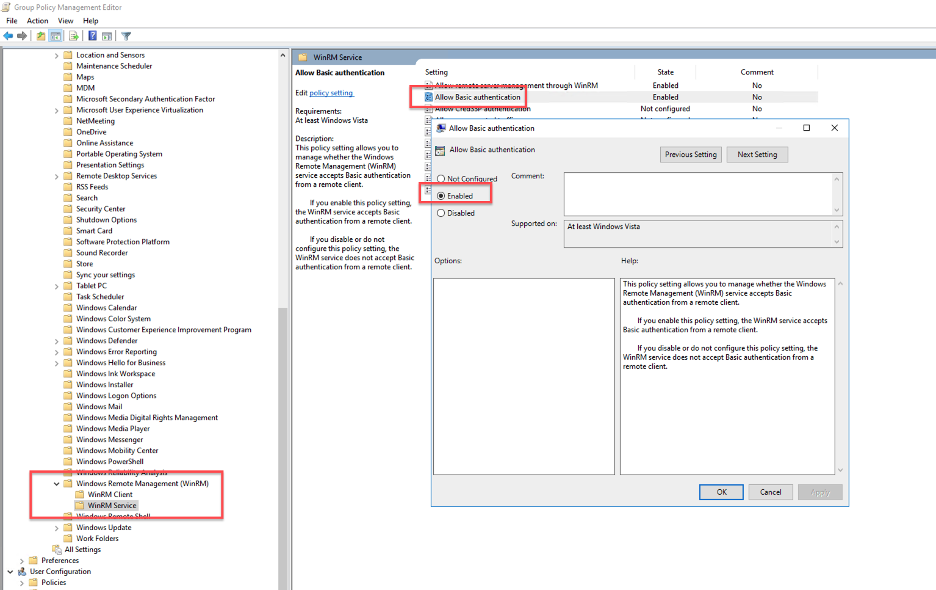
- Select Enabled and click OK.
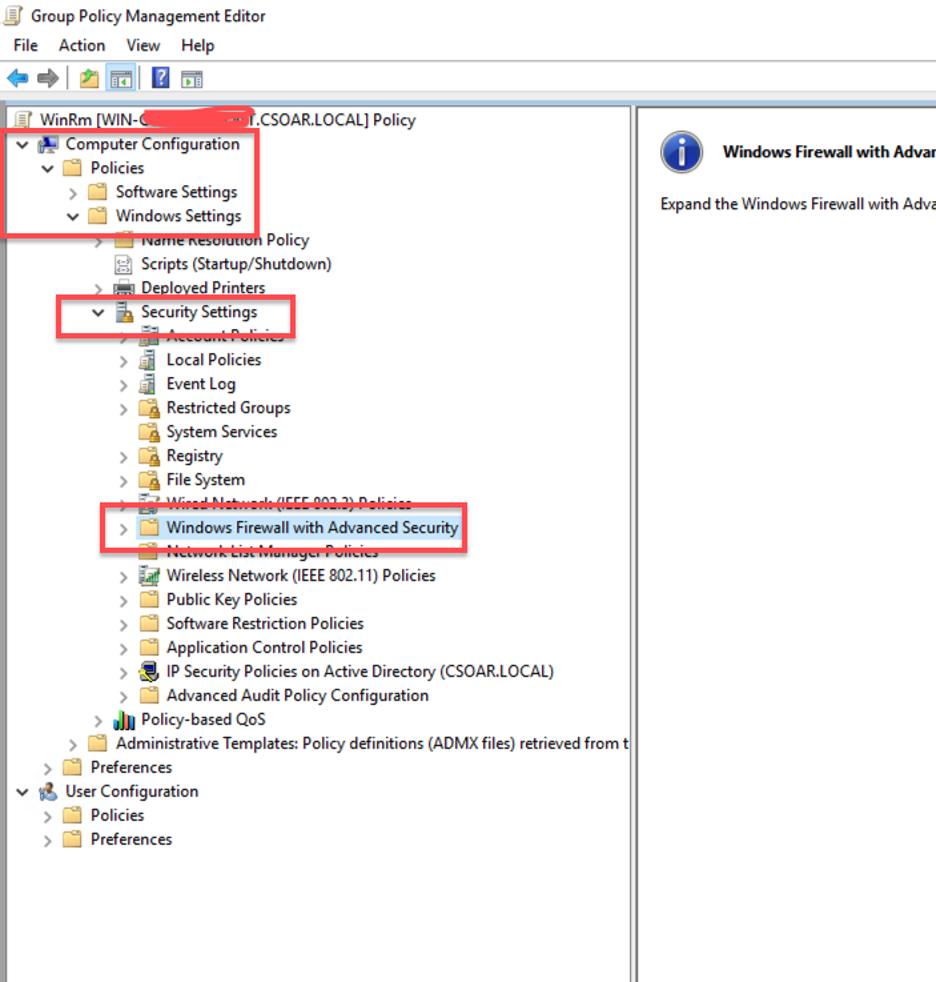
 1 Next, create a firewall rule to allow traffic on WinRM over HTTPs port 5986.
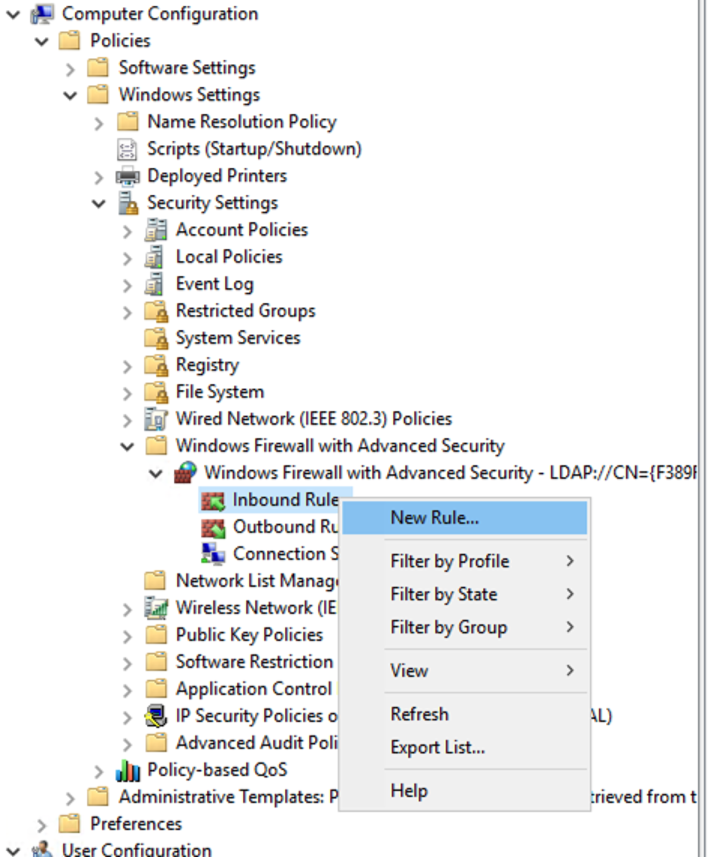
 - Within the Group Policy Management console, go to Computer Configuration > Policies > Windows Settings > Security Settings > Windows Firewall with Advanced Security.
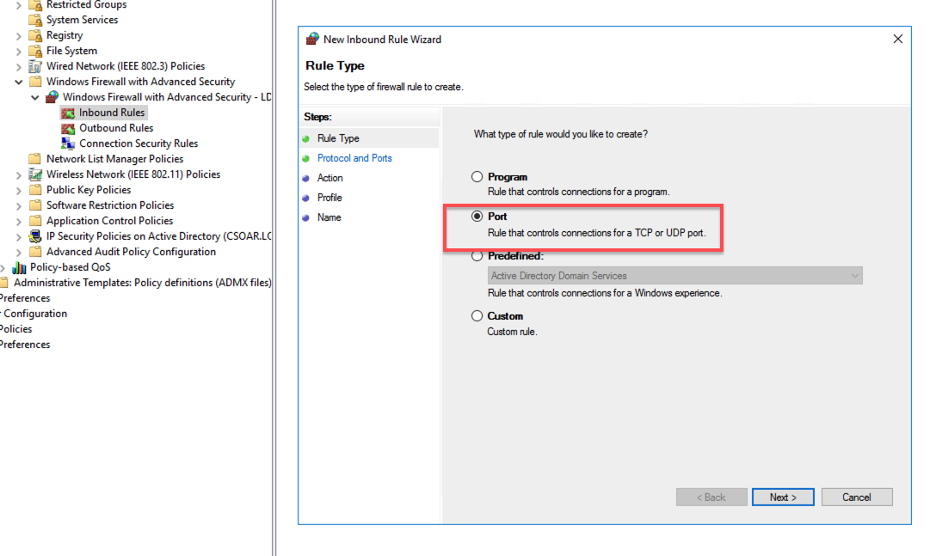
- Right-click on Inbound Rule and select New Rule.
- Select Port for New Rule and click next.
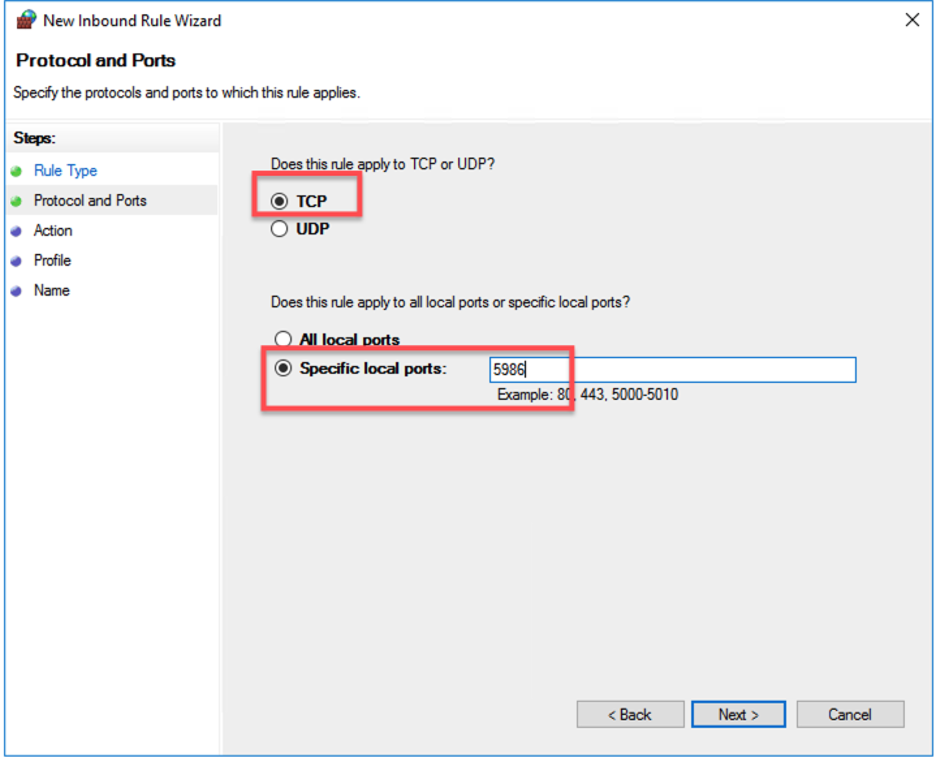
- Select TCP and set the Port number 5986.
- Select only Domain and click next.

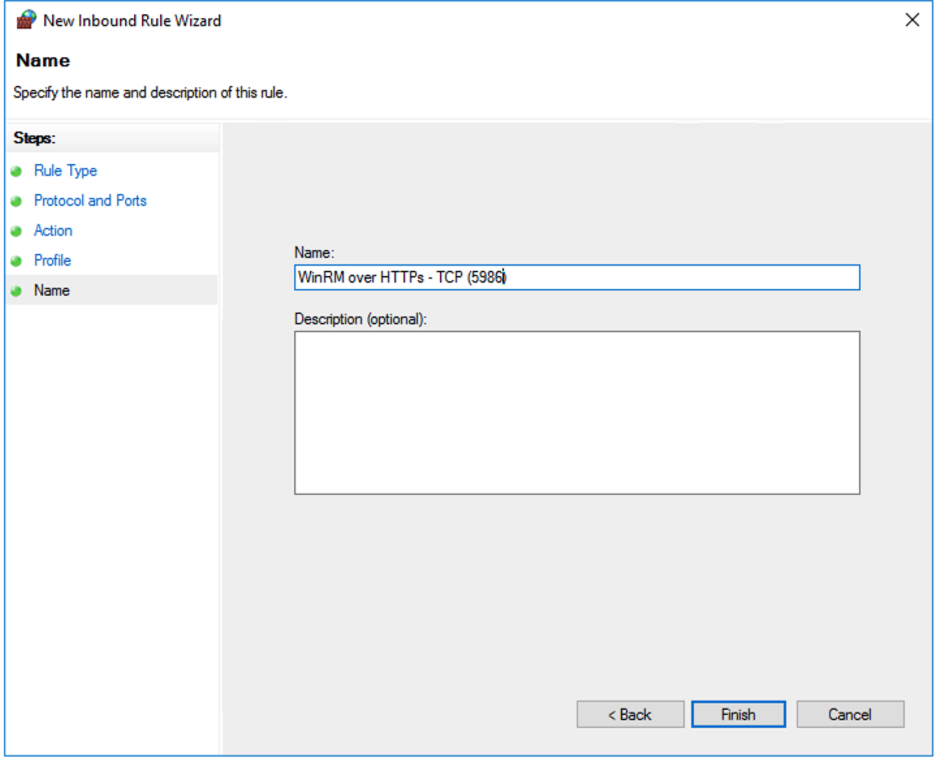
- Provide a name for the rule and click Finish.
- You can now Link the GPO with the Domain or Organizational Unit (OU) as per your requirements.
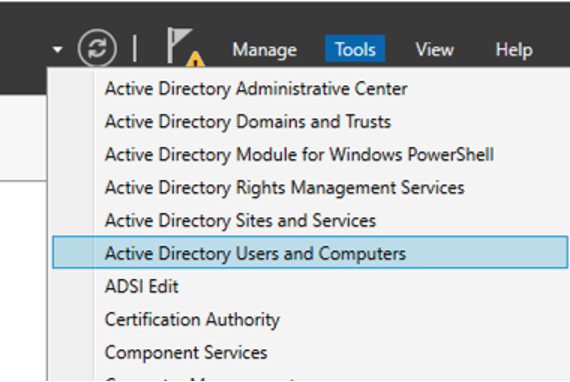
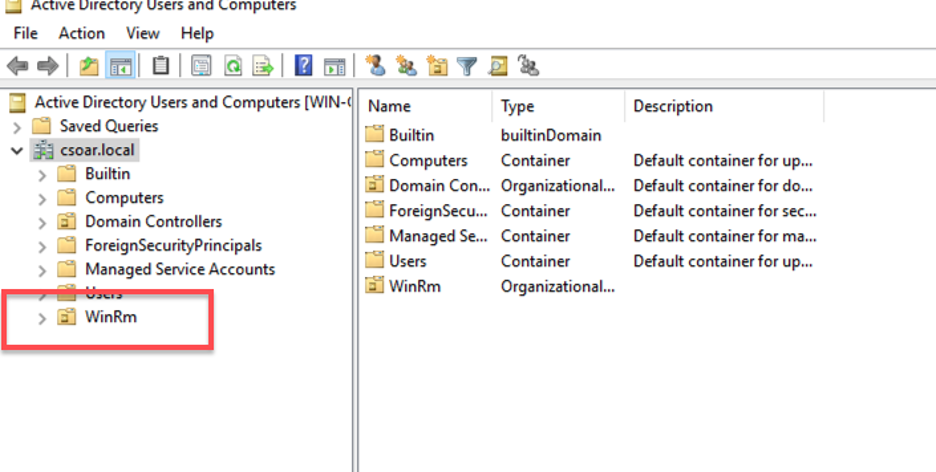
- It is recommended to create a new Organizational Unit (OU). Access Active Directory Users and Computers through the Server Manager's Tools menu.
- Create a new Organizational Unit (OU) by right-clicking on the Domain, choosing New, and then selecting Organizational Unit.
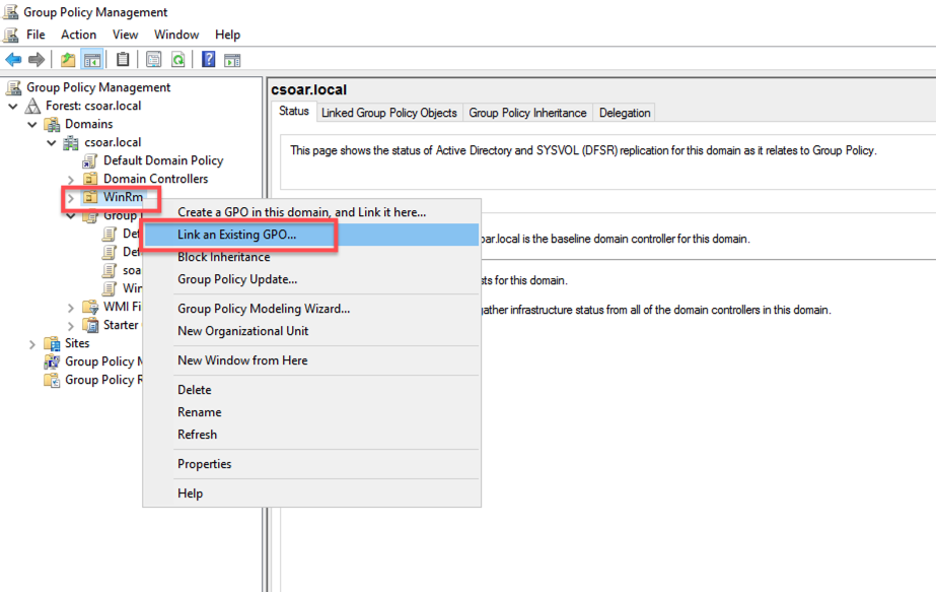
- Access the Group Policy Management through the Server Manager Tools menu.
- Right-Click on your Organizational Unit (OU) and click on Link an Existing GPO.
- Select Group Policy Object that you just created and click OK.
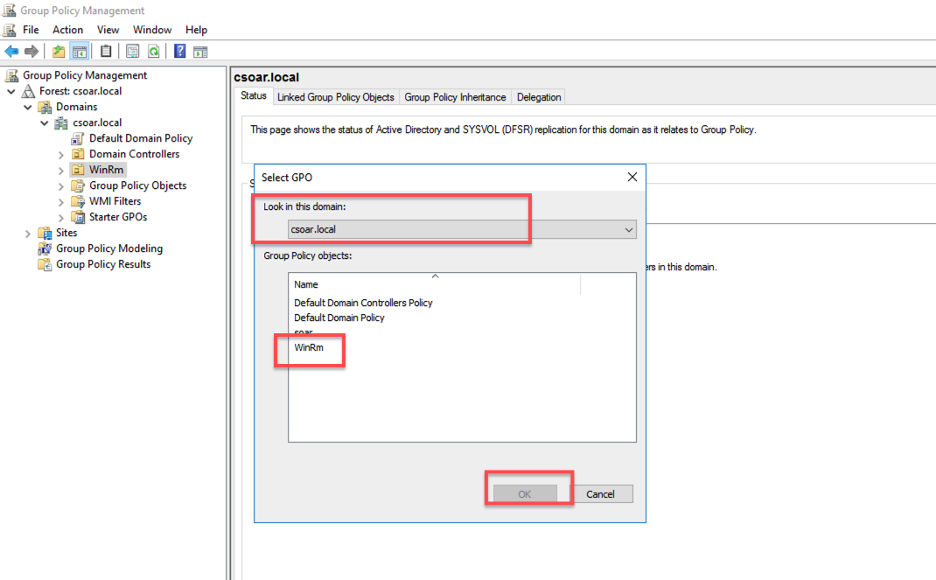
- You will notice the linkage of the Group Policy Object (GPO) to the Organizational Unit (OU).

- Execute this command from the command line interface (CLI):
gpresult /r -scope computer - The Group Policy Object (GPO) you created should appear in COMPUTER SETTINGS within the Applied Group Policy Objects.
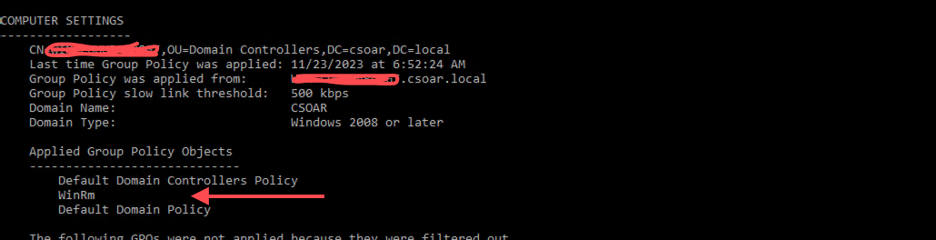
- If you cannot see the Group Policy Object (GPO), verify the Organizational Unit (OU) and confirm that the computer account is located within that OU.
- Execute the the below command from the host's command line interface (CLI).
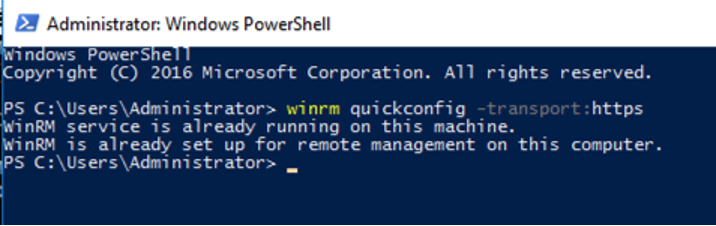
gpupdate /force - Use Windows PowerShell (Run as Administrator) to run the following command on the host where you plan to configure WinRM with HTTPS.
winrmquickconfig -transport:https
- You need to verify the Certificate on Domain Controller Open Certification Authority from Tools of Server Manager.

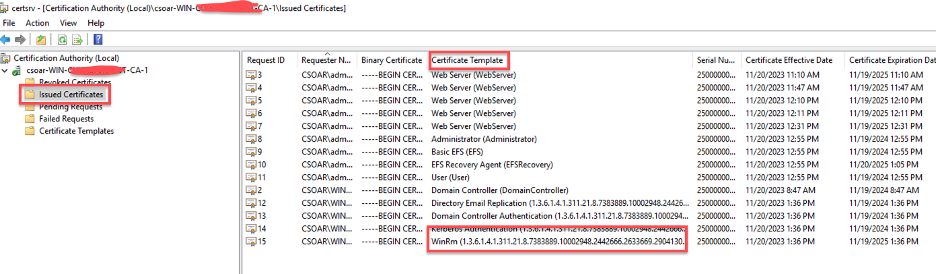
- Click on Issued Certificates.
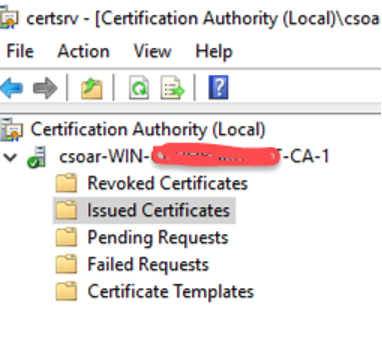
- You will see a new certificate issued by Certificate template you created for WinRm for all hosts.
- You will observe a newly issued certificate with Certificate template you created for WinRM for the hosts.
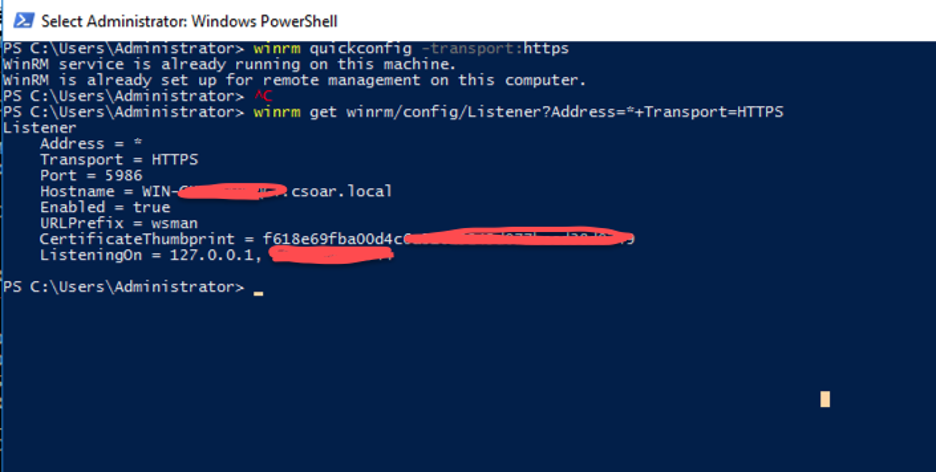
- Validate your WinRM HTTPs Listener to ensure correctness. You will see results if it's configured properly.
- If really needed, you can delete your previous WinRM HTTPs Listener and add new certificate.
winrm delete winrm/config/Listener?Address=*+Transport=HTTPS - After deletion (or In the absence of a Certificate Authority in your domain/host, you have the option to use self-signed certificates by running the following command).
- You can configure WinRM for HTTPS listener manually (ensure to set it with your accurate hostname and CertificateThumbprint).
 $hostinfo = '@{Hostname="<DNS_NAME>"; CertificateThumbprint="<THUMBPRINT>"}'
winrm create winrm/config/Listener?Address=*+Transport=HTTPS $hostinfo - Run below command from command line interface (CLI) to see if the host is listening on correct port.
For example:
netstat -na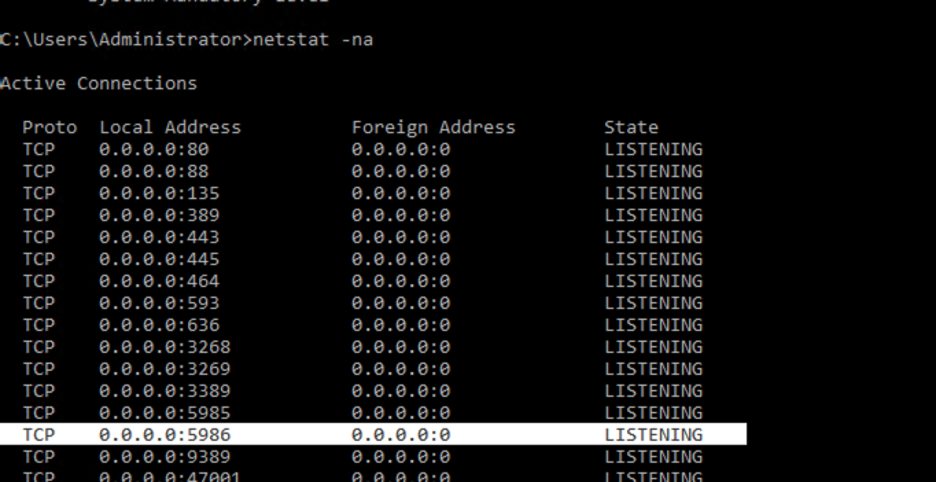
Whois Action Configuration:
You must need to download the whois.exe from Here and Drop the whois.exe file in c:/windows/system32 so that the commands are global and do not have to change the directory to where the files are
Query User Action:
Syntax: query user [<username> | <sessionname> | <sessionID>] [/server:<servername>]
Remarks:
- To use this action, you must have Full Control permission or special access permission.
- If you do not specify a user using the <username>, <sessionname>, or sessionID parameters, a list of all users who are logged on to the server is returned. Alternatively, you can also use the query session command to display a list of all sessions on a server.
- When query user returns information, a greater than (>) symbol is displayed before the current session
Configure PowerShell Tools in Automation Service and Cloud SOAR
Before you can use this automation integration, you must configure its authentication settings so that the product you're integrating with can communicate with Sumo Logic. For general guidance, see Configure Authentication for Automation Integrations.
How to open the integration's configuration dialog
- Access App Central and install the integration. (You can configure at installation, or after installation with the following steps.)
- Go to the Integrations page.
Classic UI. In the main Sumo Logic menu, select Automation and then select Integrations in the left nav bar.
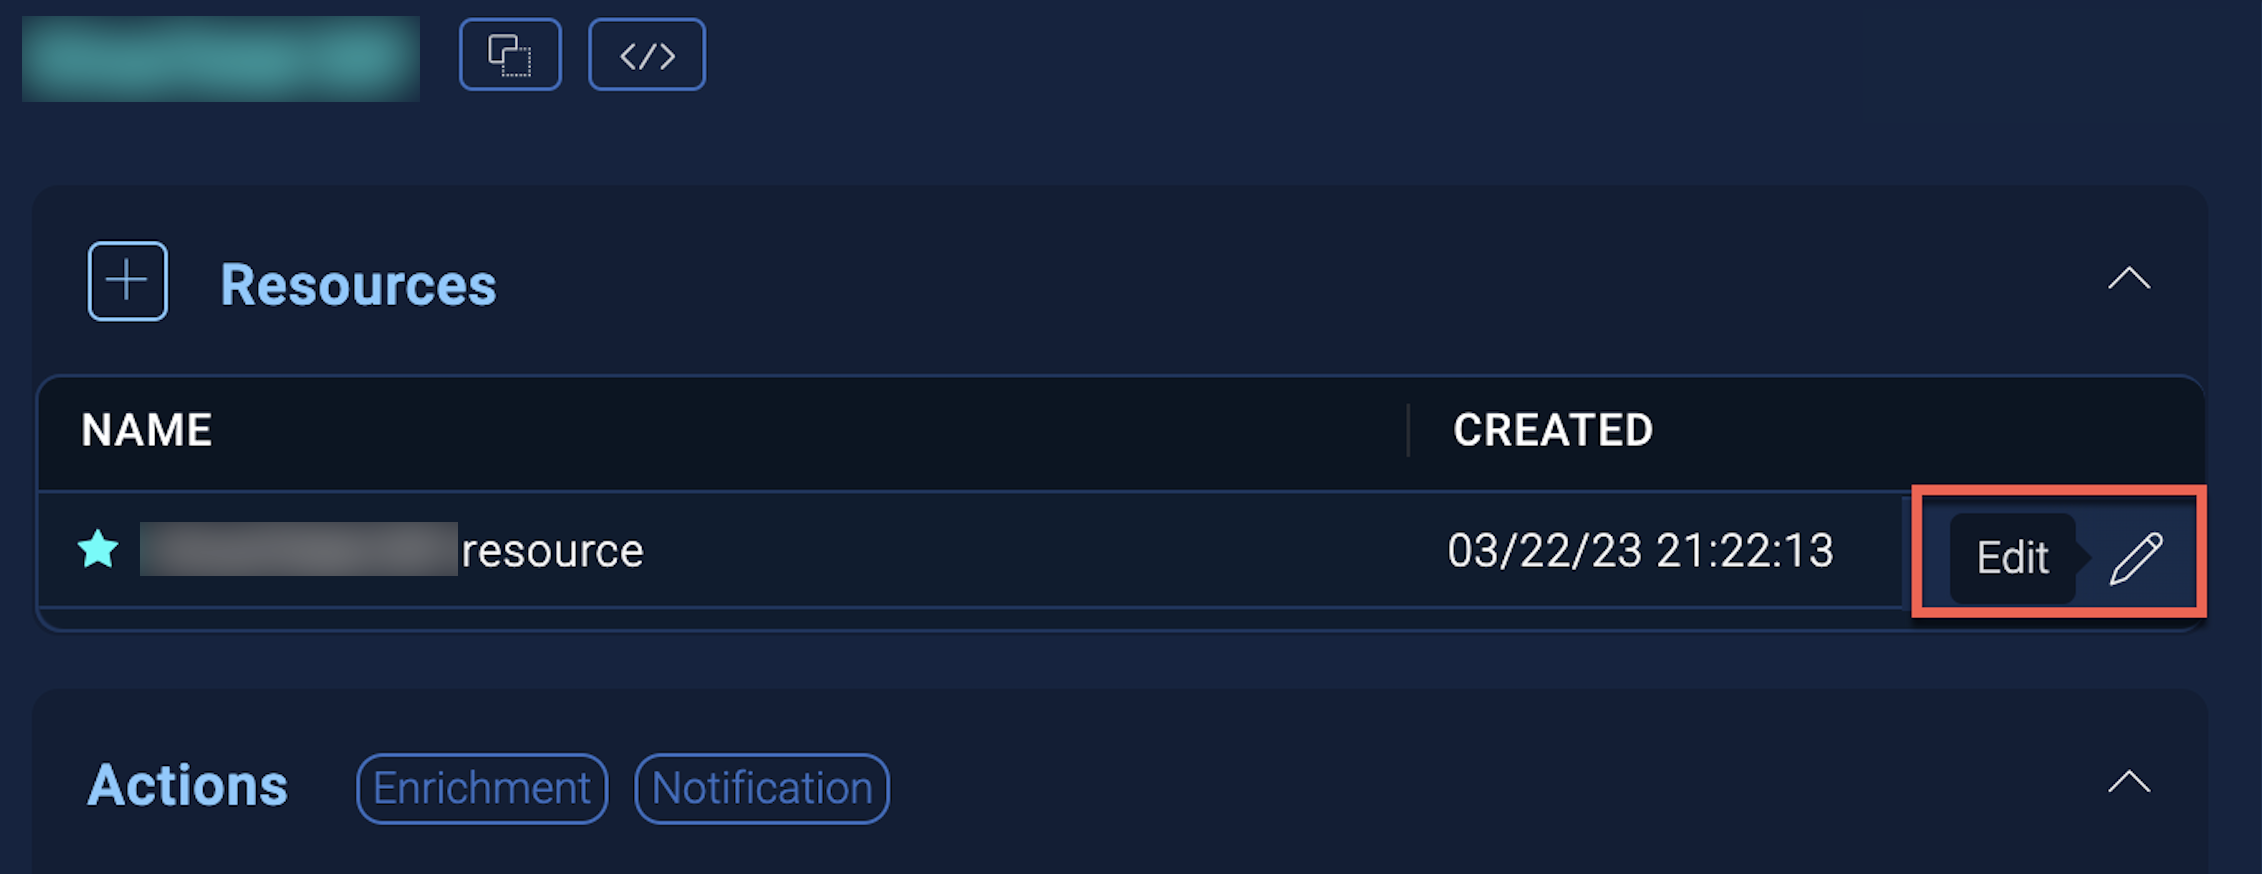
New UI. In the main Sumo Logic menu, select Automation > Integrations. You can also click the Go To... menu at the top of the screen and select Integrations. - Select the installed integration.
- Hover over the resource name and click the Edit button that appears.
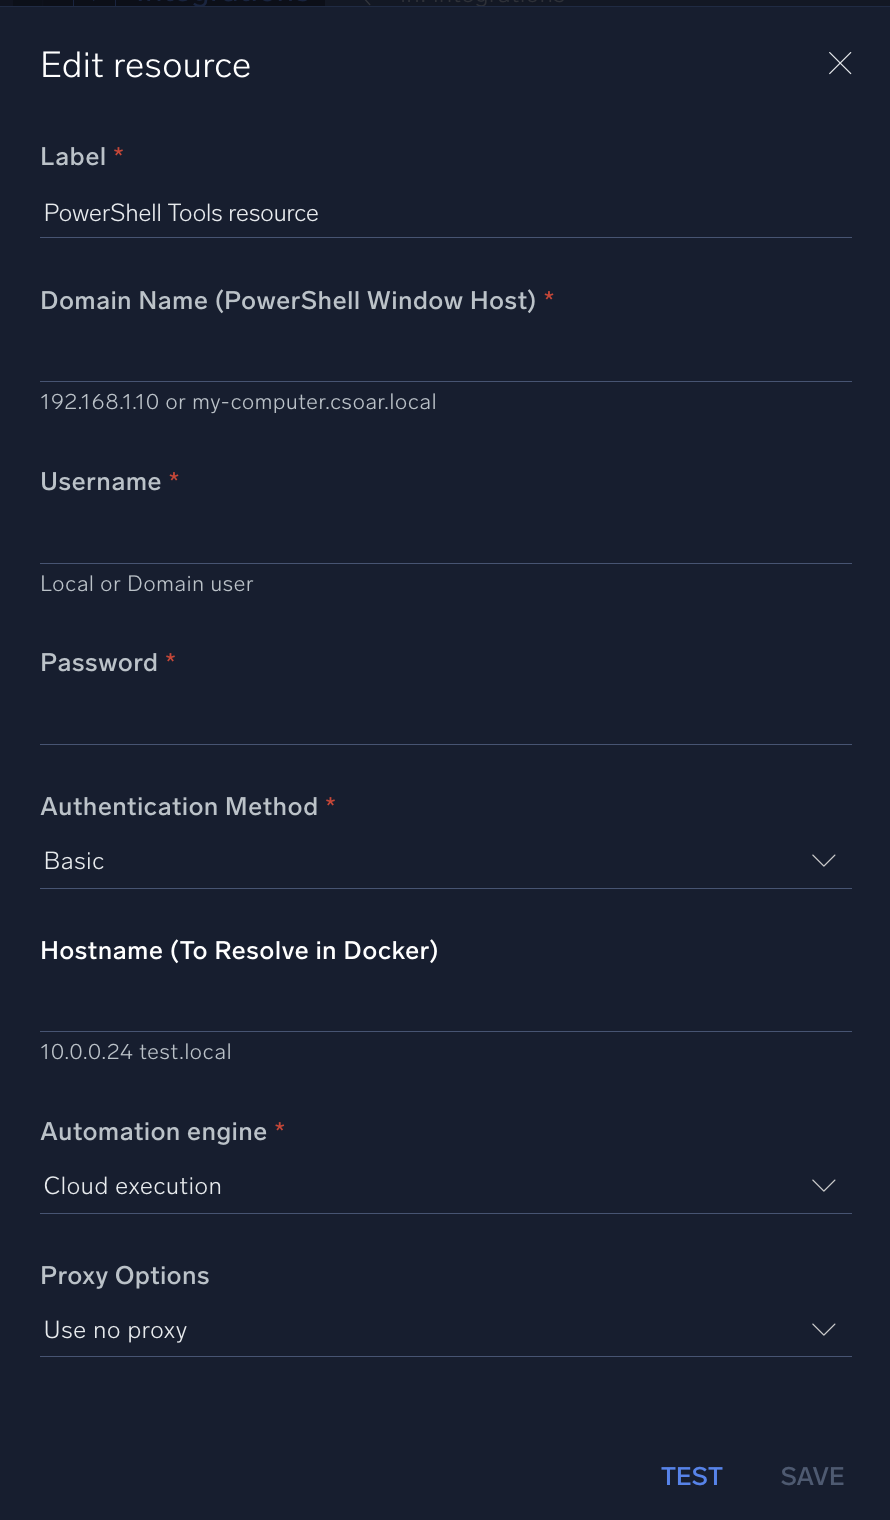
In the configuration dialog, enter information from the product you're integrating with. When done, click TEST to test the configuration, and click SAVE to save the configuration:
-
Label. Enter the name you want to use for the resource.
-
Domain Name (PowerShell Window Host). Specify the domain nme (hostname) for Window Server, for example,
192.168.1.10ormy-computer.csoar.local. -
Username. Enter the username of your Window host, either a Local or Domain user.
-
Password. Enter the password of your Window host.
-
Authentication Method. Select an authentication method:
- Basic
- Kerberos
- Negotiate
-
Hostname (To Resolve in Docker). Enter the hostname, for example,
10.0.0.24 test.local. -
Automation Engine. Select Cloud execution for this certified integration. Select a bridge option only for a custom integration. See Cloud or Bridge execution.
-
Proxy Options. Select whether to use a proxy. (Applies only if the automation engine uses a bridge instead of cloud execution.)
- Use no proxy. Communication runs on the bridge and does not use a proxy.
- Use default proxy. Use the default proxy for the bridge set up as described in Using a proxy.
- Use different proxy. Use your own proxy service. Provide the proxy URL and port number.
For information about PowerShell, see PowerShell documentation.
Change Log
- December 30, 2022 - First upload
- January 12, 2023 - Added new actions:
- VMware Carbon Black Enrichment
- CrowdStrike Falcon Enrichment
- GreyNoise Enrichment
- SentinelOne Enrichment
- November 23, 2023 (v1.5)
- Updated the integration to address hostname resolution in Docker
- Updated the configuration documentation for the Window Server Domain Controller