Manage and Update Lookup Tables
The page has information about updating, exporting, and sharing Lookup Tables. For information about creating a new Lookup Table, see Create a Lookup Table.
Update the contents of a lookup table
This section has instructions for updating a lookup table. You can:
- Merge data. Use this option to update existing rows with new values, or to add new rows to the lookup table.
- Replace data. Use this option to completely replace the data in the lookup table with the data in the .csv file.
- Delete data. Use this option to remove all the data in the lookup table.
You can also use the Lookups API to update a lookup table.
Merge data into a lookup table
You can use the Merge Data option to update existing lookup tables rows with new values, or to add new rows to a lookup table.
Before you start, create a .csv file that contains the data you want to merge. Note that:
- The header of the .csv file must contain the primary key fields, or the merge operation will fail.
- If a primary key value in the .csv file matches an existing primary key value in the lookup table, the corresponding row in the table will be overwritten.
- If a primary key value in the .csv file does not match a primary key value in any row in the table, a new row will be added to the table.
- Any rows that exist in the lookup table, but not in the .csv file, will remain unchanged.
- If the first row of the file does not match the fields defined in the table schema, the updates in the file will be discarded, and the lookup table will not be updated.
- If the .csv file contains additional columns (fields) that aren't defined in the table schema, the additional fields will be dropped during the merge operation.
- If the file does not contain one or more columns (fields) that are defined the table schema, the merge operation. will fail. The primary key(s) must be present in the file for the merge to succeed.
The file should have a .csv extension, and not be larger than 100 MB. The first row of the table should contain the names of the fields defined in the table schema.
For example: username,IPAddress,region
- Go to your Library.
- Mouse over the lookup table you want to view, and select Edit from the three-dot kebab menu.
- The edit page for the lookup table appears.
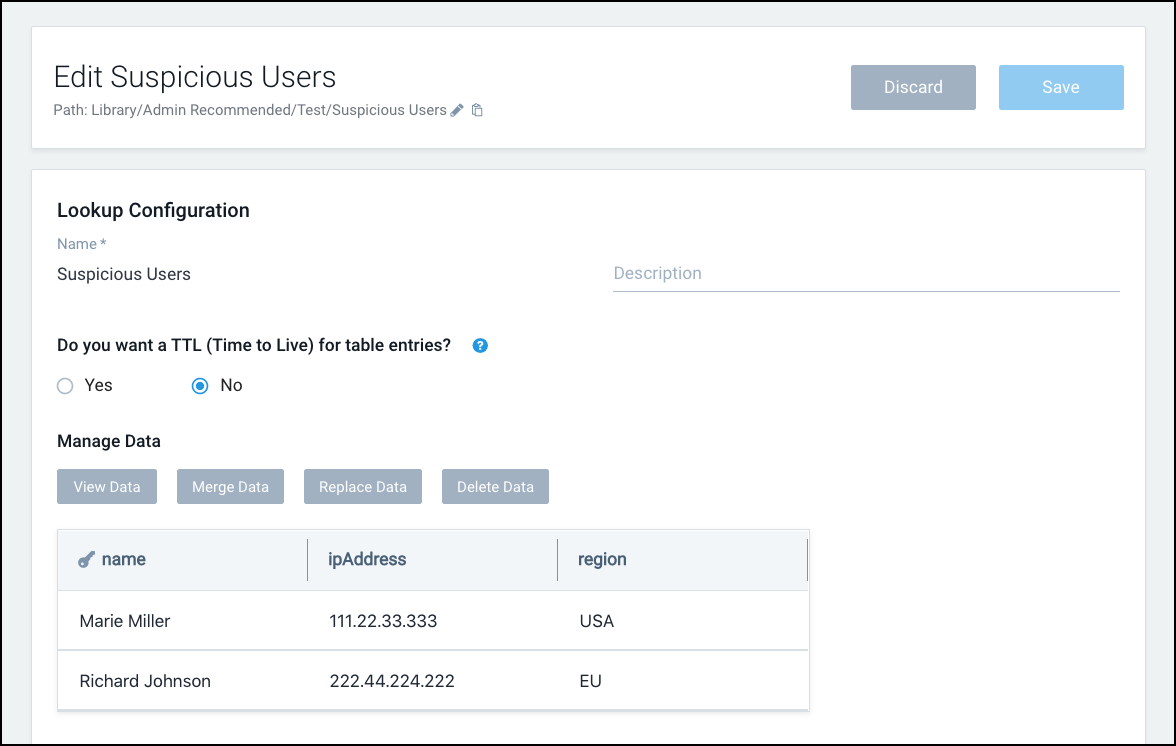
- Click Merge Data.
- The Merge Lookup Data popup appears.
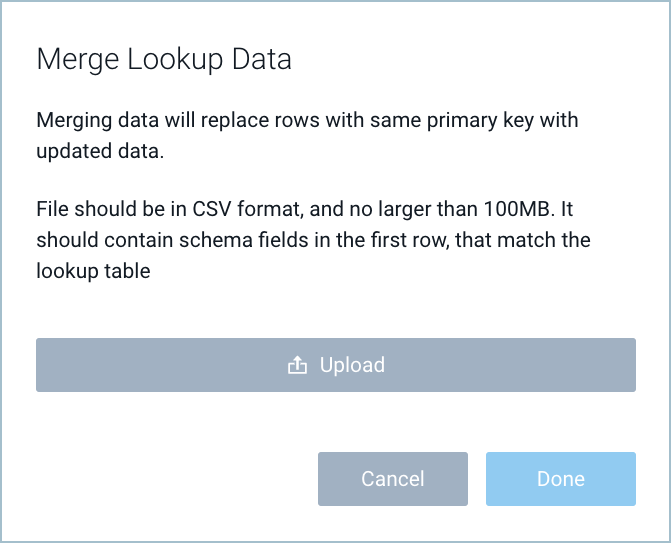
- Click Upload.
- Navigate to the .csv file and click Open.
- Click Done.
Replace all the rows in a lookup table with new rows
You can use the Replace Data option to completely replace the data in a lookup table with the data in a .csv file.
Before you start, create a .csv file that contains the rows you overwrite the lookup table with.
The file should have a .csv extension, and not be larger than 100 MB. The first row of the table should contain the names of the fields defined in the table schema.
For example: username,IPAddress,region
For a field that is configured to be boolean, make sure that the field value is either true or false. Field values are case-insensitive, so TRUE or FALSE are also fine. However, if a boolean field contains any other value, the value written to the table will be false.
- Go to your Library.
- Mouse over the lookup table you want to view, and select Edit from the three-dot kebab menu.
- The edit page for the lookup table appears.
- Click Replace Data.
- The Replace All Lookup Data popup appears.
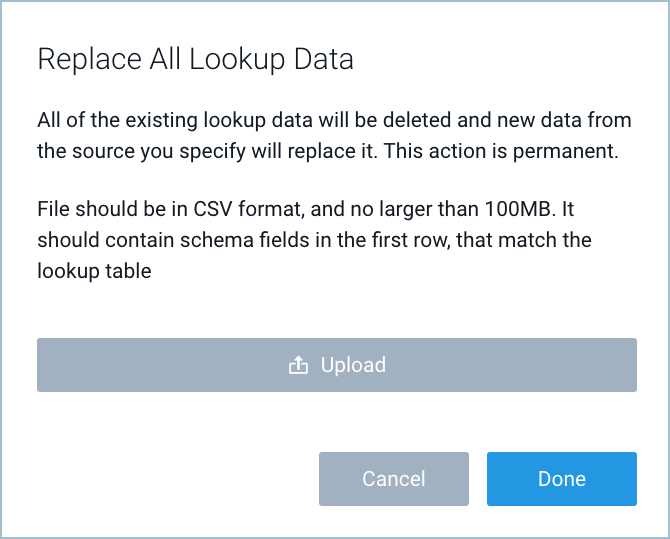
- Click Upload.
- Navigate to the .csv file and click Open.
- Click Done.
Delete the contents of a lookup table
You can use the Delete Data option to remove all the data in a lookup table.
Follow the steps below to delete all of the contents of a lookup table:
- Go to your Library.
- Mouse over the lookup table you want to delete, and select Edit from the three-dot kebab menu.
- The edit page for the lookup table appears.
- Click Delete Data.
- You are prompted to confirm that you want to delete the contents of the lookup file.
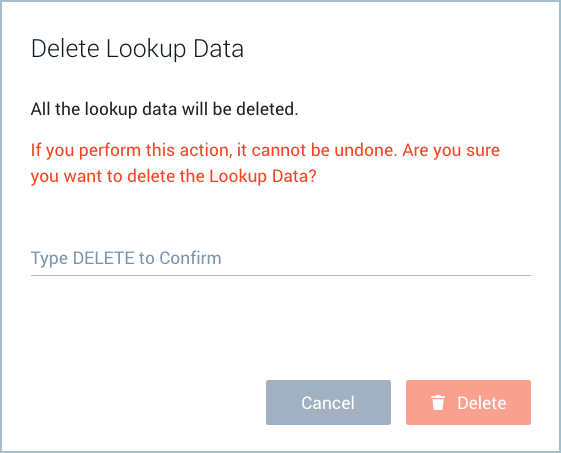
- Enter
Delete, and click Delete.
Update a lookup table with the save operator
You can use the save operator to save the results of a Sumo log query to a lookup table you created using the Lookup UI or API. For more information, see save Operator.
To save the results of a query to a lookup table in a scheduled search, see Save to Lookup.
Export a lookup table schema
If you want to replicate a lookup table schema in a different folder in the Library, the process is to export it, and then import it into the desired folder. When you export a lookup table, the data it contains is not exported.
- Go to your Library.
- Mouse over the lookup table you want to export, and select Export from the three-dot kebab menu.
- The export popup presents the contents of the lookup table in JSON format.
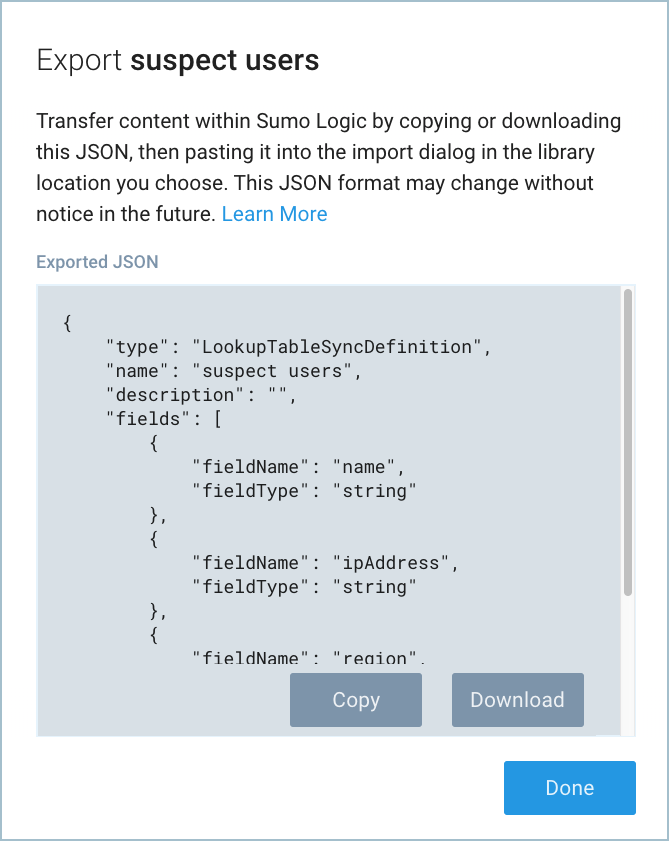
- Click Copy to copy the JSON to the clipboard, or Download to download a JSON file.
- Click Done.
- To create new lookup table with the JSON, follow the instructions in Import Content in the Library.
Share a lookup table
You can share a lookup table with other users, a role, or a combination of the two.
- Go to your Library.
- Mouse over the row for a lookup table you want to share, and click the sharing icon towards the right side of the row. You’ll be prompted to enter the user and roles with whom you want to share the table, the level of access you want to grant, and other sharing options. For information about sharing, see Share Content.
Delete a lookup table
You can also use the Lookups API to create a delete table.
Follow the steps below to completely delete a lookup table:
- Go to your Library.
- Mouse over the lookup table you want to delete, and select Delete from the three-dot kebab menu.
View Lookup Table update status
When you are viewing a Lookup Table in the Library, you can view information about multi-row updates to the table that are queued up or have been recently completed.
You can toggle your view between Lookup Actions Queue and Lookup Actions History with the icons labeled a and b in the screenshot below, respectively.
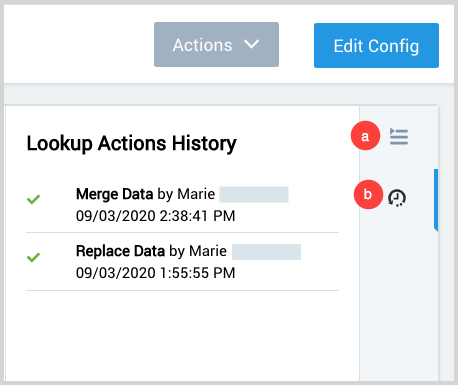
The notifications include what type of update was initiated and its status.
Types of updates include:
- Full Replace. The contents of the Lookup Table were completely replaced.
- Merge Data. The contents of the Lookup Table were updated (if they already existed), or additional rows were appended (if they didn't already exist). No data was deleted.
- Delete Data. The contents of the current lookup were completely deleted by the user.
The status of an update can be one of the following:
- Queued. The update operation has been queued but hasn't been completed.
- In Progress. The update operation is in progress.
- Completed. The update operation was successfully completed.
- Completed with Warning. The update operation was successful, but there were some warnings.
- Error. There was an issue in completing the update operation.
FAQ
Upgrade the lookup table to avoid negative count results
Lookup schema matching is relaxed to allow Int-Long type mismatch to support the new behavioural change of the count operator.
If the schema type is Int and the field type is Long, there can be possible overflow resulting in a negative count value after crossing the maximum integer value of 2147483647. To resolve this, create a new lookup table with long data type and run the below query:
cat path://"<Lookup file Path>" | save path://"<New Lookup File Path>"
By doing so, the query will read the data from the existing lookup table in old file and migrate it to the new file.