Save Inventory Data to a Lookup Table
This topic has instructions for using a saved Sumo Logic search to populate a Lookup Table with Cloud SIEM inventory data. Once you’ve created an inventory Lookup Table, you can leverage it in log searches, and also use it to normalize hostnames and usernames.
The instructions below are for saving inventory data to a Lookup Table using the save search operator. In this procedure, you’ll:
- Create a Lookup Table schema.
- Create a log search that saves inventory data to the Lookup Table.
- Schedule the search to run on a daily basis, with an Alert Type of “Email”. You’ll configure the alert to send an email if the search returns fewer than five results (an indication that the query was not completely successful).
Although the Scheduled Search feature does support an Alert Type of “Save to Lookup”, it is not recommended for this use case. That’s because the “Save to Lookup” option does not support adding more than 512 rows to a Lookup Table.
Prerequisites
In order to create an inventory Lookup Table you need to have one or more sources of inventory data. One of the most common sources of inventory data in Sumo Logic is the Windows Active Directory Inventory source running on an Installed Collector. We recommend you collect AD logs every 12 hours, and that you do not collect logs more frequently than every 8 hours.
Any inventory source–or any log source, for that matter–can be used to populate Lookup Tables. Sumo Logic also has a variety of inventory sources that run on Hosted Collectors, including the Okta and Carbon Black sources.
Step 1: Create the Lookup Table schema
In this step, you create the Lookup Table schema.
As an example, assume that you are creating a table that will be used to normalize usernames in email format (jdoe@acme.com) to an login name format (john.doe), to be populated by data from Active Directory.
In this case we create a table with two fields: mail (email address) and samaccountname (login name).
Note the following:
- The name of the fields in the table schema must match the names of the fields in the search results that will populate the table. It’s easiest to use the exact same names as the fields in the data source (as we do in this example) but you can rename a field in the search to make it match the corresponding column name.
- You can have more than two fields in the Lookup Table but table size is a consideration. In our example, we populate only the fields required for name normalization.
To create the Lookup Table schema:
- Go to the Sumo Logic Library.
- Navigate to the folder where you want to create the Lookup Table.
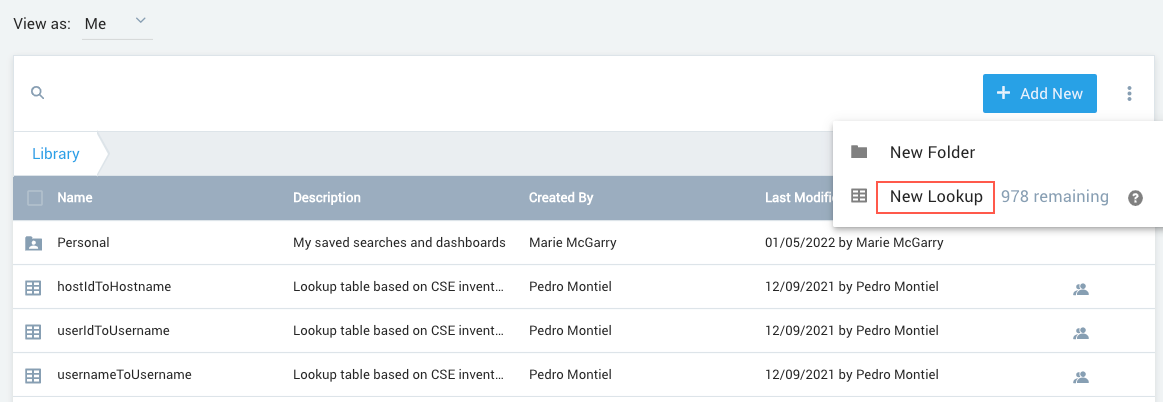
- Click Add New and then select New Lookup.
- The Create Lookup Table page appears.
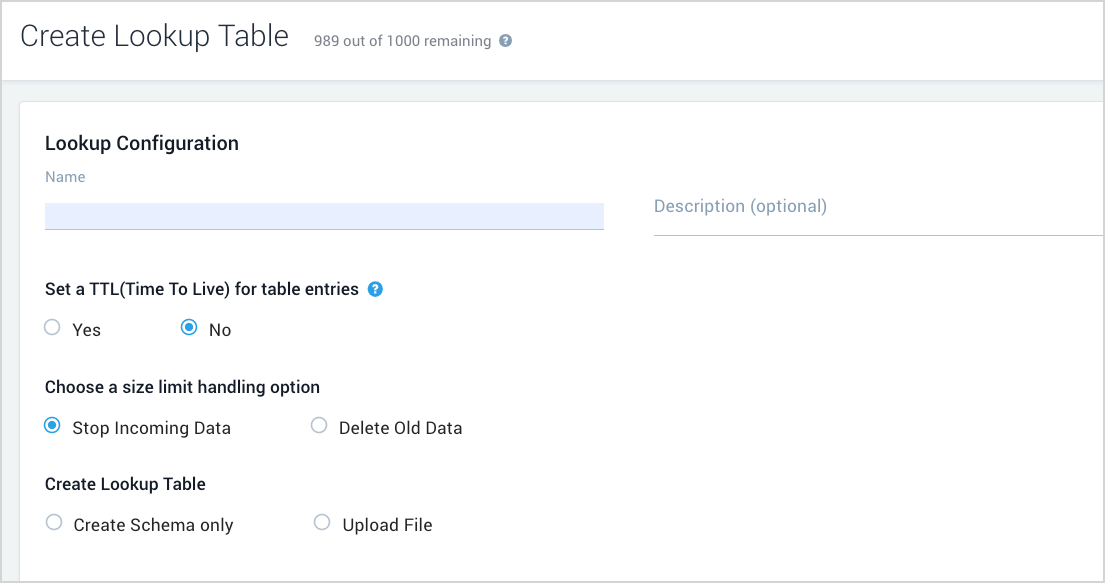
- Name. Enter a name for the Lookup Table.
- Description. (Optional)
- Set a TTL (Time to Live) for table entries? Click No.
- Choose a size limit handling option. This option controls how additions to the Lookup table will be handled when it reaches its size limit (100 MB). Click Delete Old Data.
- Create Lookup Table Click Create Schema only.
- The page displays a Schema section. (The screenshot below shows the schema settings for our example filled in.)
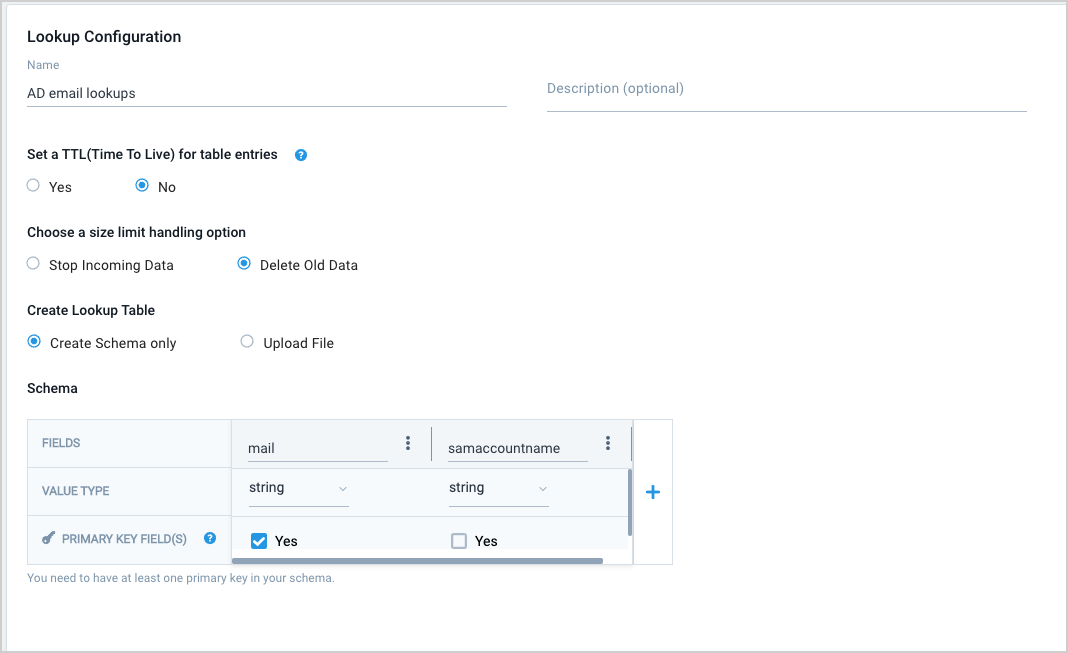
- For the first column, enter:
- Fields. Enter mail.
- Value Type. Leave the default, string, selected.
- Primary Key Field(s). Click the Yes checkbox.
- For the second column, enter:
- Fields. Enter samaccountname.
- Value Type. Leave the default, string, selected.
- Click Create.
Step 2: Create a search to populate the table
In this step you create an aggregate search that returns the fields required for the table and writes the results to the Lookup Table you configured above. The search must be an aggregate–that’s easy to accomplish using a count by clause to uniquely identify entries. (The count value can be ignored as it’s not a column in the lookup table).
For our use case, the query is:
_sourceCategory="/windows/inventory" and _collector="ad-collector"
| where !isBlank(mail) and !isBlank(samaccountname)
| count by mail, samaccountname
| save <PATH>
Where:
-
_sourceCategoryidentifies the source category you assigned to the Active Directory Source. -
_collectoridentifies the collector where the Active Directory source runs. -
PATHis the path of the lookup table, in this format:path://"/Library/Admin Recommended/userIdToUsername"You can copy the path to the Lookup Table in the Sumo Logic Library. Hover over the row for the table in the Library, and select Copy path to clipboard from the three-dot kebab menu.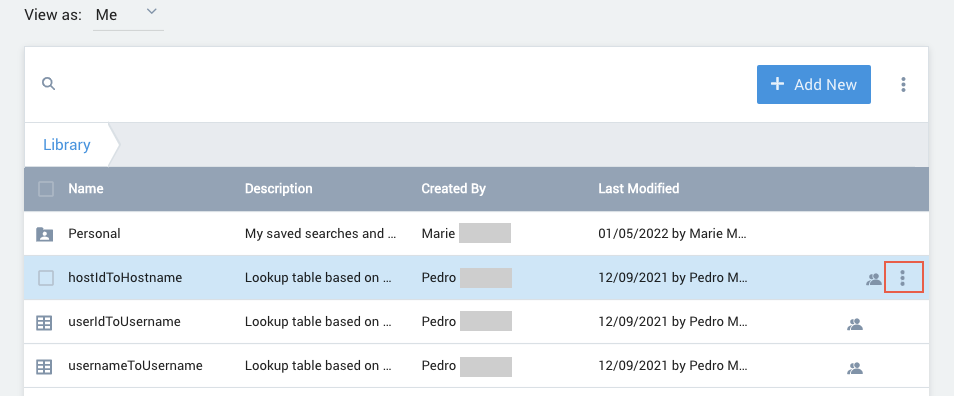
Step 3: Save and schedule the search
In this step you save and schedule the search created in Step 2 to run on a regular basis. Daily is a good choice.
Be sure to choose “Email” as the Alert type. (Don’t select Save to Lookup). You can select the conditions under which email alerts will be sent, and the time at which the queries are run. In this example, we have selected to only send an email when the search returns less than 5, which is indicative of an error.
To save and schedule the search:
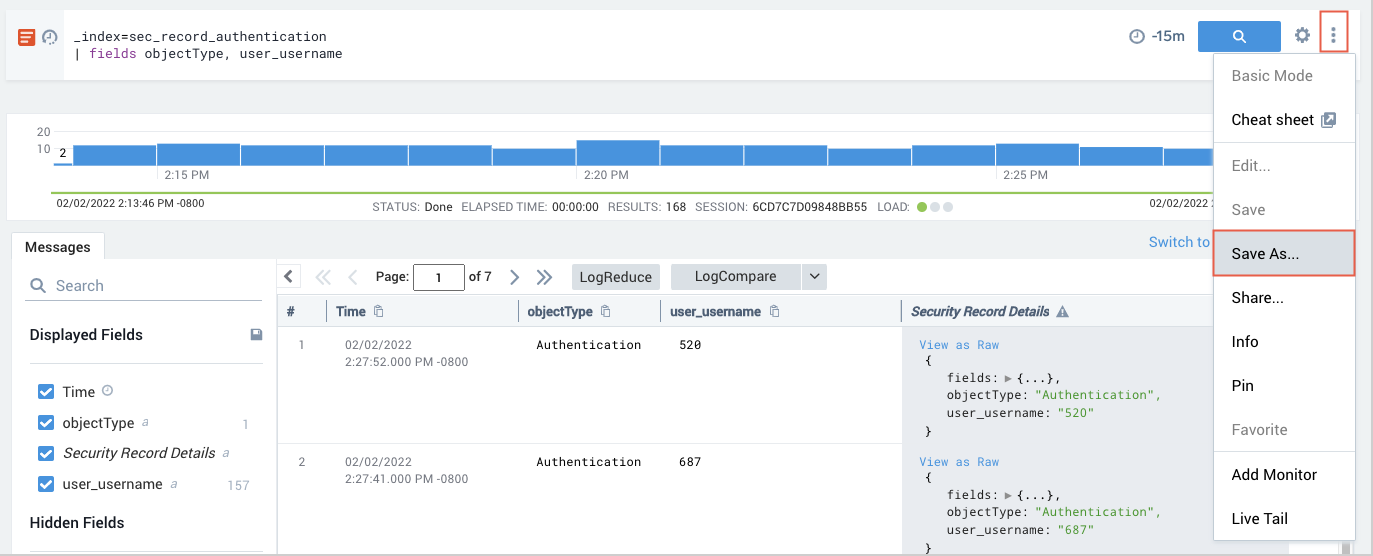
- In the log search tab where you’ve run your query, choose Save as from the three-dot kebab menu in the query area.
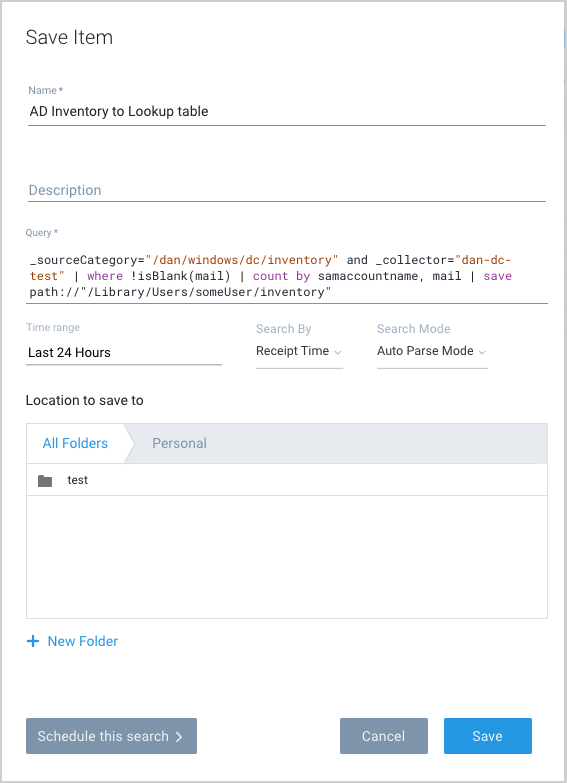
- On the Save Item popup:
- Name. Enter a name for the query.
- Time range. Select a time range for the query.
- Search By. Select Receipt Time.
- Location to save to. Choose a folder location.
- Click Schedule this search.
- On the Save Item popup:
- Run frequency. Select Daily, unless you have another preference.
- Send Notification. Choose If the following condition is met.
- Alert condition. Select Less than <.
- Alert type. Select Email.
- Number of results. Enter 5, or another value if you prefer.
- Recipients. Enter the email addresses of one or more users to receive email alerts.
- Include in email. Select Search Query and Histogram, unless you have another preference.
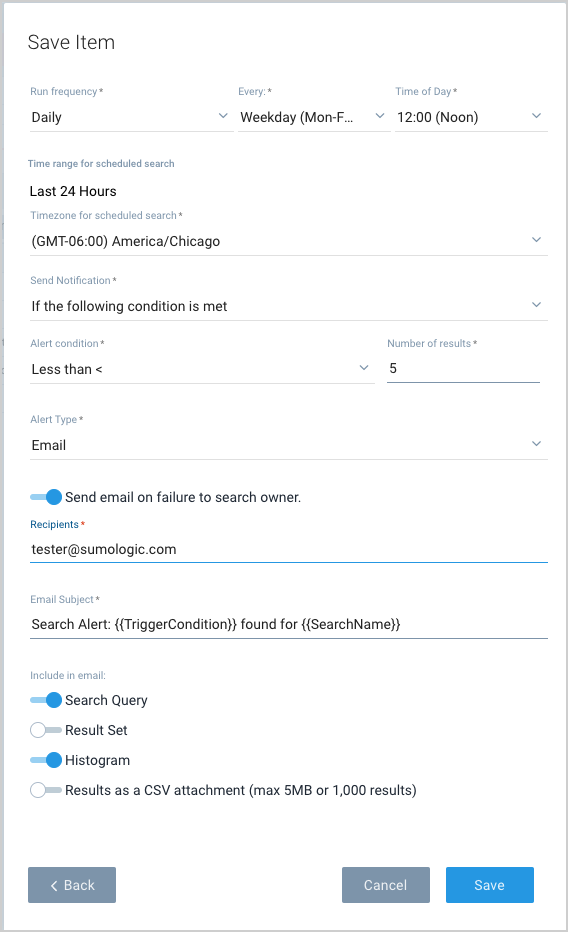
- Click Save.
Step 4: Configure the Lookup Table in Cloud SIEM
If you’re going to use the Lookup Table to normalize Entities in Cloud SIEM, follow the instructions in Configure an Entity Lookup Table.