Create an Entity Group
An administrator can use the Entity Groups feature to define groups of Entities and to assign attributes to them at the group level. You can define the members of an Entity Group in two ways:
- Based on Entity name or an IP address range.
- Based on membership in a group in an Inventory system like Active Directory.
Note that membership in an Entity Group is not configured by explicitly assigning individual Entities to the group. Instead you define an Entity Group in terms of criteria, like name or IP address, so that Entities will automatically inherit the properties of Entity Groups they match without manual edits.
You can assign criticality, tags, and suppression status to an Entity Group, and those settings will be applied to all of the Entities in the group.
Consider an Entity Group configured to:
- Include any host in the Active Directory “laptops” group, and
- Set a (pre-configured) criticality to group members.
Each laptop in the “laptops” group will automatically inherit the criticality defined for the Entity Group, and so will laptops assigned to the “laptops” group in the future. In other words, when an Entity is added, if it matches the membership criteria of an existing Entity Group, it will be automatically added to that group.
Note that when an Insight is created, any tags that are assigned to the primary Entity in the Insight are automatically inherited by the Insight. So, tags that an Entity inherits from an Entity Group will also be inherited by Insights that fire on the Entity. (Such inheritance is not retro-active: Insights that fired on an Entity prior to the Entity being tagged won’t be tagged.)
Entity Group limits
The number of Entity Groups you can configure per org varies by the type of the group:
- You can configure a maximum of 1000 Entity Groups based on membership in a group in an Inventory system.
- You can configure a maximum of 10000 Entity Groups based on Entity name or an IP address range.
Overlapping Entity Groups
It’s possible to define Entity Groups that overlap, in terms of the Entities they contain. However, for the sake of simplicity, we recommend you configure your Entity Groups to not overlap. If an Entity does belong to more than one group, the tags from all of the groups are applied to the Entity. Criticality and suppression status are applied by the first Entity Group that matches in this order:
- Entity Groups based on Inventory source and group are processed in alphabetical order, by Entity Group name.
- Entity Groups based on IP address ranges are processed in order from most specific (smallest block) to least specific (largest block).
- Entity Groups based on name are processed in order, by the length of the match string configured as either Prefix or Suffix, then alphabetically, by Entity Group name.
Create an Entity Group based on Entity attributes
Follow these instructions to create an Entity Group based on Entity name or whether the Entity is within a specified range of IP addresses.
- In the top menu select Configuration, and then under Entities select Groups.
- On the Entity Groups page, click Create.
- The Create Entity Group popup appears. (In the screenshot below, values are already entered.)
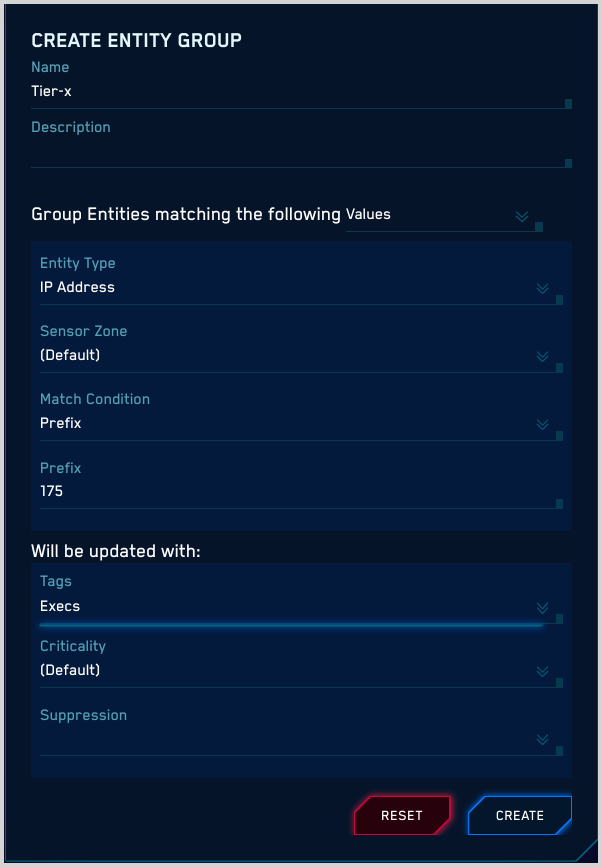
- Name. Enter a name for the Entity Group.
- Description. (Optional.)
- Group Entities matching the following. Select Values.
- Entity Type. Select one of the following Entity types:
- IP Address
- MAC Address
- Username
- Hostname
- Process
- Command
- Hash
- Domain
- User Agent
- URL
- File
- Match Condition. Select one of the following match types:
- Prefix. After you select this option, a Prefix field appears. Enter a string that matches the leading characters of the names of the Entities you want to include in the group.
- Suffix. After you select this option, a Suffix field appears. Enter a string that matches the trailing characters of the names of the Entities you want to include in the group.
- IP Address Range. After you select this option, an IP Address Range field appears. Enter a CIDR block of IP addresses.
- Sensor Zone. This field is present if you selected _IP Address _as the Entity Type above. Optionally, select a Sensor Zone from the pulldown.
noteIf you select a Sensor Zone, the IP addresses assigned to the Entity Group will be limited to addresses that are within the specified IP Address Range and also have been assigned the selected Sensor Zone.
- Tags. Select any tags you’d like to apply to Entities in the group.
- Criticality. If desired, select a Criticality.
- Suppression. Select Suppressed if you want to suppress Signals on Entities in the group.
Create an Entity Group based on inventory group membership
Follow these instructions to create an Entity Group that corresponds to a group in an inventory service in your infrastructure.
- In the top menu select Configuration, and then under Entities select Groups.
- On the Entity Groups page, click Create.
- The Create Entity Group popup appears. (In the screenshot below, values are already entered.)
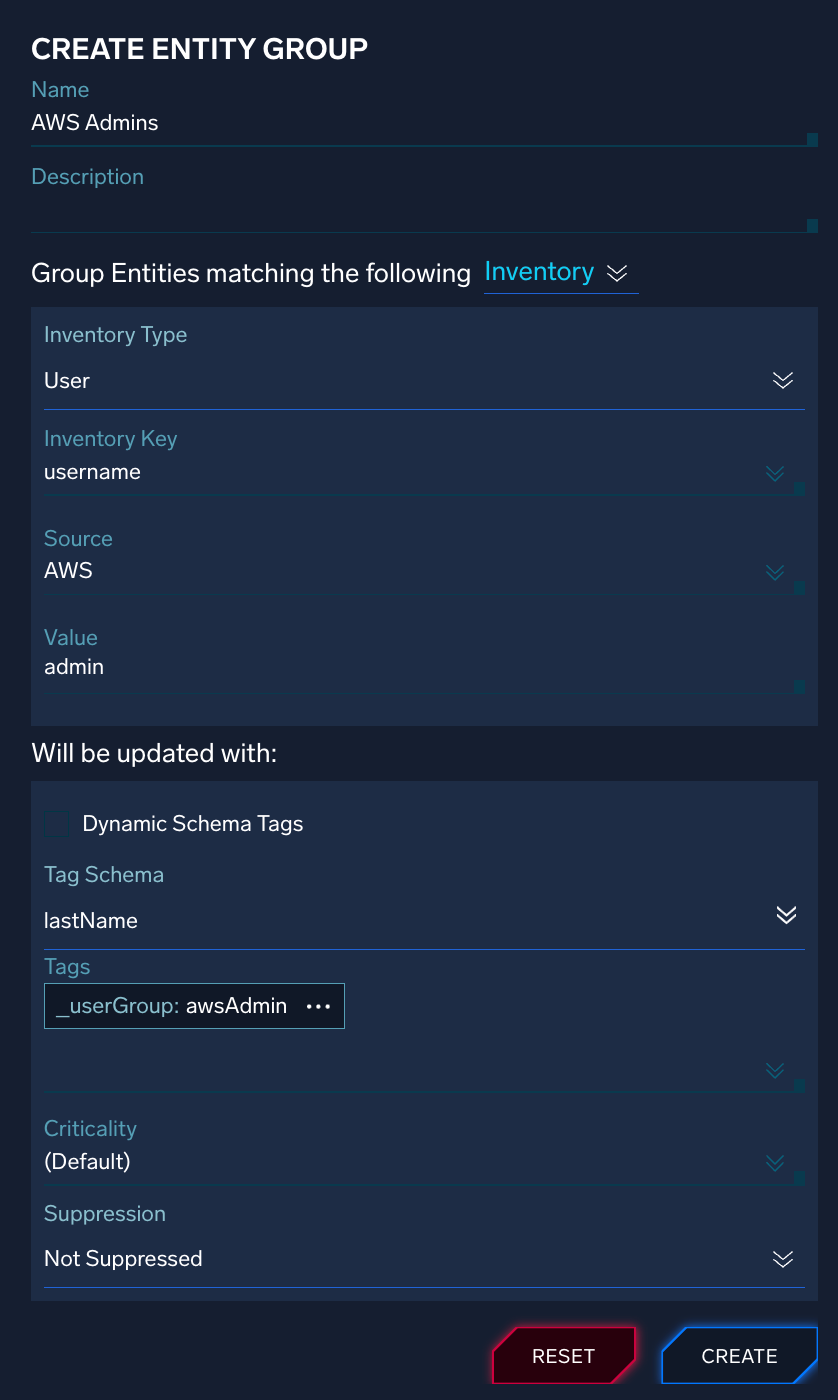
- Name. Enter a name for the Entity Group.
- Description. (Optional.)
- Group Entities matching the following. Select Inventory.
- Inventory Type. Select one of:
- Computer
- User
- Inventory Key. Select an attribute to use from the Inventory Type selected above. You can use second-level unnormalized inventory attributes in this field (for example,
fields.foo.bar). Select groups if you want to use an existing Entity Group attribute. - Source. Select an inventory source from the pull-down list.
- Value. Enter a value for the attribute selected in the Inventory Key field above. You can use REGEX expressions in this field (for example,
[a-zA-Z]*OU=TCH,OU=PAR,OU=EUR[a-zA-Z]*).
If groups was selected in the Inventory Key field, enter the name of the group in the inventory system that contains the entities you want to add to the Entity Group.noteValue refers to a normalized attribute. The name of the raw attribute varies depending on the inventory source. And if you are entering a value for a group, keep in mind that just as not all inventory sources provide user or computer data, not all inventory sources have an attribute that gets mapped to groups. For information about how attributes are normalized from inventory sources, see Inventory Sources and Data.
- Dynamic Schema Tags. Select if you'd like to apply a custom tag schema to the Entities in the group. If you select this option, the Value field changes to *, indicating the value will be automatically generated from the custom tag schema.
- Tag Schema. Select the tag schema to use for the Entity group.
- Tags. Select any tags you’d like to apply to Entities in the group. If you previously selected Dynamic Schema Tags, the phrase (in addition to dynamic) appears, indicating that the tags you select here will be added to the automatically-generated schema tags.
- Criticality. If desired, select a Criticality.
- Suppression. Select Suppressed if you want to suppress Signals on Entities in the group.
Using tags in rule expressions
If you've applied a tag to an Entity, you can use the tag in a rule expression. For example, if you've attached a keyword tag "DB Server" to an Entity, this array_contains statement will return "true" if the Entity in a Record's srcDevice_ip field has the tag "DB Server"
array_contains(fieldTags["srcDevice_ip"], "DB Server")
API support
You can use the /entity-group-configuration API to create, read, update, and delete Entity Groups. For more information, see Cloud SIEM APIs.